

Mason Jar Ice Cream: Creamy, Customizable, and So Easy!
Print it, save it, or add it to your recipe binder.
Summer’s here, and with it comes the undeniable craving for something cool, creamy, and utterly delicious. But who wants to haul out a bulky ice cream machine, or even worse, face a melting mess trying to get to the store? That’s where Mason Jar Ice Cream swoops in to save the day! This recipe is a total game-changer, letting you whip up single servings of perfectly creamy, flavorful ice cream with nothing more than a jar and a good shake.
Why I Love This Recipe
I’m all about finding ingenious shortcuts that deliver incredible results, and this Mason Jar Ice Cream truly fits the bill. What’s not to love? It’s ridiculously simple, requires zero special equipment, and the cleanup is practically nonexistent. This recipe empowers you to create your own personalized ice cream flavors on a whim, satisfying those specific cravings without committing to a whole batch.
It’s also fantastic for kids (or adults who are kids at heart!) because the shaking process is genuinely fun. Plus, the quick gratification of making fresh ice cream in just a few minutes of active time? Pure bliss. It’s perfect for those spontaneous dessert moments or when you just want a little something sweet without all the fuss.
Ingredients
To make your own delightful Mason Jar Ice Cream, you’ll need just a few basic ingredients:
- 1 cup heavy whipping cream
- 3 tablespoons granulated sugar
- 1 teaspoon vanilla extract
- Pinch of salt
For Flavor Variations (choose one or get creative!):
- 2 tablespoons strawberry jam (for strawberry flavor)
- 2 tablespoons baking cocoa (for chocolate flavor)
Swaps and Notes
- Heavy Whipping Cream: This is non-negotiable for that creamy texture! Don’t try to substitute with half-and-half or milk.
- Sweetener: While granulated sugar is classic, you could experiment with maple syrup or honey for a different flavor profile, though the texture might be slightly different. Adjust to your sweetness preference!
- Vanilla Extract: Don’t skip the vanilla, even for flavored ice cream. It really enhances the overall taste.
- Salt: A tiny pinch of salt helps balance the sweetness and brings out the flavors.
- Flavorings: The beauty of this recipe is its versatility!
- Chocolate: For a richer chocolate, use unsweetened cocoa powder and adjust sugar if needed. You could also melt a bit of chocolate and cool it before adding.
- Strawberry: Use a good quality strawberry jam or puree fresh strawberries and add them in.
- Other Ideas: Get creative! Try a tablespoon of peanut butter for peanut butter ice cream, a few crushed cookies for cookies and cream, a teaspoon of instant coffee for coffee ice cream, or even a dash of cinnamon for a warming spice. The possibilities are endless!
List of Steps for the Recipe
- Gather your jar: Grab a clean, wide-mouth pint-sized mason jar. The wide mouth makes it easier to add ingredients and scoop out your finished ice cream.
- Add ingredients: Pour the heavy whipping cream, granulated sugar, vanilla extract, and a pinch of salt into the mason jar. Now, add your chosen flavoring – either strawberry jam for a fruity treat or baking cocoa for a chocolatey delight.
- Seal it tight: Secure the metal lid tightly onto the mason jar. Make sure it’s really on there; you don’t want any creamy explosions while shaking! Avoid using plastic lids for this step as they might not seal as well under pressure.
- Shake it up! Now for the fun part: shake the jar vigorously for about 5 minutes. You’ll feel the mixture thicken as you go. Keep shaking until it reaches a consistency similar to whipped cream – thick and airy.
- Freeze: Pop the sealed jar directly into your freezer. For the best, scoopable texture, let it freeze for at least 4 hours. Leaving it overnight is even better for a firmer, more traditional ice cream consistency.
- Enjoy! Once frozen, take your homemade Mason Jar Ice Cream out of the freezer. You can enjoy it straight from the jar for a no-fuss treat, or scoop it into a bowl. Don’t forget to add your favorite toppings like whipped cream, a drizzle of chocolate sauce, fresh fruit, or cherries!
Tips for Success
- Cold Ingredients: Start with very cold heavy cream. This helps it whip up faster and more efficiently.
- Proper Seal: Double-check that your lid is on super tight before you start shaking. A leaky jar is a messy jar!
- Shake Vigorously: Don’t be shy with your shaking! The more vigorously you shake, the quicker and thicker your ice cream will become. It’s a mini arm workout!
- Don’t Overfill: Leave a little headspace in the jar, as the mixture will expand slightly as it freezes.
- Overnight Freeze: While 4 hours will get you soft-serve consistency, an overnight freeze will give you a firmer, more scoopable ice cream, just like from the store.
Serving Suggestions and Pairings
This Mason Jar Ice Cream is a treat in itself, but it’s also a fantastic base for all sorts of delicious additions!
- Classic Toppings: Think whipped cream, chocolate syrup, caramel sauce, sprinkles, or a maraschino cherry on top.
- Fruity Fun: Fresh berries, sliced bananas, or a spoonful of extra jam can add a wonderful fresh element.
- Crunchy Additions: Crushed cookies, chopped nuts, granola, or even a sprinkle of toasted coconut flakes will add delightful texture.
- Dessert Pairings: Serve a scoop alongside a warm brownie, or get inspired by other no-bake delights. It would be fantastic after a refreshing glass of This Blueberry Lemonade is My Favorite Refreshing Drink for Sunny Days, or as a scoop on the side of This Easy Ice Cream Sandwich Cake is My Favorite No-Bake Summer Dessert.
Storage and Leftover Tips
Because this recipe makes a single serving, you might not have leftovers! However, if you do, simply keep the sealed jar in the freezer. It will stay good for about a week. After a few days, it might become very firm, so let it sit out at room temperature for 5-10 minutes before scooping, or give it a quick zap in the microwave (just a few seconds!) to soften it slightly.
More Recipes You Will Love
If you’re a fan of easy, no-bake desserts and sweet treats, you’ll definitely want to explore these other recipes:
- For another incredibly easy no-bake delight, try This No-Bake Oreo Cream Pie is My Favorite Quick Dessert Hack.
- If you love mint and chocolate, This Grasshopper Pie is My Favorite No-Bake Dessert with a Mint Chocolate Twistis a must-try.
- And for a truly indulgent baking project (that’s still super fun!), you can’t go wrong with These Chocolate Chip Cookie Dough Brownie Bombs are My Favorite Sweet Obsession.
Final Thoughts
Mason Jar Ice Cream is a revelation for anyone who loves ice cream but hates the fuss. It’s proof that you don’t need fancy equipment to create something truly delicious and satisfying. So, on your next hot day, or whenever a craving strikes, grab a jar and shake up some creamy, homemade goodness!
What flavor will you try first? Share your favorite Mason Jar Ice Cream creations in the comments below! And for more genius kitchen hacks and delicious recipes, be sure to follow Chef Maniac and Jason Griffith.
Related posts:
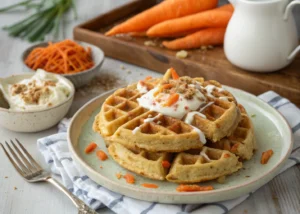 Carrot Cake Waffles with Cream Cheese Drizzle – A Bunny-Approved Brunch
 How I Make Garlic Butter Chicken with Creamy Lemon Parmesan Pasta on Busy Weeknights
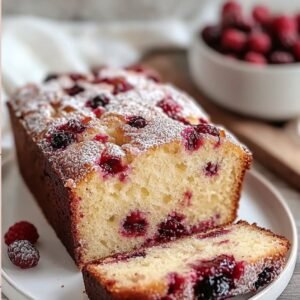 Rhubarb Quick Bread Recipe – Sweet, Tangy & Perfectly Moist Every Time
 Sausage Hashbrown Bites: The Cheesy, Crispy Snack You Didn’t Know You Needed

