
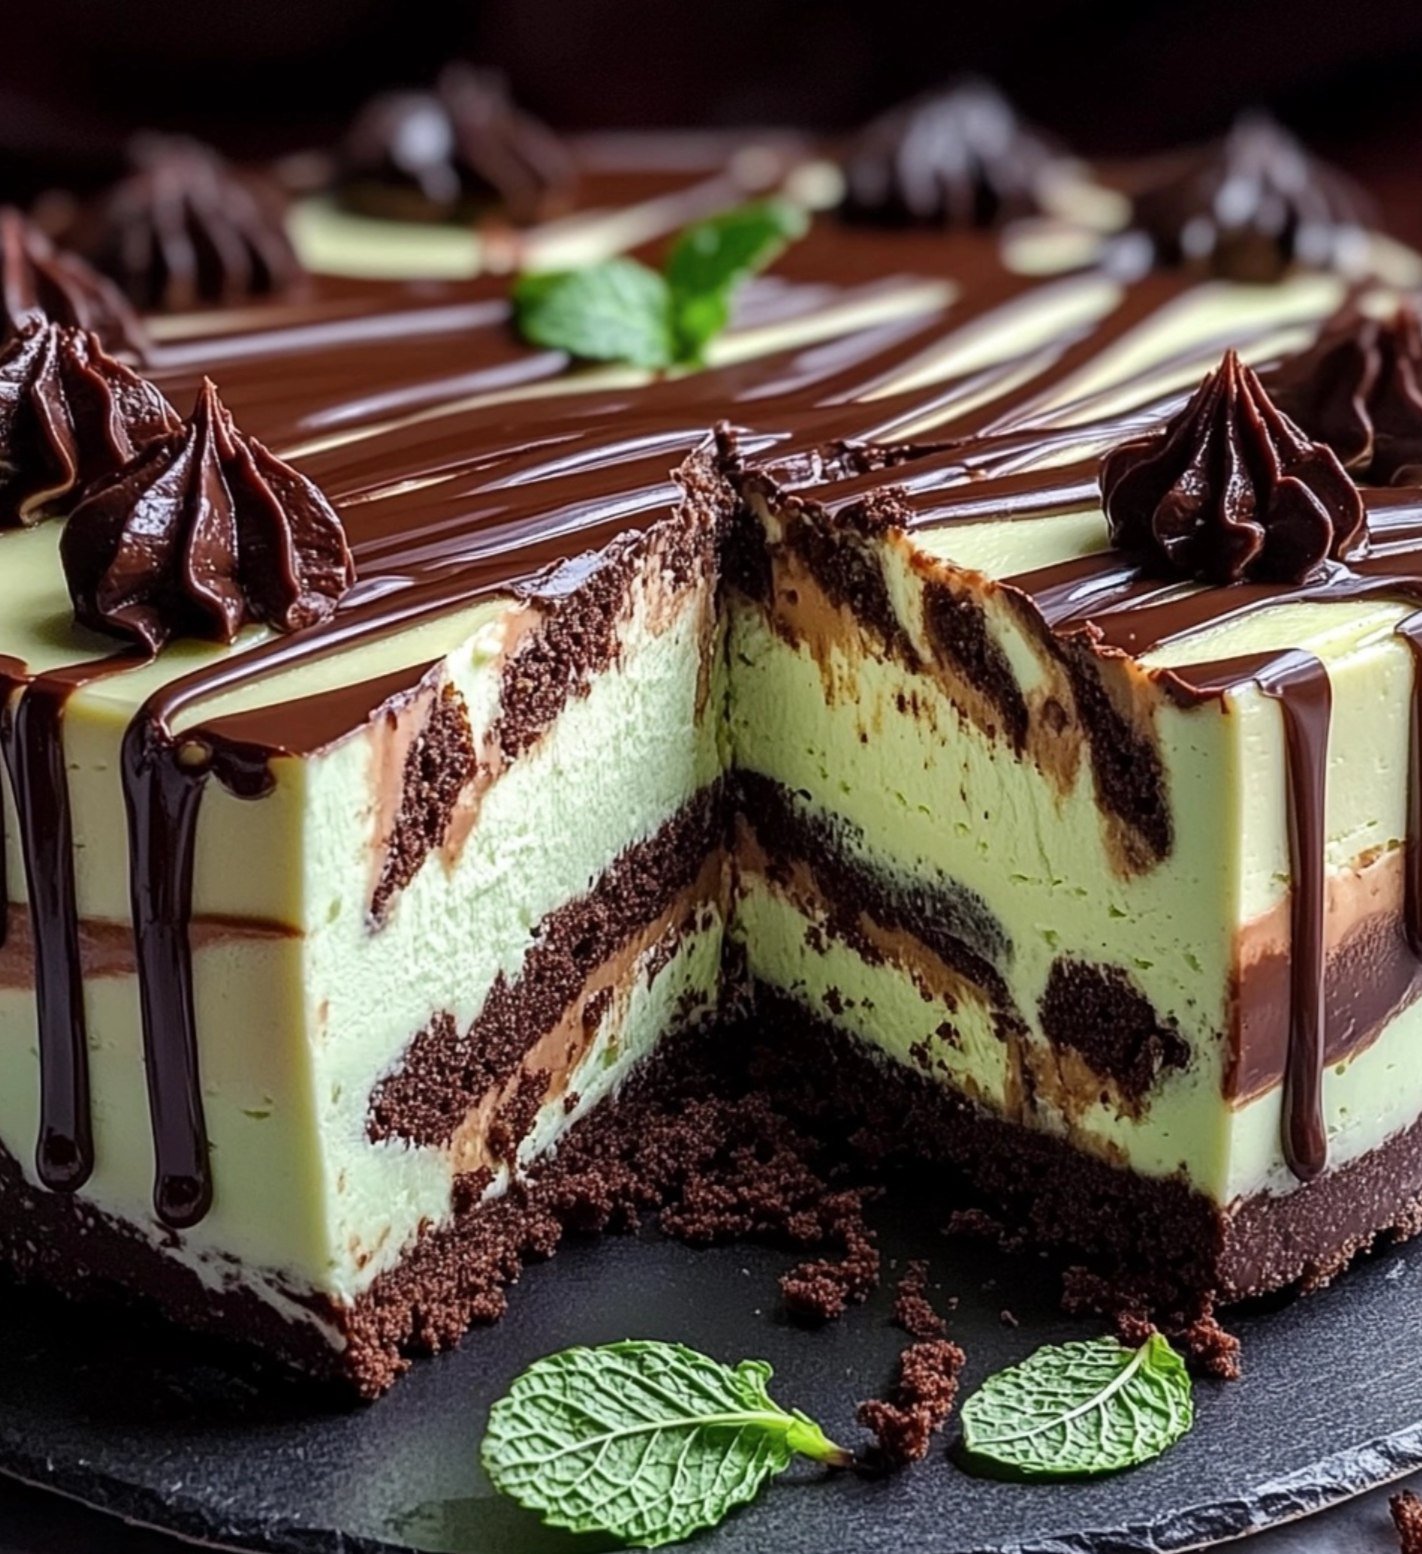
Easy No-Bake Mint Chocolate Cheesecake Recipe with Stunning Zebra Stripes

Print it, save it, or add it to your recipe binder.
If there is one thing I love more than a decadent dessert, it’s a decadent dessert that doesn’t require me to turn on the oven. As a food writer, I’ve seen a lot of “viral” trends come and go, but the zebra stripe technique is one of those timeless kitchen tricks that never fails to impress. Today, I’m sharing my recipe for a No-Bake Mint Chocolate Zebra Cheesecake—a dessert that tastes like a high-end bistro treat but is simple enough to whip up on a Tuesday night.
Why I Love This Recipe
This recipe hits the trifecta of perfect dessert qualities: texture, flavor, and visual appeal. The base is a crunchy, buttery Mint Oreo crust that provides a deep cocoa anchor. The filling is where the magic happens. By using a “zebra” pouring technique, you get alternating layers of rich dark chocolate and refreshing mint cream cheese. It’s light, airy, and incredibly smooth thanks to the gelatin, which gives it that professional “set” without the heavy, dense feeling of a baked cheesecake.
Plus, it’s a “no-fuss” win. If you’ve ever enjoyed this no-bake Oreo cream pie, you know how satisfying a chilled cookie-based dessert can be. This zebra version just takes that satisfaction and adds a bit of artistic flair.
Ingredients You’ll Need
For the Mint Oreo Crust:
- 25 Mint Oreos: The mint filling in the cookies doubles down on the flavor.
- 4 tablespoons unsalted butter: Melted to bind the crumbs together.
For the Creamy Filling:
- 2 packets (2 ½ teaspoons each) unflavored gelatin powder: This ensures a clean slice.
- 6 tablespoons cold water: To bloom the gelatin.
- 2 (8-ounce) packages cream cheese: Make sure it’s softened to room temperature for a lump-free texture.
- 2 cups heavy cream: Provides the necessary loft and richness.
- ½ cup milk: To help thin the batter just enough for the zebra pour.
- 1 cup granulated sugar: Adjust slightly if you prefer a less sweet filling.
- ¼ cup dark cocoa powder: For that deep, intense chocolate contrast.
- 1-2 teaspoons mint extract: Start with one; some brands are stronger than others!
- Green food coloring (optional): A few drops make the mint layers “pop.”
Optional Garnish:
- Stabilized whipped cream
- Chopped Andes mints
- Fresh mint leaves
Swaps and Notes
- The Crust: If you can’t find Mint Oreos, regular Oreos work perfectly fine. You can also try a graham cracker crust if you want a lighter flavor profile.
- The Extract: Be careful not to use peppermint oil in place of extract unless you reduce the amount significantly; it is much more potent.
- The Cocoa: I highly recommend Dutch-processed or dark cocoa powder. It provides a sharper color contrast against the green mint layers.
- Gelatin Substitutes: If you are vegetarian, you can use agar-agar, but the setting ratios will differ, so follow the package instructions for a firm set.
Step-by-Step Instructions
1. Prepare the Crust
Start by crushing your Mint Oreos into fine crumbs. You can use a food processor for the most even texture, or go old-school with a zip-top bag and a rolling pin. Mix the crumbs with the melted butter until it looks like wet sand. Press this firmly into the bottom of a 9-inch springform pan. I like to use the bottom of a flat measuring cup to really pack it in. Chill this in the fridge while you work on the filling.
2. Dissolve the Gelatin
In a small heat-proof bowl, sprinkle the gelatin over the cold water. Let it sit (bloom) for about 5 minutes until it looks like thick applesauce. Pop it in the microwave for 20-30 seconds until it’s liquid and clear. Set it aside to cool slightly.
3. Build the Cheesecake Base
In a large bowl, beat the softened cream cheese and sugar until fluffy. Gradually stream in the heavy cream, milk, and the dissolved gelatin. Continue beating until the mixture is smooth and slightly thickened.
4. Divide and Flavor
Split the mixture evenly into two separate bowls.
- Bowl 1 (Chocolate): Sift in the dark cocoa powder and whisk until smooth.
- Bowl 2 (Mint): Fold in the mint extract and green food coloring.
5. Create the Zebra Pattern
This is the fun part! Take the chilled crust out of the fridge. Using a large spoon or a small measuring cup, pour about ¼ cup of the chocolate mixture right into the center of the crust. Then, pour ¼ cup of the mint mixture directly into the center of the chocolate.
The weight of each addition will push the previous layer outward, creating rings. Keep alternating until all the batter is used. For a “swirled” look, you can take a toothpick or skewer and gently drag it from the center toward the edges.
6. Chill to Set
This cheesecake needs time to find its soul. Let it chill in the refrigerator for at least 3 hours, though overnight is always better for the cleanest slices.
7. Garnish and Serve
Once firm, run a thin knife around the edge of the springform pan before releasing the sides. Top with whipped cream, Andes mints, and fresh mint for that professional bakery look.
Tips for Success
- Room Temp is Key: If your cream cheese is cold, you will have lumps. Leave it out for at least 2 hours before starting.
- Sift the Cocoa: Cocoa powder loves to clump. Sift it before adding it to the cheesecake base to avoid “chocolate spots” in your filling.
- The Pour: Don’t rush the zebra stripes. Let each dollop spread out a bit before adding the next one to ensure the rings stay distinct.
Serving Suggestions and Pairings
This cheesecake is rich and refreshing, making it the perfect palate cleanser after a heavy meal.
- Coffee: Pair a slice with a bold espresso or a dark roast coffee to balance the sweetness.
- Something Salty: If you’re hosting a party, serve this alongside a savory snack like this beer cheese dip or some salty totchos to create a flavor-balanced spread.
Nutritional Information (Per Serving)
Estimate based on 12 slices:
- Calories: 385 kcal
- Total Fat: 28g
- Carbohydrates: 32g
- Protein: 5g
- Sugar: 24g
Storage and Leftover Tips
Keep your cheesecake covered in the refrigerator. It will stay fresh and delicious for up to 4-5 days. Can you freeze it?Yes! You can freeze this cheesecake (without the whipped cream garnish) for up to 2 months. Thaw it in the fridge overnight before serving to maintain that silky texture.
More Recipes You Will Love
If you enjoyed this minty treat, you have to try these other fan favorites:
- Grasshopper Pie with a Mint Chocolate Twist
- Chocolate Oreo Hearts (Perfect for No-Bake Fans)
- Edible Cookie Dough for Late Night Cravings
- Mess-Free Campfire S’mores Cones
Final Thoughts
There is something so satisfying about slicing into a zebra cheesecake and seeing those perfect, rhythmic stripes. It’s proof that you don’t need a fancy oven or hours of baking time to create a “wow” moment in the kitchen.
Did you try this recipe? I’d love to hear how your zebra stripes turned out! Leave a comment below or tag us on social media with your photos. Don’t forget to follow ChefManiac for more easy, impressive recipes every week!
Easy No-Bake Mint Chocolate Cheesecake Recipe with Stunning Zebra Stripes
—a dessert that tastes like a high-end bistro treat but is simple enough to whip up on a Tuesday night.
Prep: min | Cook: min | Total: min
Servings:
Ingredients
Instructions
Nutrition
- Calories: 385 kcal
- Fat: 28g
- Carbs: 32g
- Protein: 5g
Rate This Recipe
Average Rating: 0 (0 votes)