Homemade Nesquik Recipe – Make Chocolate Milk Mix from Scratch in 5 Minutes
Print it, save it, or add it to your recipe binder.
Homemade Nesquik Recipe (Better Than Store-Bought!)
If you’re anything like me, the nostalgic joy of stirring chocolate powder into a cold glass of milk never gets old. But what if you could make that delicious mix yourself—without preservatives or mystery ingredients? This Homemade Nesquik recipe uses just four simple pantry staples to recreate that rich, chocolatey flavor you loved as a kid, only better.
Why I Love This Recipe
There’s no denying it—store-bought chocolate milk mixes are convenient, but they often come with additives and artificial flavors. This DIY version gives you total control over the ingredients. It’s smooth, perfectly sweet, and mixes beautifully into milk for a fast treat. Plus, it stores just as well and makes an awesome addition to hot drinks, baking, or even no-bake treats.
Ingredients
- 1 cup cocoa powder
- 1 cup granulated sugar
- 1/2 teaspoon salt
- 1 teaspoon vanilla extract
Swaps & Notes
- Sugar: Use coconut sugar or a sugar substitute for a lower-glycemic version.
- Vanilla Extract: If storing for a long time, you can omit and stir in vanilla when mixing the drink.
- Cocoa Powder: Go with Dutch-processed for a smoother, more mellow chocolate flavor.
Homemade Nesquik Recipe – Make Chocolate Milk Mix from Scratch in 5 Minutes
Homemade Nesquik Recipe (Better Than Store-Bought!)
Prep: min | Cook: min | Total: min
Servings:
Ingredients
- 1 cup cocoa powder
- 1 cup granulated sugar
- 1/2 teaspoon salt
- 1 teaspoon vanilla extract
Instructions
- Mix the Dry Ingredients: In a medium mixing bowl, whisk together cocoa powder, sugar, and salt until no lumps remain.
- Add Vanilla: Drizzle in the vanilla extract and mix thoroughly until the mixture is uniform. The powder will be slightly clumpy—that’s okay.
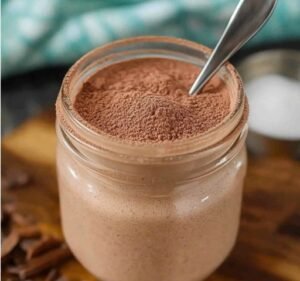
- Store: Transfer the mixture to an airtight jar or container. Keep it in a cool, dry place for up to 3 months.
- Make Chocolate Milk: Add 2 tablespoons of the mix to 1 cup (240 ml) of cold or warm milk. Stir vigorously until the powder dissolves completely. For extra smoothness, use a blender or milk frother.
- Enjoy!: Your rich, homemade chocolate milk is ready to sip!
Nutrition
- Calories:
- Fat:
- Carbs:
- Protein:
Rate This Recipe
Average Rating: 0 (0 votes)
Instructions
1. Mix the Dry Ingredients
In a medium mixing bowl, whisk together cocoa powder, sugar, and salt until no lumps remain.
2. Add Vanilla
Drizzle in the vanilla extract and mix thoroughly until the mixture is uniform. The powder will be slightly clumpy—that’s okay.
3. Store
Transfer the mixture to an airtight jar or container. Keep it in a cool, dry place for up to 3 months.
4. Make Chocolate Milk
Add 2 tablespoons of the mix to 1 cup (240 ml) of cold or warm milk. Stir vigorously until the powder dissolves completely. For extra smoothness, use a blender or milk frother.
5. Enjoy!
Your rich, homemade chocolate milk is ready to sip!
Tips for Success
- Use a fine-mesh sieve if you want a smoother powder with zero clumps.
- Double the batch—this stuff disappears fast!
- Stir with warm milk first, then add cold milk for quicker dissolving.
- For a hot cocoa version, mix into steamed milk and top with whipped cream or marshmallows.
Serving Suggestions & Pairings
Pair your homemade Nesquik chocolate milk with snacks or desserts like:
- Chocolate Chip Cookie Bites for the ultimate after-school-style snack.
- No-Bake Monster Cookie Energy Balls for a wholesome pairing.
- Edible Cookie Dough as a late-night sweet combo.
- Copycat Neiman Marcus Cookies to truly channel the café vibe.
- Brownie Batter Dip for the chocolate-on-chocolate experience.
Storage & Leftovers
- Pantry: Keep in an airtight jar in a cool, dry spot. Lasts up to 3 months.
- Fridge Optional: You can refrigerate it if your kitchen is humid, but it’s not required.
- Pre-mixed Milk: Once you’ve made chocolate milk, store in the fridge for up to 3 days. Always shake or stir before serving.
More Recipes You’ll Love
If chocolate is your thing, don’t miss:
- Brownie Batter Dip
- No-Bake Monster Cookie Energy Balls
- Edible Cookie Dough
- Chocolate Chip Cookie Bites
- Copycat Neiman Marcus Cookies
Final Thoughts
This Homemade Nesquik recipe proves that some of the best things in life are simple. Just a few ingredients and five minutes are all you need for a chocolate milk mix that’s richer, cleaner, and totally craveable.
If you try it, I’d love to hear how it turned out! Share your creations, drop a comment, and don’t forget to follow for more homemade kitchen wins.
Stay chocolatey,
Jason Griffith – ChefManiac.com 🍫🥛