Introduction
Looking for a quick, flavorful, and versatile filling for your burritos? This Salsa Chicken Burrito Filling is your answer. Combining tender chicken with zesty tomato sauce, salsa, and spices, it’s a crowd-pleaser that’s perfect for busy weeknights or meal prepping.
Why I Love This Recipe
This recipe stands out for its simplicity and bold flavors. The combination of tomato sauce and salsa creates a rich base, while the spices add depth and warmth. Plus, it’s easily adaptable to suit your taste preferences.
Ingredients
- 2 skinless, boneless chicken breast halves
- 1 (4 oz) can tomato sauce
- ¼ cup salsa
- 1 (1.25 oz) package taco seasoning mix
- 1 teaspoon ground cumin
- 2 cloves garlic, minced
- 1 teaspoon chili powder
- Hot sauce, to taste
Ingredient Swaps and Notes
- Chicken: Substitute with boneless, skinless chicken thighs for a juicier texture.
- Salsa: Choose your preferred heat level—mild, medium, or hot.
- Taco Seasoning: Use homemade taco seasoning to control sodium and spice levels.
- Add-ins: Consider adding black beans, corn, or diced bell peppers for extra flavor and nutrition.
Instructions
- Cook the Chicken: Place chicken breasts and tomato sauce in a medium saucepan over medium-high heat. Bring to a boil.
- Add Flavors: Add salsa, taco seasoning, cumin, garlic, and chili powder. Stir to combine.
- Simmer: Reduce heat and let the mixture simmer for 15 minutes.
- Shred Chicken: Using two forks, shred the chicken into thin strands directly in the saucepan.
- Final Simmer: Continue cooking the shredded chicken and sauce, covered, for another 5 to 10 minutes. Add hot sauce to taste. If the mixture becomes too thick, add a bit of water to reach the desired consistency.
Tips for Success
- Shredding: For easier shredding, let the chicken rest for a few minutes after the initial simmer.
- Consistency: Monitor the sauce’s thickness and adjust with water as needed.
- Flavor Boost: For added depth, sauté the garlic before adding it to the saucepan.
Serving Suggestions & Pairings
- Burritos: Spoon the filling into warm tortillas, add your favorite toppings like shredded cheese, sour cream, and lettuce.
- Quesadillas: Use as a filling along with cheese for a quick and tasty quesadilla. Try these sheet pan quesadillas for inspiration.
- Rice Bowls: Serve over rice with beans and veggies for a hearty bowl.
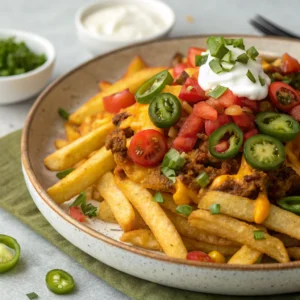
- Nachos: Top tortilla chips with the filling, cheese, and jalapeños, then bake until bubbly. For a fun twist, check out these totchos.
Storage and Leftovers
- Refrigerate: Store in an airtight container for up to 4 days.
- Freeze: Freeze portions in freezer-safe bags for up to 3 months. Thaw overnight in the refrigerator before reheating.
- Reheat: Warm in a skillet over medium heat, adding a splash of water if needed to loosen the sauce.
More Recipes You’ll Love
- This Mexican Chicken and Rice Casserole – A hearty one-pan meal.
- This Dorito Casserole – A fun and flavorful twist on a classic.
- This Walking Taco Bar – Perfect for parties and gatherings.
Final Thoughts
This Salsa Chicken Burrito Filling is a versatile and flavorful addition to your recipe repertoire. Whether you’re making burritos, quesadillas, or rice bowls, it’s sure to satisfy. Give it a try and let us know how you enjoyed it!