The Easiest Bread You’ll Ever Make: Why Bread in a Bag is a Game Changer
There is something deeply satisfying about the smell of fresh bread wafting through the house. For years, I avoided baking my own loaves because the process felt intimidating—too much flour on the counters, too much kneading, and way too many dishes to clean. That all changed when I discovered the “Bread in a Bag” method.
I’m Jason Griffith, and if you’ve followed my work here at ChefManiac, you know I’m a fan of kitchen shortcuts that don’t sacrifice flavor. This recipe is the ultimate “low-mess” miracle. By mixing and proofing the dough directly in a gallon-sized freezer bag, you contain the flour explosion and make the cleanup a breeze. It’s the perfect science experiment for kids and a reliable staple for busy adults who want that bakery-fresh taste without the bakery-level effort.
Why I Love This Recipe
What makes this bread stand out isn’t just the novelty of the bag; it’s the texture. Despite the simple process, you end up with a remarkably soft, tight crumb that is perfect for sandwiches or toasting.
Unlike my Classic Spaghetti Recipe with Homemade Sauce, which requires a bit of stovetop hovering, this bread is mostly “set it and forget it.” It’s tactile, fun, and virtually foolproof. Plus, if you’ve already mastered This Chocolate Chip Banana Bread, this yeast-based loaf is the natural next step in your baking journey.
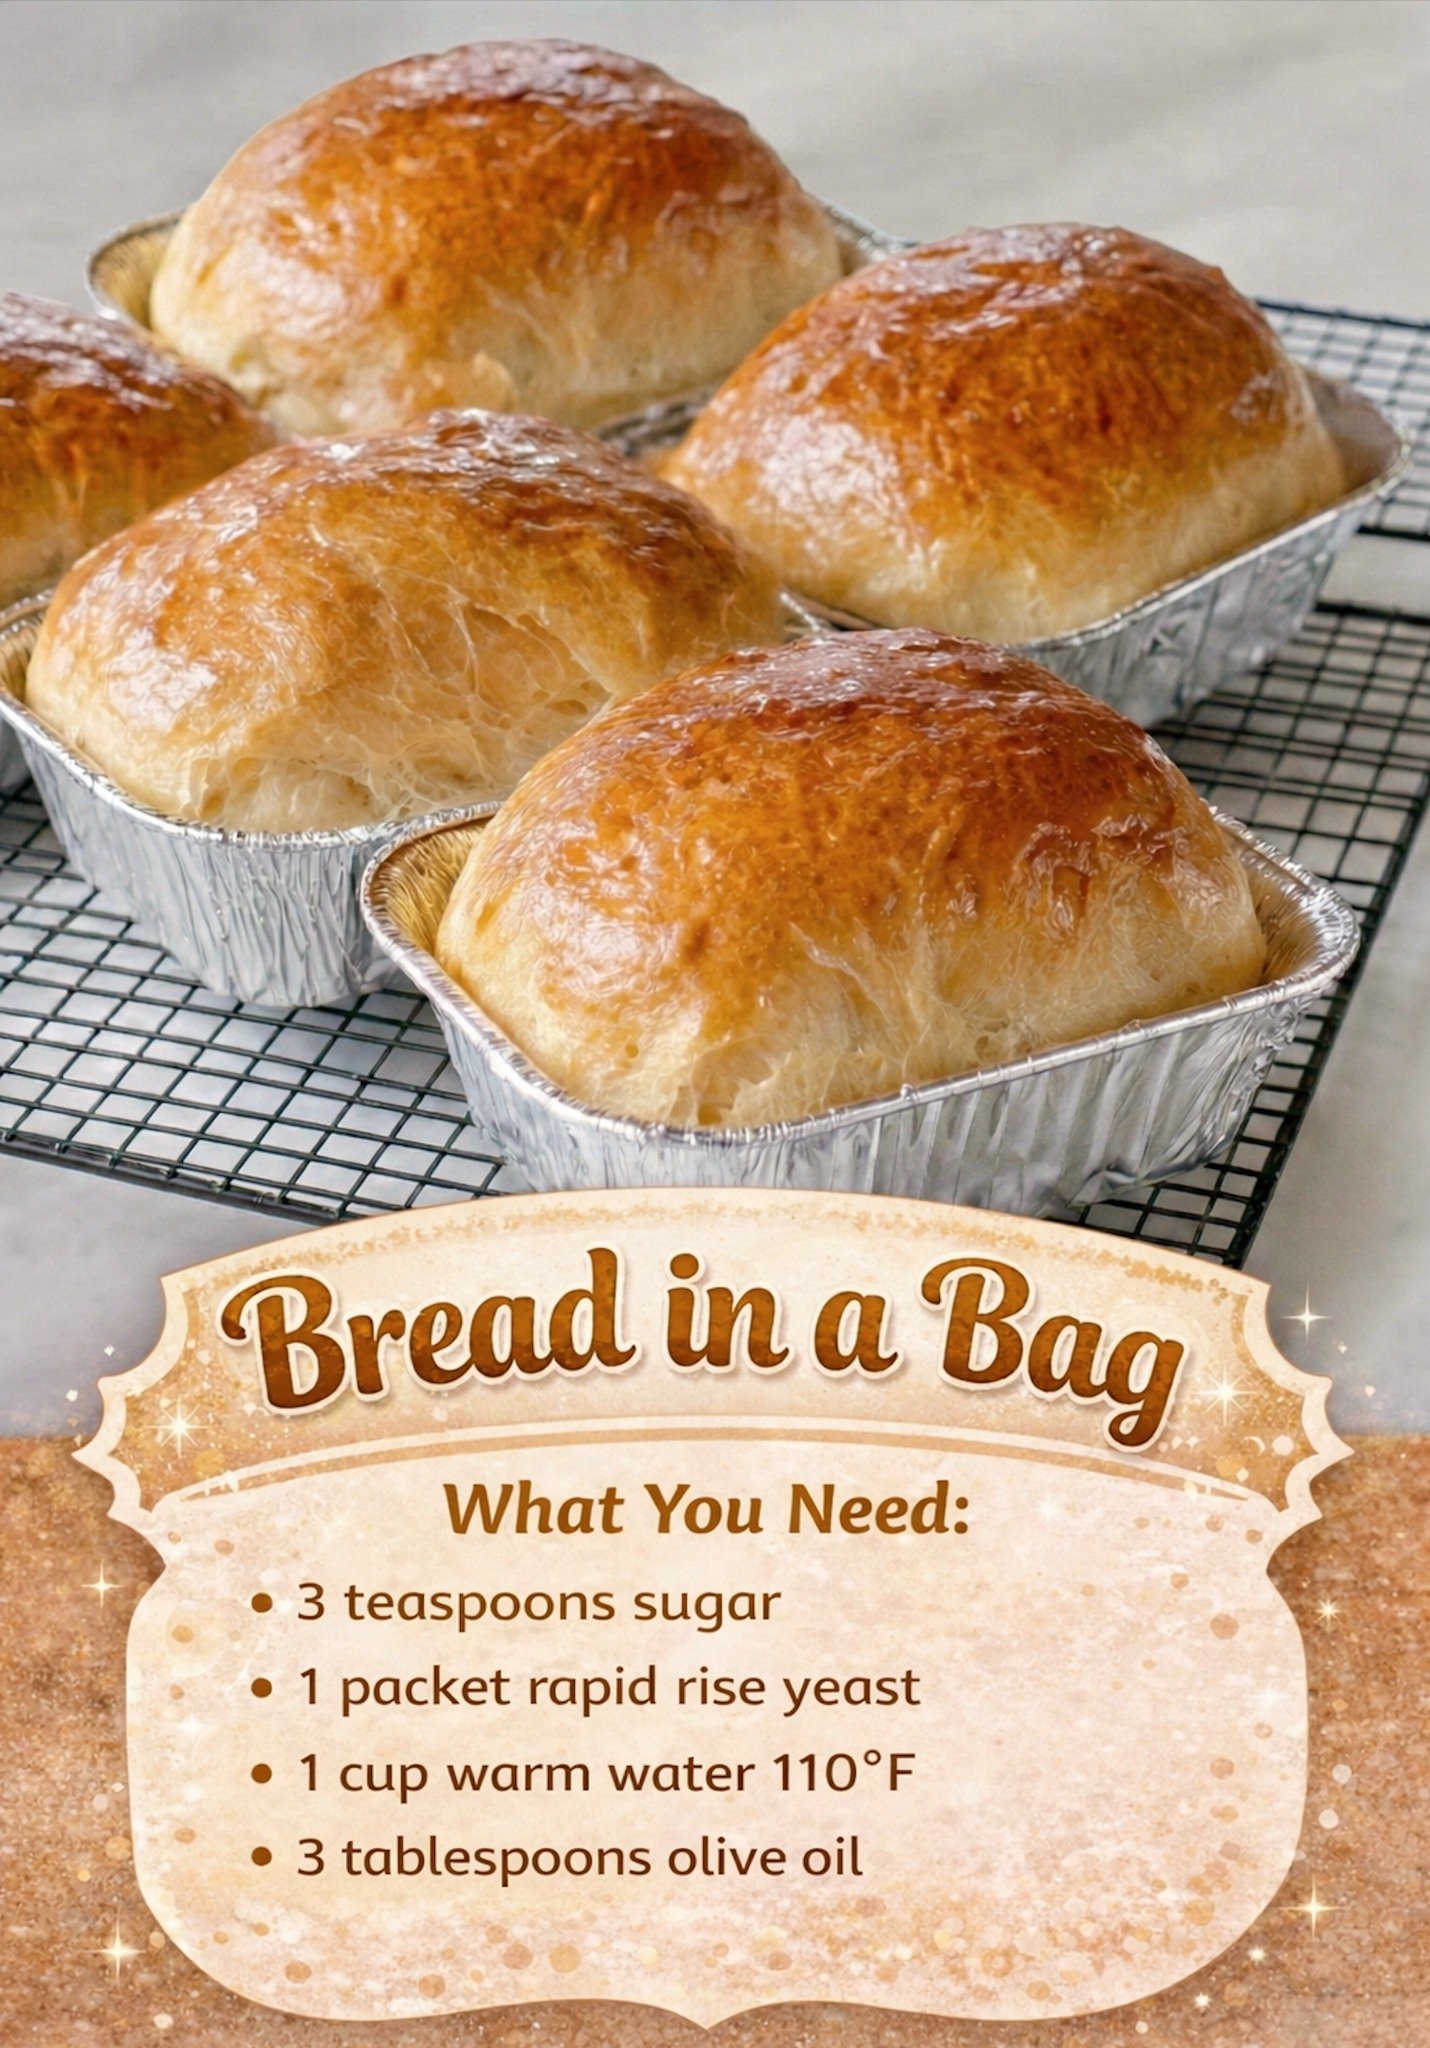
Ingredients You’ll Need
To get started, gather these simple pantry staples. You likely already have everything you need in your kitchen!
- All-Purpose Flour: 3 cups (divided)
- Granulated Sugar: 3 tsp (this feeds the yeast and helps with browning)
- Rapid Rise Yeast: 1 packet (standard .25 oz)
- Warm Water: 1 cup (Target 110°F / 43°C)
- Olive Oil: 3 tbsp (adds fat for a softer crust)
- Salt: 1¼ tsp
Swaps and Notes
- The Bag Matters: Do not use a standard sandwich bag. Use a high-quality, freezer-strength gallon bag. The reinforced plastic can handle the pressure of the gas released by the yeast and the “kneading” through the plastic.
- Flour Alternatives: While all-purpose flour provides the softest results, you can swap in 1 cup of whole wheat flour for a heartier, nuttier loaf.
- The Fat: If you don’t have olive oil, melted butter or avocado oil works beautifully.
- Water Temperature: If the water is too cold, the yeast won’t wake up; if it’s too hot (above 130°F), it will kill the yeast. Aim for the temperature of a warm baby bottle.
Step-by-Step Instructions
1. Start the Dough (The “Sponge” Phase)
Open your freezer-strength bag and add 1 cup of the flour, the sugar, the yeast, and the warm water. Seal the bag tightly, making sure to squeeze out the excess air. Squeeze and shake the bag with your hands until the ingredients are well combined. Let the bag sit on your counter for 10–15 minutes. You’ll know it’s working when the mixture looks frothy and bubbly.
2. Finish the Mixing
Open the bag and add the remaining 2 cups of flour, the olive oil, and the salt. Reseal the bag (again, removing the air) and begin “kneading” the bag with your hands. You want to push and pull the dough through the plastic until a soft, cohesive ball forms and pulls away from the sides of the bag.
3. Smooth It Out
Dust a clean surface with a little bit of flour. Remove the dough from the bag—it should come out easily. Knead the dough by hand for just 2–3 minutes. You aren’t looking for an intense workout here; you just want the dough to feel smooth and elastic.
4. Shape and Rise
Form the dough into a log shape that fits into a greased 9×5-inch loaf pan. Cover the pan with a clean kitchen towel and place it in a warm, draft-free spot. Let it rise for about 45–60 minutes, or until the dough has doubled in size and risen slightly above the rim of the pan.
5. Bake to Perfection
Preheat your oven to 375°F (190°C). Bake the loaf for 25–30 minutes. The top should be a beautiful golden brown, and if you tap the bottom of the loaf, it should sound hollow.
6. Cool and Slice
This is the hardest part: wait! Let the bread cool in the pan for 5 minutes, then move it to a wire rack. Let it cool for at least 30 minutes before slicing. This allows the internal structure to set so the bread doesn’t turn “gummy” when cut.
Tips for Success
- Tacky, Not Sticky: If the dough is sticking to the bag excessively in Step 2, add an extra tablespoon of flour at a time. It should feel slightly tacky to the touch, but it shouldn’t leave a mess on your fingers.
- The “Windowpane” Test: To see if you’ve kneaded enough, pull off a small piece of dough and stretch it. If you can stretch it thin enough to see light through it without it tearing, the gluten is ready!
- Steam for Crust: If you like a crustier exterior, place a small oven-safe dish with water on the bottom rack of the oven while the bread bakes.
Serving Suggestions and Pairings
This bread is incredibly versatile. It’s sturdy enough to stand up to a hearty bowl of Instant Pot Lasagna and light enough for a morning snack.
- Breakfast: Slather a warm slice with butter and jam, or serve it alongside these 3-Ingredient Chocolate Chip Oatmeal Breakfast Cookies for a complete morning spread.
- Afternoon Treat: It pairs wonderfully with a hot cup of coffee and a Pumpkin Spice Muffin.
- Dinner: Use it to mop up the extra sauce from your favorite pasta dishes.
Nutritional Information (Per Serving)
Estimate based on 10 slices per loaf
- Calories: 165 kcal
- Total Fat: 4.5g
- Carbohydrates: 28g
- Protein: 4g
- Sodium: 290mg
Storage and Leftover Tips
- Room Temp: Store in an airtight bag or bread box for up to 3 days.
- Fridge: Avoid the fridge, as it can actually dry out homemade bread faster.
- Freeze: This bread freezes beautifully! Slice it first, wrap it tightly in plastic wrap, and store in a freezer bag for up to 3 months. You can toast slices directly from the freezer.
- Leftovers: If the bread gets a little stale after a few days, it makes the world’s best French toast or homemade croutons.
Final Thoughts
Baking bread doesn’t have to be a daunting task that takes up your entire Saturday. With the Bread in a Bag method, you get all the reward with a fraction of the cleanup.
I’d love to hear how yours turned out! Did you add any herbs or cheese to the bag? Leave a comment below or tag us on social media with your creations. Don’t forget to follow ChefManiac for more easy, family-friendly recipes!


Leave a Reply