Individual Brownie Cheesecake Bites with Decadent Toppings
Print it, save it, or add it to your recipe binder.
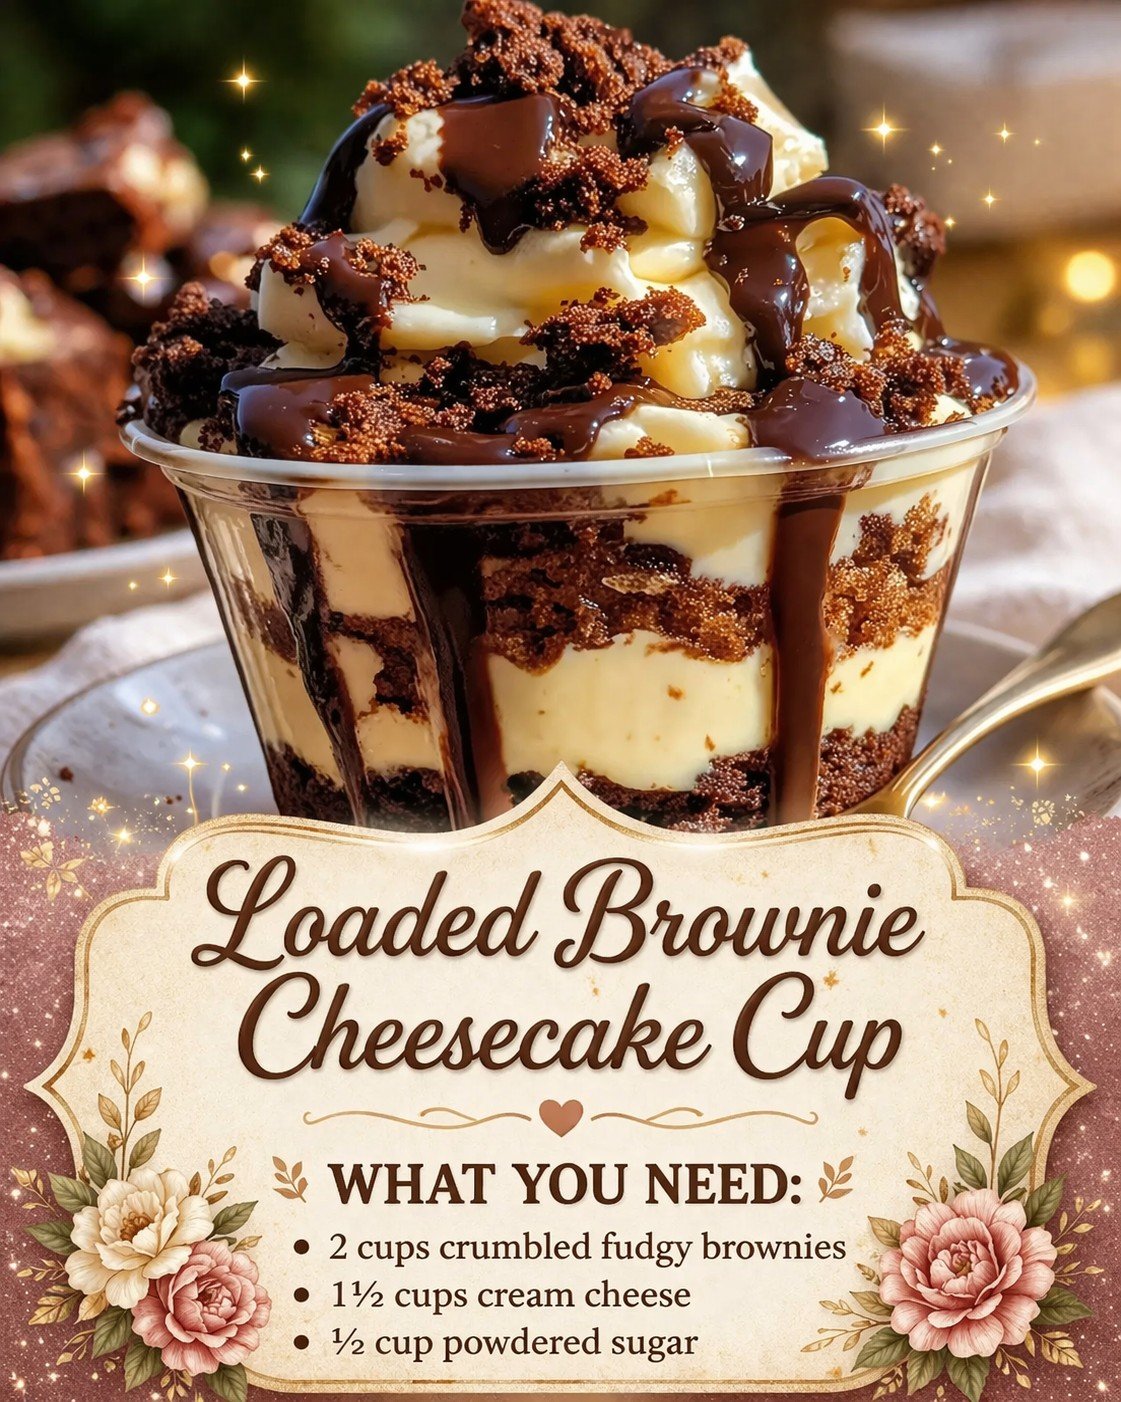
The Ultimate Loaded Brownie Cheesecake Cups: A Decadent Dessert Mashup
By Jason Griffith | ChefManiac.com
If you have ever found yourself standing in front of the fridge, unable to decide between a fudgy brownie and a creamy slice of cheesecake, I have the ultimate solution for you. These Loaded Brownie Cheesecake Cups are the best of both worlds—bite-sized, portable, and absolutely exploding with flavor.
This isn’t just a basic cheesecake; it’s a “loaded” experience. We are talking about a chewy brownie base, a silky cheesecake center, and a top layer piled high with chocolate chips, caramel, and maybe even a few crushed nuts. It’s the kind of dessert that makes you the hero of the bake sale or the star of the dinner party.
Why I Love This Recipe
What I love most about these cups is the texture contrast. You get the slight “snap” of the brownie edges, the fudgy middle, and that melt-in-your-mouth cream cheese swirl. Because they are baked in a muffin tin, you don’t have to worry about the stress of a traditional cheesecake water bath or the dreaded “crack” on top.
These are also incredibly fun to customize. They are a fantastic sweet follow-up to a savory meal like this Mexican Chicken and Rice Casserole or a fun snack to have on the table alongside these Totchos.
Ingredients
For the Brownie Base:
- Unsalted Butter: 1/2 cup (melted)
- Granulated Sugar: 1 cup
- Eggs: 2 large
- Vanilla Extract: 1 tsp
- Cocoa Powder: 1/2 cup (unsweetened)
- All-Purpose Flour: 1/2 cup
- Salt: 1/4 tsp
For the Cheesecake Layer:
- Cream Cheese: 8 oz (softened to room temperature)
- Sugar: 1/4 cup
- Egg: 1 large
- Vanilla Extract: 1/2 tsp
For the “Loaded” Toppings:
- Mini Chocolate Chips: 1/2 cup
- Caramel Sauce: For drizzling
- Chopped Pecans or Walnuts: (Optional)
Swaps and Notes
- Shortcut: If you are short on time, you can use a high-quality boxed brownie mix for the base. Just follow the package instructions and fill the muffin cups 1/3 full.
- Low Sugar: You can substitute the granulated sugar in the cheesecake layer for a monk fruit sweetener.
- Toppings: Get creative! I love topping these with crushed Oreos or even a dollop of peanut butter.
Step-by-Step Instructions
1. Prep the Oven and Tin
Preheat your oven to 350°F (175°C). Line a standard 12-cup muffin tin with paper liners and spray them lightly with non-stick cooking spray to ensure the brownies release easily.
2. Make the Brownie Batter
In a medium bowl, whisk the melted butter and sugar. Add the eggs and vanilla, whisking until smooth. Fold in the cocoa powder, flour, and salt until just combined. Distribute the batter evenly among the 12 muffin cups (about 1–2 tablespoons per cup).
3. Whip the Cheesecake Filling
In a separate bowl, beat the softened cream cheese and sugar until light and fluffy. Add the egg and vanilla, mixing just until smooth. Do not overbeat, as this can incorporate too much air and cause the cheesecake to puff and then fall.
4. The Layering Process
Spoon about 1 tablespoon of the cheesecake mixture over the brownie batter in each cup. Use a toothpick to gently swirl the two batters together if you want a “marbled” look, or leave them layered for a distinct contrast.
5. Add the “Load”
Sprinkle the mini chocolate chips and any nuts over the top of the cheesecake layer.
6. Bake
Bake for 20–25 minutes. The edges of the brownie should be set, and the cheesecake should be slightly jiggly but firm to the touch.
7. Cool and Drizzle
Let the cups cool completely in the tin. This is the hardest part, but they need to set! Once cool, drizzle with caramel sauce before serving.
Tips for Success
- Room Temp Cream Cheese: This is non-negotiable! If your cream cheese is cold, you will have lumps in your cheesecake layer that won’t bake out.
- Don’t Overbake: Brownies continue to cook as they cool. If you wait until they look completely dry, they will be overdone.
- The Chill Factor: These actually taste even better after being chilled in the fridge for an hour. The flavors meld together into a fudge-like dream.
Serving Suggestions and Pairings
These are the ultimate party food. For a full “snack-bar” vibe, serve them alongside a warm bowl of Crockpot Nacho Dipor a tray of Sheet Pan Quesadillas. If you’re hosting a morning gathering, they also make a decadent “dessert” side to a One Pan Breakfast Bake.
Nutritional Information (Per Cup)
- Calories: 245 kcal
- Total Fat: 14g
- Carbohydrates: 28g
- Protein: 3g
- Sugar: 18g (Note: Estimates based on 12 servings per batch.)
Storage and Leftover Tips
Because of the cream cheese, these must be stored in the refrigerator. Keep them in an airtight container for up to 5 days. They also freeze beautifully! Wrap individual cups in plastic wrap and store in a freezer bag for up to 3 months. Just thaw in the fridge before enjoying.
More Recipes You Will Love
If you enjoyed this decadent dessert, you have to try these other fan-favorites:
- Crockpot Nacho Dip – The ultimate party starter.
- Mexican Chicken and Rice Casserole – A one-pan dinner that everyone loves.
- Totchos (Tater Tot Nachos) – The perfect salty counterpoint to a sweet brownie.
Final Thoughts
Loaded Brownie Cheesecake Cups are a testament to the fact that you don’t need a lot of equipment to make a dessert that looks and tastes expensive. They are simple, reliable, and always the first thing to disappear from the dessert table.
What toppings would you add to yours? I’m thinking white chocolate or peanut butter chips next time! Let me know in the comments, and don’t forget to follow ChefManiac for more easy, delicious recipes. Happy baking!

Individual Brownie Cheesecake Bites with Decadent Toppings
The Ultimate Loaded Brownie Cheesecake Cups: A Decadent Dessert Mashup
Prep: min | Cook: min | Total: min
Servings:
Ingredients
Instructions
Nutrition
- Calories: 245 kcal
- Fat: 14g
- Carbs: 28g
- Protein: 3g
Rate This Recipe
Average Rating: 0 (0 votes)