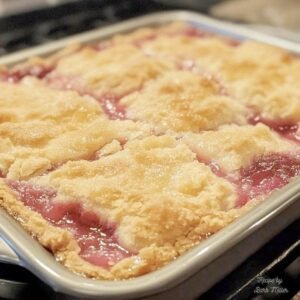

Heaven on Earth Cake: A Fluffy, Creamy, and Fruity No-Bake Dessert

Print it, save it, or add it to your recipe binder.
Heaven on Earth Cake: The Fluffy, Creamy, No-Bake Dessert
Hey everyone, Jason Griffith here! When you’re in the mood for a dessert that is light, airy, and a total dream, this Heaven on Earth Cake is the perfect solution. It’s a no-bake wonder with a rich, creamy pudding layer, a fluffy whipped topping, and a delicate, angel food cake base. It’s the kind of dessert that feels incredibly luxurious but is actually a total breeze to make. It’s a sweet, fruity, and incredibly delicious dessert that is perfect for a warm summer day, a potluck, or a special family treat.
I first had this cake at a church picnic, and I was immediately hooked. It was so light, creamy, and packed with so many different textures and flavors. I knew I had to get the recipe. The secret is to use a simple angel food cake base and then layer it with a rich, creamy pudding and a fluffy whipped topping. It’s a dessert that feels nostalgic and new all at once, and it’s a total crowd-pleaser.
Why I Love This Recipe
What I love most about this Heaven on Earth Cake is its incredible texture and simplicity. The no-bake aspect is a huge win, especially during the summer. You just mix, layer, and chill. The combination of the light angel food cake with the creamy pudding and the fluffy whipped topping is a perfect balance. It’s a dessert that is both light and decadent, and it’s always a huge hit with everyone who tries it.
This recipe is also a great make-ahead dessert. It needs several hours in the fridge to set up perfectly, which makes it an ideal solution for a party or a family gathering. You can prepare it a day in advance and just pull it out of the fridge when you’re ready to serve. For another great make-ahead no-bake dessert, my recipe for This Grasshopper Pie is My Favorite No-Bake Dessert with a Mint Chocolate Twist is also a total showstopper.
Ingredients
- 1 prepared angel food cake, torn into small pieces
- 1 box (3.4 oz) instant vanilla pudding mix
- 2 cups cold milk
- 1 (8 oz) block cream cheese, softened
- 1/2 cup powdered sugar
- 1 (8 oz) tub whipped topping (like Cool Whip), thawed
- 1 cup fresh fruit (strawberries, blueberries, or peaches), chopped
Swaps and Notes
- Angel Food Cake: A store-bought angel food cake is perfect for this recipe because it’s light and airy. You can also make your own from a box mix.
- Pudding Mix: Instant vanilla pudding mix is the key to this recipe’s quick preparation. You can use instant white chocolate or cheesecake pudding mix for a different flavor.
- Milk: Whole milk works best for a rich, creamy pudding, but 2% milk will also work.
- Cream Cheese: Make sure your cream cheese is completely softened to room temperature. This is crucial for a smooth, lump-free filling.
- Fruit: Fresh fruit is best for this recipe. Strawberries, blueberries, or peaches are all great options. You can also use canned or frozen fruit, just be sure to drain them well.
Instructions
- Prepare the Cake Base: Tear the prepared angel food cake into small, bite-sized pieces. Arrange a single layer of the cake pieces in the bottom of a 9×13-inch baking dish.
- Make the Pudding: In a medium bowl, whisk together the instant vanilla pudding mix and the cold milk for about 2 minutes, until it starts to thicken.
- Make the Cream Cheese Layer: In a separate large bowl, use a hand mixer or a stand mixer to beat the softened cream cheese and powdered sugar until it is smooth and creamy.
- Combine: Gently fold in half of the thawed whipped topping into the cream cheese mixture.
- Layer the Cake: Spread the cream cheese mixture evenly over the cake pieces in the baking dish.
- Add the Pudding: Pour the prepared pudding over the cream cheese layer, spreading it evenly.
- Add the Topping: Gently spread the remaining whipped topping over the top of the pudding.
- Add the Fruit: Sprinkle the fresh chopped fruit evenly over the top of the cake.
- Chill: Cover the dish with plastic wrap and refrigerate for at least 4 hours, or until it is well chilled and set.
Tips for Success
- Soften the Cream Cheese: This is the most important step in this recipe. Don’t skip it! It ensures a smooth, creamy base.
- Chill Everything: For the best results, make sure your milk is very cold and your whipped topping is well-chilled. This helps the pudding and whipped topping set properly.
- Don’t Overmix: When you fold in the whipped topping, mix gently with a spatula. You want to keep the air in the mixture to maintain that light, fluffy texture.
- Let It Set: Giving the cake a full 4 hours to chill is a crucial step. It allows the pudding and the cream cheese layers to set completely.
Serving Suggestions and Pairings
This Heaven on Earth Cake is a complete dessert on its own. It’s a perfect treat with a cup of coffee or a tall glass of milk. For another great crowd-pleasing dessert, you might also like my recipe for This Big Family Banana Pudding is My Favorite Classic Dessert to Feed a Crowd.
Nutritional Information (Per Serving)
Please note: This is an approximation and can vary based on the specific ingredients used.
- Calories: Approximately 350
- Protein: 5g
- Fat: 15g
- Carbohydrates: 50g
This is a rich and decadent dessert, so it’s best enjoyed as an occasional treat.
Storage and Leftover Tips
This dessert stores beautifully. You can store it, covered, in the refrigerator for up to 3 days. The fruit may get a little watery over time, so it’s best to add it just before serving. This dessert does not freeze well.
More Recipes You Will Love
If you’re a fan of simple, delicious desserts, you’ll love some of my other creations. For a fun cake that’s always a hit, my This Unicorn Poke Cake Became My Favorite Party Trick is a showstopper. For another easy and nostalgic treat, you can’t go wrong with my recipe for These Old School No-Bake Cookies Never Fail Me and I’ve Made Them 100 Times. And for another simple no-bake dessert, my This Easy Ice Cream Sandwich Cake is My Favorite No-Bake Summer Dessert is a winner.
Final Thoughts
This Heaven on Earth Cake is a recipe that is sure to become a new favorite in your home. It’s a simple, elegant, and incredibly delicious dessert that is the perfect way to get a little bit of that sweet, fruity flavor on your plate.
I’d love to know what your favorite no-bake desserts are! Let me know in the comments below. And don’t forget to follow me for more delicious recipes. Happy cooking!

Heaven on Earth Cake: A Fluffy, Creamy, and Fruity No-Bake Dessert
Heaven on Earth Cake: The Fluffy, Creamy, No-Bake Dessert
Prep: min | Cook: min | Total: min
Servings:
Ingredients
- 1 prepared angel food cake, torn into small pieces
- 1 box (3.4 oz) instant vanilla pudding mix
- 2 cups cold milk
- 1 (8 oz) block cream cheese, softened
- 1/2 cup powdered sugar
- 1 (8 oz) tub whipped topping (like Cool Whip), thawed
- 1 cup fresh fruit (strawberries, blueberries, or peaches), chopped
- Swaps and Notes:
- Angel Food Cake: A store-bought angel food cake is perfect for this recipe because it's light and airy. You can also make your own from a box mix.
- Pudding Mix: Instant vanilla pudding mix is the key to this recipe's quick preparation. You can use instant white chocolate or cheesecake pudding mix for a different flavor.
- Milk: Whole milk works best for a rich, creamy pudding, but 2% milk will also work.
- Cream Cheese: Make sure your cream cheese is completely softened to room temperature. This is crucial for a smooth, lump-free filling.
- Fruit: Fresh fruit is best for this recipe. Strawberries, blueberries, or peaches are all great options. You can also use canned or frozen fruit, just be sure to drain them well.
- Instructions:
- Prepare the Cake Base: Tear the prepared angel food cake into small, bite-sized pieces. Arrange a single layer of the cake pieces in the bottom of a 9x13-inch baking dish.
- Make the Pudding: In a medium bowl, whisk together the instant vanilla pudding mix and the cold milk for about 2 minutes, until it starts to thicken.
- Make the Cream Cheese Layer: In a separate large bowl, use a hand mixer or a stand mixer to beat the softened cream cheese and powdered sugar until it is smooth and creamy.
- Combine: Gently fold in half of the thawed whipped topping into the cream cheese mixture.
- Layer the Cake: Spread the cream cheese mixture evenly over the cake pieces in the baking dish.
- Add the Pudding: Pour the prepared pudding over the cream cheese layer, spreading it evenly.
- Add the Topping: Gently spread the remaining whipped topping over the top of the pudding.
- Add the Fruit: Sprinkle the fresh chopped fruit evenly over the top of the cake.
- Chill: Cover the dish with plastic wrap and refrigerate for at least 4 hours, or until it is well chilled and set.
- Tips for Success:
- Soften the Cream Cheese: This is the most important step in this recipe. Don’t skip it! It ensures a smooth, creamy base.
- Chill Everything: For the best results, make sure your milk is very cold and your whipped topping is well-chilled. This helps the pudding and whipped topping set properly.
- Don't Overmix: When you fold in the whipped topping, mix gently with a spatula. You want to keep the air in the mixture to maintain that light, fluffy texture.
- Let It Set: Giving the cake a full 4 hours to chill is a crucial step. It allows the pudding and the cream cheese layers to set completely.
- Serving Suggestions and Pairings:
- Nutritional Information (Per Serving):
- Calories: Approximately 350
- Protein: 5g
- Fat: 15g
- Carbohydrates: 50g
- Storage and Leftover Tips:
- More Recipes You Will Love:
- Final Thoughts:
Instructions
- Prepare the : Cake Base: Tear the prepared angel food cake into small, bite-sized pieces. Arrange a single layer of the cake pieces in the bottom of a 9x13-inch baking dish.
- Make the : Pudding: In a medium bowl, whisk together the instant vanilla pudding mix and the cold milk for about 2 minutes, until it starts to thicken.
- Make the : Cream Cheese Layer: In a separate large bowl, use a hand mixer or a stand mixer to beat the softened cream cheese and powdered sugar until it is smooth and creamy.
- Combine: Gently fold in half of the thawed whipped topping into the cream cheese mixture.
- Layer the : Cake: Spread the cream cheese mixture evenly over the cake pieces in the baking dish.
- Add the : Pudding: Pour the prepared pudding over the cream cheese layer, spreading it evenly.
- Add the : Topping: Gently spread the remaining whipped topping over the top of the pudding.
- Add the : Fruit: Sprinkle the fresh chopped fruit evenly over the top of the cake.
- Chill: Cover the dish with plastic wrap and refrigerate for at least 4 hours, or until it is well chilled and set.
- Tips for Success: Soften the Cream Cheese: This is the most important step in this recipe. Don’t skip it! It ensures a smooth, creamy base.
- Chill : Everything: For the best results, make sure your milk is very cold and your whipped topping is well-chilled. This helps the pudding and whipped topping set properly.
- Don't : Overmix: When you fold in the whipped topping, mix gently with a spatula. You want to keep the air in the mixture to maintain that light, fluffy texture.
- Let : It Set: Giving the cake a full 4 hours to chill is a crucial step. It allows the pudding and the cream cheese layers to set completely.
- Serving Suggestions and Pairings: This Heaven on Earth Cake is a complete dessert on its own. It's a perfect treat with a cup of coffee or a tall glass of milk. For another great crowd-pleasing dessert, you might also like my recipe for This Big Family Banana Pudding is My Favorite Classic Dessert to Feed a Crowd.
- Nutritional Information (Per Serving): Please note: This is an approximation and can vary based on the specific ingredients used.
- Calories: Approximately 350
- Protein: 5g
- Fat: 15g
- Carbohydrates: 50g
- This is a rich and decadent dessert, so it’s best enjoyed as an occasional treat.
- Storage and Leftover Tips: This dessert stores beautifully. You can store it, covered, in the refrigerator for up to 3 days. The fruit may get a little watery over time, so it's best to add it just before serving. This dessert does not freeze well.
- More Recipes You Will Love: If you’re a fan of simple, delicious desserts, you'll love some of my other creations. For a fun cake that's always a hit, my This Unicorn Poke Cake Became My Favorite Party Trick is a showstopper. For another easy and nostalgic treat, you can't go wrong with my recipe for These Old School No-Bake Cookies Never Fail Me and I’ve Made Them 100 Times. And for another simple no-bake dessert, my This Easy Ice Cream Sandwich Cake is My Favorite No-Bake Summer Dessert is a winner.
- Final Thoughts: This Heaven on Earth Cake is a recipe that is sure to become a new favorite in your home. It’s a simple, elegant, and incredibly delicious dessert that is the perfect way to get a little bit of that sweet, fruity flavor on your plate.
- I'd love to know what your favorite no-bake desserts are! Let me know in the comments below. And don't forget to follow me for more delicious recipes. Happy cooking!
Nutrition
- Calories:
- Fat: 15g
- Carbs: 50g
- Protein: 5g
Rate This Recipe
Average Rating: 0 (0 votes)