Easy Homemade Cheese Straws for Parties, Snacking, and Holiday Trays
Print it, save it, or add it to your recipe binder.
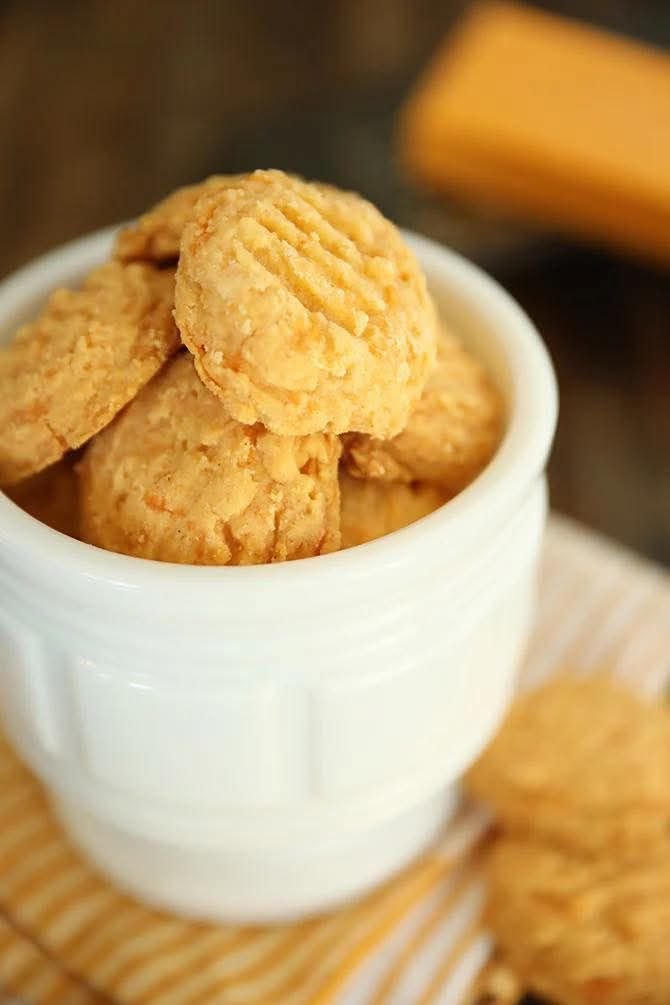
Cheese Straws
If you love a savory snack with serious flavor, these Cheese Straws are about to become a go-to favorite. Made with sharp cheddar, butter, flour, and a little kick from cayenne, they bake up rich, cheesy, and wonderfully crisp. They are the kind of old-school snack that feels right at home on a holiday tray, beside a bowl of soup, or set out for guests with drinks and appetizers.
What makes this recipe especially lovable is how simple it is. With just a handful of ingredients and a quick mix-and-bake method, you get a homemade snack that tastes far more special than the effort it takes. Whether you call them cheese straws or cheesy bites, one thing is certain: they disappear fast.
Introduction
There is something timeless about a good cheese straw recipe. It is buttery, flaky, salty, and packed with bold cheddar flavor in every bite. These are not sweet cookies pretending to be savory. They are deeply cheesy, rich, and satisfying, with just enough cayenne to keep things interesting.
This version keeps the process easy by scooping the dough onto a baking sheet instead of piping or shaping long straws. The result is rustic, crisp, and perfect for snacking. They are great for parties, lunchbox add-ins, game days, or anytime you want something homemade that leans savory instead of sweet.
Why I Love This Recipe
I love this recipe because it proves how much flavor can come from a very short ingredient list. Sharp cheddar brings bold flavor, butter adds richness, and cayenne gives the whole batch a subtle warmth that balances the cheese beautifully.
I also love how versatile they are. They can be served as an appetizer, a snack, or part of a party spread. They feel classic enough for holidays and casual enough for everyday nibbling. And since they keep well in an airtight container, they are a great make-ahead option too.
Most of all, they are the kind of savory bake that stands out in a world full of sweets. When you want something crisp, cheesy, and just a little addictive, these always hit the mark.
Ingredients
Here is what you need to make these Cheese Straws:
- 1 block (8 ounces) sharp cheddar cheese
- 3/4 cup unsalted butter, room temperature
- 1 teaspoon salt
- 1/2 teaspoon garlic powder
- 1/2 to 1 teaspoon cayenne powder, to taste
- 2 cups all-purpose flour
Swaps and Notes
This recipe is simple, but a few notes can help you get the best result.
- Sharp cheddar: Use a good sharp cheddar for the boldest flavor. Freshly shredding it makes a difference.
- Butter: Room temperature butter blends more easily with the cheese and helps create a smooth dough.
- Cayenne: Use the lower amount for mild heat or the higher amount if you want a little more kick.
- Texture: A shorter bake gives you a crisp exterior with a slightly more tender center, while a longer bake makes them crisp all the way through.
- Shape: Even though they are called cheese straws, this scoop-and-bake version is more like cheesy straw bites or savory cheese cookies.

Easy Homemade Cheese Straws for Parties, Snacking, and Holiday Trays
Most of all, they are the kind of savory bake that stands out in a world full of sweets. When you want something crisp, cheesy, and just a little addictive, these always hit the mark.
Prep: min | Cook: min | Total: min
Servings:
Ingredients
- 1 block (8 ounces) sharp cheddar cheese
- 3/4 cup unsalted butter, room temperature
- 1 teaspoon salt
- 1/2 teaspoon garlic powder
- 1/2 to 1 teaspoon cayenne powder, to taste
- 2 cups all-purpose flour
Instructions
- Prep the oven and pan: Preheat your oven to 350°F. Line a baking sheet with parchment paper or a silicone baking mat.
- Shred the cheese: Use a box grater to shred the sharp cheddar cheese. Freshly grated cheese works best for flavor and texture.
- Mix the cheese and butter: In a mixing bowl, use a mixer to blend the shredded cheese and room temperature butter together until smooth.
- Add the seasonings: Mix in the salt, garlic powder, and cayenne powder until evenly combined.
- Add the flour: Gradually add the flour and mix well until a dough forms.
- Scoop the dough: Use a 1 1/2 tablespoon cookie scoop to portion the dough onto the prepared baking sheet, leaving about 2 inches between each piece.
- Press with a fork: If desired, gently press the tops with the tines of a fork. Dipping the fork in water can help prevent sticking.
- Bake: Bake for 20 to 30 minutes, or until golden brown. Bake for less time if you want a crisp outside and a slightly chewy center, or longer for a crispier result all the way through.
- Cool: Let them cool on the baking sheet for about 10 minutes before transferring to a cooling rack. Continue baking in batches until all the dough is used.
Nutrition
- Calories: 120
- Fat: 9g
- Carbs: 7g
- Protein: 2g
Rate This Recipe
Average Rating: 0 (0 votes)
How to Make Cheese Straws
1. Prep the oven and pan
Preheat your oven to 350°F. Line a baking sheet with parchment paper or a silicone baking mat.
2. Shred the cheese
Use a box grater to shred the sharp cheddar cheese. Freshly grated cheese works best for flavor and texture.
3. Mix the cheese and butter
In a mixing bowl, use a mixer to blend the shredded cheese and room temperature butter together until smooth.
4. Add the seasonings
Mix in the salt, garlic powder, and cayenne powder until evenly combined.
5. Add the flour
Gradually add the flour and mix well until a dough forms.
6. Scoop the dough
Use a 1 1/2 tablespoon cookie scoop to portion the dough onto the prepared baking sheet, leaving about 2 inches between each piece.
7. Press with a fork
If desired, gently press the tops with the tines of a fork. Dipping the fork in water can help prevent sticking.
8. Bake
Bake for 20 to 30 minutes, or until golden brown. Bake for less time if you want a crisp outside and a slightly chewy center, or longer for a crispier result all the way through.
9. Cool
Let them cool on the baking sheet for about 10 minutes before transferring to a cooling rack. Continue baking in batches until all the dough is used.
Tips for Success
Use freshly shredded cheese instead of pre-shredded. It melts and blends better, and the flavor is stronger too.
Do not overwork the dough once the flour is added. Mix until everything comes together, but stop once it looks evenly combined.
Watch the first batch closely so you can find your ideal texture. If you like them more tender in the center, pull them earlier. If you want them fully crisp and cracker-like, let them go a bit longer.
Cooling them on the baking sheet first helps them firm up, so do not rush that step.
Serving Suggestions and Pairings
These Cheese Straws are perfect on appetizer boards, holiday snack tables, or served alongside soups and salads. They also pair beautifully with dips and savory party foods.
For a crowd-pleasing appetizer spread, serve them with This Baked Brie Appetizer Is My Favorite Effortless Way to Impress Guests or This Beer Cheese Dip Is My Favorite Party Starter That Disappears in Minutes. If you are building a more casual game-day menu, These Sheet Pan Quesadillas Are My Favorite Way to Feed a Crowd Fastwould fit right in.
And for another cheesy comfort-food option, Easy Cheesy Chicken Sliders with Marinara Garlic Butter are always worth bookmarking.
Nutritional Information Per Serving
Approximate nutrition per serving, based on 24 pieces:
- Calories: 120
- Carbohydrates: 7g
- Protein: 2g
- Fat: 9g
- Saturated Fat: 5g
- Fiber: 0g
- Sugar: 0g
- Sodium: 170mg
These values are estimates and may vary depending on the exact cheese and portion size used.
Storage and Leftover Tips
Store the cooled cheese straws in an airtight container on the counter for up to 1 week. Make sure they are fully cooled before storing so they stay crisp.
If they soften a little over time, you can refresh them in a low oven for a few minutes to bring back some of their crunch.
These also make a great make-ahead snack for parties and holidays since they hold up well for several days.
More Recipes You Will Love
If these Cheese Straws are your kind of snack, there are plenty of other savory recipes worth trying. This Crockpot Nacho Dip Is the Reason I Never Have Leftovers is perfect for parties and casual gatherings.
For another cheesy appetizer, This Beer Cheese Dip Is My Favorite Party Starter That Disappears in Minutes is always a hit. And if you want something heartier, These Sheet Pan Quesadillas Are My Favorite Way to Feed a Crowd Fastmake a great addition to any comfort-food lineup.
Final Thoughts
These Cheese Straws are the kind of savory homemade snack that never goes out of style. They are buttery, crisp, cheesy, and just spicy enough to keep you reaching for one more. With simple ingredients and an easy method, they are a perfect recipe to keep on hand for holidays, entertaining, or everyday snacking.
If you make them, I would love to hear whether you kept them mild or turned up the cayenne for extra heat. Keep following along for more easy appetizers, cozy savory bakes, and homemade favorites from Jason Griffith.