Authentic Chicago-Style Bakery Apple Slices: A Nostalgic Midwest Treat
Print it, save it, or add it to your recipe binder.
Authentic Chicago-Style Bakery Apple Slices: A Nostalgic Midwest Treat
By Jason Griffith
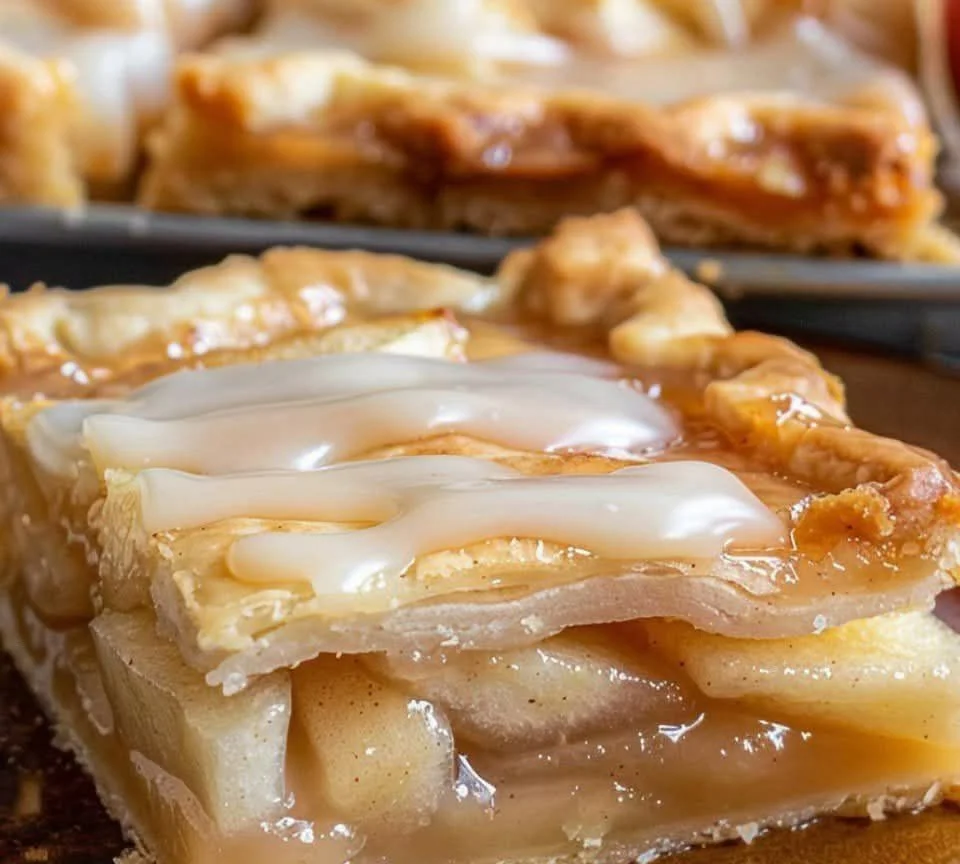
If you have ever spent a brisk autumn morning wandering through a neighborhood in Chicago, you know that the local bakeries are the heart of the community. While the city is famous for its deep-dish pizza and iconic hot dogs, those “in the know” head straight for the glass display cases filled with Chicago-Style Bakery Apple Slices. These aren’t your typical apple bars; they are a distinct, soft, cake-like delicacy that bridges the gap between a blondie and a fresh apple pie.
As a food writer for chefmaniac.com, I’ve tasted my fair share of high-end patisserie, but there is something about the humble apple slice that brings me right back to the basics of good baking. It’s a recipe that doesn’t rely on flashy techniques or hard-to-find ingredients. Instead, it’s about the warmth of cinnamon, the earthy hint of nutmeg, and the natural sweetness of perfectly baked apples. This is the kind of “premium” comfort food that makes your kitchen smell like a professional bakery for hours.
Why I Love This Recipe
What truly makes this recipe a standout is its incredible texture. Most apple desserts lean toward a flaky crust or a crumbly streusel. These apple slices, however, feature a soft, tender crumb that holds the fruit in a gentle embrace. It’s sturdy enough to pick up with your hands—making it a favorite for “grab-and-go” breakfasts—but moist enough to serve as a sophisticated plated dessert.
I also love how customizable this dish is. It’s a “pantry-staple” recipe, meaning you likely have everything you need in your kitchen right now. It takes the stress out of entertaining because it’s virtually foolproof. Whether you’re hosting a weekend brunch or just looking for a way to use up those extra apples from the orchard, these bars deliver that authentic Chicago bakery experience every single time.
Ingredients You’ll Need
- Apples: 2 large apples (peeled, cored, and thinly sliced).
- All-Purpose Flour: 1 cup.
- Granulated Sugar: 1/2 cup.
- Brown Sugar: 1/4 cup, packed (this adds a hint of molasses depth).
- Baking Powder: 1 teaspoon.
- Salt: 1/4 teaspoon.
- Unsalted Butter: 1/2 cup, melted.
- Egg: 1 large egg, room temperature.
- Vanilla Extract: 1 teaspoon.
- Milk: 1/2 cup (whole milk provides the best richness).
- Ground Cinnamon: 1 teaspoon.
- Ground Nutmeg: 1/4 teaspoon.
- Powdered Sugar: For a final, snowy dusting.
Swaps and Notes
- The Apple Choice: For the best results, use a firm, tart apple like Granny Smith or a crisp Honeycrisp. They hold their shape and won’t turn into mush during the 45-minute bake time.
- Spice it Up: If you want a more “intense” fall flavor, feel free to add a pinch of ground cloves or ginger.
- Dairy-Free Options: You can substitute the melted butter with a neutral oil (like avocado oil) and the milk with oat or almond milk. The texture will be slightly different but still delicious.
- Add Crunch: If you prefer a bit of texture, folding in 1/2 cup of chopped walnuts or pecans is a classic Chicago bakery move.
Step-by-Step Instructions
1. Prep the Oven and Pan
Preheat your oven to 350°F. Grease a 9×9-inch baking pan thoroughly with butter or non-stick spray. For the easiest removal, you can line the pan with parchment paper, leaving an overhang on the sides.
2. Whisk the Dry Ingredients
In a large mixing bowl, combine the flour, granulated sugar, brown sugar, baking powder, salt, cinnamon, and nutmeg. Use a whisk to ensure there are no clumps of brown sugar and that the spices are evenly distributed.
3. Combine the Wet Ingredients
In a separate medium bowl, whisk together the melted butter, egg, vanilla extract, and milk. Ensure the melted butter isn’t hot when you add the egg, or you might accidentally scramble it!
4. Form the Batter
Pour the wet ingredients into the dry ingredients. Stir with a spatula or wooden spoon until just combined. You want to avoid overmixing here; a few small lumps are perfectly fine.
5. Fold in the Apples
Gently fold your thin apple slices into the batter. The batter will be relatively thick, and the apples should be well-coated.
6. Bake to Perfection
Spread the batter evenly into your prepared pan. Bake for 40 to 45 minutes. You’re looking for a beautiful golden-brown top and a toothpick inserted into the center to come out clean.
7. The Finishing Touch
Allow the bars to cool in the pan for at least 20 minutes. This helps the structure set. Dust generously with powdered sugar before slicing into nine even squares.
Tips for Success
- Thin is In: Slice your apples thinly (about 1/8th of an inch). This ensures they soften completely and integrate into the batter rather than sitting as hard chunks.
- Don’t Overmix: As with most soft-crumb bakes, overworking the gluten in the flour will result in a tough, rubbery bar. Mix until you no longer see streaks of dry flour, then stop.
- Parchment is Your Friend: If you want those perfectly clean, “bakery-case” edges, use parchment paper to lift the entire block out of the pan once cooled, then slice on a cutting board.
Serving Suggestions and Pairings
These bars are versatile enough to be served at any time of day. For a truly indulgent experience, serve a warm slice with a scoop of vanilla bean ice cream or a dollop of fresh whipped cream.
If you’re serving these for brunch, they pair exceptionally well with a hot cup of coffee or a spiced chai latte. For a fall-themed dessert spread, I love pairing these alongside other treats like Caramel Apple Pie Cookies to give your guests a variety of apple textures to choose from. You could even drizzle a little extra caramel sauce over the top to turn it into an ultra-premium dessert.
Nutritional Information (Per Serving)
- Calories: 320 kcal
- Total Fat: 14g
- Saturated Fat: 8g
- Cholesterol: 55mg
- Sodium: 125mg
- Carbohydrates: 45g
- Fiber: 2g
- Protein: 4g
Storage and Leftover Tips
One of the best things about these apple slices is that they actually taste better the next day as the moisture from the apples seeps into the cake.
- Room Temperature: Store in an airtight container for up to 2 days.
- Refrigeration: These will keep for up to 5 days in the fridge.
- Freezing: You can freeze individual slices by wrapping them in plastic wrap and then foil. They stay fresh for up to 2 months.
- Reheating: A quick 15-second zap in the microwave will bring back that “fresh from the oven” soft texture.
More Recipes You Will Love
If you enjoyed the warm spices and cozy vibes of these apple bars, you’ll definitely want to check out these other favorites from the blog:
- Pecan Pie Bars – A perfect make-ahead treat for the holidays.
- Easy Pumpkin Spice Muffins – Your go-to fall breakfast for busy mornings.
- Chocolate Chip Banana Bread – The ultimate way to use up those overripe bananas.
- Caramel Apple Nachos – A quick and fun twist on a classic fall dessert.
Final Thoughts
Baking doesn’t always have to be about complex layers or temperamental doughs. Sometimes, the most rewarding recipes are the ones that remind us of a specific time and place. These Chicago-Style Bakery Apple Slices are a tribute to the simple, honest baking that has fueled the Midwest for generations.
I’d love to know—do you have a favorite bakery treat that reminds you of home? Give this recipe a try and let me know how it turned out in the comments below! Don’t forget to follow chefmaniac.com for more recipes that bring the bakery experience directly to your kitchen.
— Jason Griffith

Authentic Chicago-Style Bakery Apple Slices: A Nostalgic Midwest Treat
. These aren't your typical apple bars; they are a distinct, soft, cake-like delicacy that bridges the gap between a blondie and a fresh apple pie.
Prep: min | Cook: min | Total: min
Servings:
Ingredients
Instructions
Nutrition
- Calories: 320 kcal
- Fat: 14g
- Carbs: 45g
- Protein: 4g
Rate This Recipe
Average Rating: 0 (0 votes)