Red Velvet Cheesecake Drip Cake
Introduction
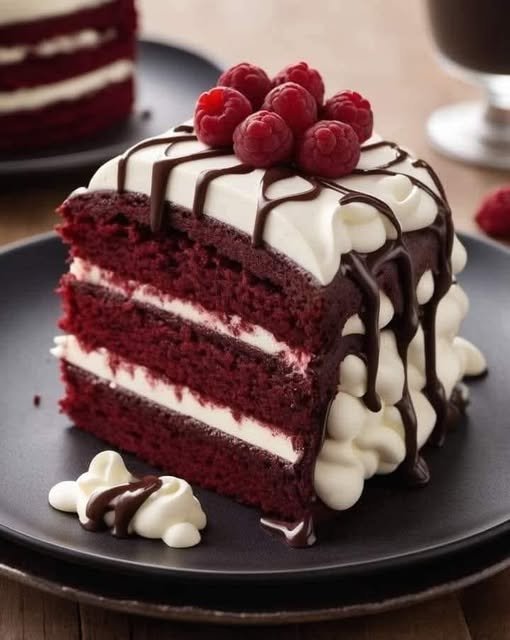
Imagine everything you love about red velvet, Oreo cookies, and cheesecake—stacked into one dazzling dessert. This Red Velvet Cheesecake Drip Cake combines a rich Oreo cookie crust, ultra-creamy red velvet cheesecake filling, and a silky semisweet chocolate ganache drip that cascades down the sides. Topped with whole Oreos for flair, this cake is a celebration in every bite.
Why I Love This Recipe
This cake is bold, decadent, and absolutely stunning. The red velvet flavor brings cocoa depth and vibrant color, the cheesecake is rich but not too sweet, and the ganache drip gives it that bakery-style finish. It belongs on the same dessert table as peanut butter brownies or brownie bombs for pure indulgence.
🛒 Ingredients
For the Oreo Crust:
- 1 ½ cups Oreo cookie crumbs
- ½ cup unsalted butter, melted
For the Red Velvet Cheesecake Layer:
- 32 oz (4 blocks) cream cheese, softened
- 1 cup granulated sugar
- 3 tbsp all-purpose flour
- 4 large eggs
- 1 tsp vanilla extract
- ¼ cup unsweetened cocoa powder
- Red food coloring, to desired shade
- ½ cup crushed Oreos
For the Chocolate Drip:
- 1 cup heavy cream
- 8 oz semisweet chocolate chips
For the Topping:
- Whole Oreo cookies, for garnish
👨🍳 Instructions
1️⃣ Prepare the Pan
Preheat oven to 325°F (165°C).
Grease and flour a 9-inch springform pan.
2️⃣ Make the Crust
Mix Oreo cookie crumbs and melted butter until well combined.
Press evenly into the bottom of the springform pan.
Set aside while you prepare the filling.
3️⃣ Make the Cheesecake Filling
In a large bowl, beat cream cheese and sugar until smooth and creamy.
Add flour and mix.
Add eggs one at a time, mixing after each.
Add vanilla, cocoa powder, and a few drops of red food coloring.
Fold in the crushed Oreos.
4️⃣ Bake
Pour the cheesecake mixture over the crust.
Bake for 60–70 minutes, or until the edges are set and the center is slightly jiggly.
Cool completely at room temperature, then refrigerate for at least 4 hours or overnight.
5️⃣ Make the Chocolate Drip
Heat heavy cream in a saucepan just until simmering.
Remove from heat and pour over chocolate chips.
Let sit for 5 minutes, then stir until smooth.
Let cool slightly until thick but pourable.
6️⃣ Decorate
Drizzle the ganache over the chilled cheesecake, letting it drip naturally over the sides.
Top with whole Oreo cookies for a dramatic finish.
⏱️ Time & Yield
- Prep Time: 25 minutes
- Bake Time: 60–70 minutes
- Chill Time: 4–6 hours
- Total Time: ~6 hours
- Servings: 12 slices
- Calories: ~490 per slice
💡 Tips for Success
- Room temperature ingredients are key for a smooth, crack-free cheesecake.
- For deeper color and red velvet flavor, use gel-based food coloring.
- Don’t overmix after adding eggs—just until incorporated.
- Add a thin layer of ganache on top before the drip for extra drama.
🍽️ Serving Suggestions
This showstopping cheesecake is ideal for:
- Birthdays and holiday celebrations
- Pairing with no-bake Oreo cream pie for an Oreo lover’s feast
- Serving alongside banana pudding for balance
- A dramatic finish to a romantic dinner
❄️ Storage
- Fridge: Store covered for up to 5 days
- Freezer: Wrap tightly and freeze for up to 2 months
- Thaw overnight in the fridge before serving
🍴 More Recipes You’ll Love
- These Chocolate Chip Cookie Dough Brownie Bombs Are My Favorite Sweet Obsession
- The Best Peanut Butter Brownies I’ve Ever Made (And I’ve Made a Lot)
- This Brownie Batter Dip Is My Favorite No-Bake Dessert for Instant Chocolate Cravings
- This No-Bake Oreo Cream Pie Is My Favorite Quick Dessert Hack
- This Big Family Banana Pudding Is My Favorite Classic Dessert to Feed a Crowd
🧾 Final Thoughts
This Red Velvet Cheesecake Drip Cake is a visual stunner and a flavor powerhouse. With its Oreo base, rich red filling, and glossy chocolate top, it’s everything a dessert should be: indulgent, eye-catching, and absolutely unforgettable.
💬 Show Us Your Slice!
Made it? Share your creation and tag @ChefManiac—we’d love to see your drippy masterpiece! Need a printable version or want to pin it? Just say the word—I’ve got you covered.
Related posts:
 Shrimp Alfredo with Broccoli and Homemade Garlic Bread – A Creamy, Comforting Classic Made Easy
 Grilled T-Bone Steak with Shrimp, Baked Potato, and Corn – The Ultimate Surf-and-Turf Feast
 Shakshuka Recipe: The Best Middle Eastern Breakfast You’ll Ever Try
 Air Fryer Chicken Fajitas That Are Juicy, Flavorful, and Ready in 20 Minutes
Leave a Reply