
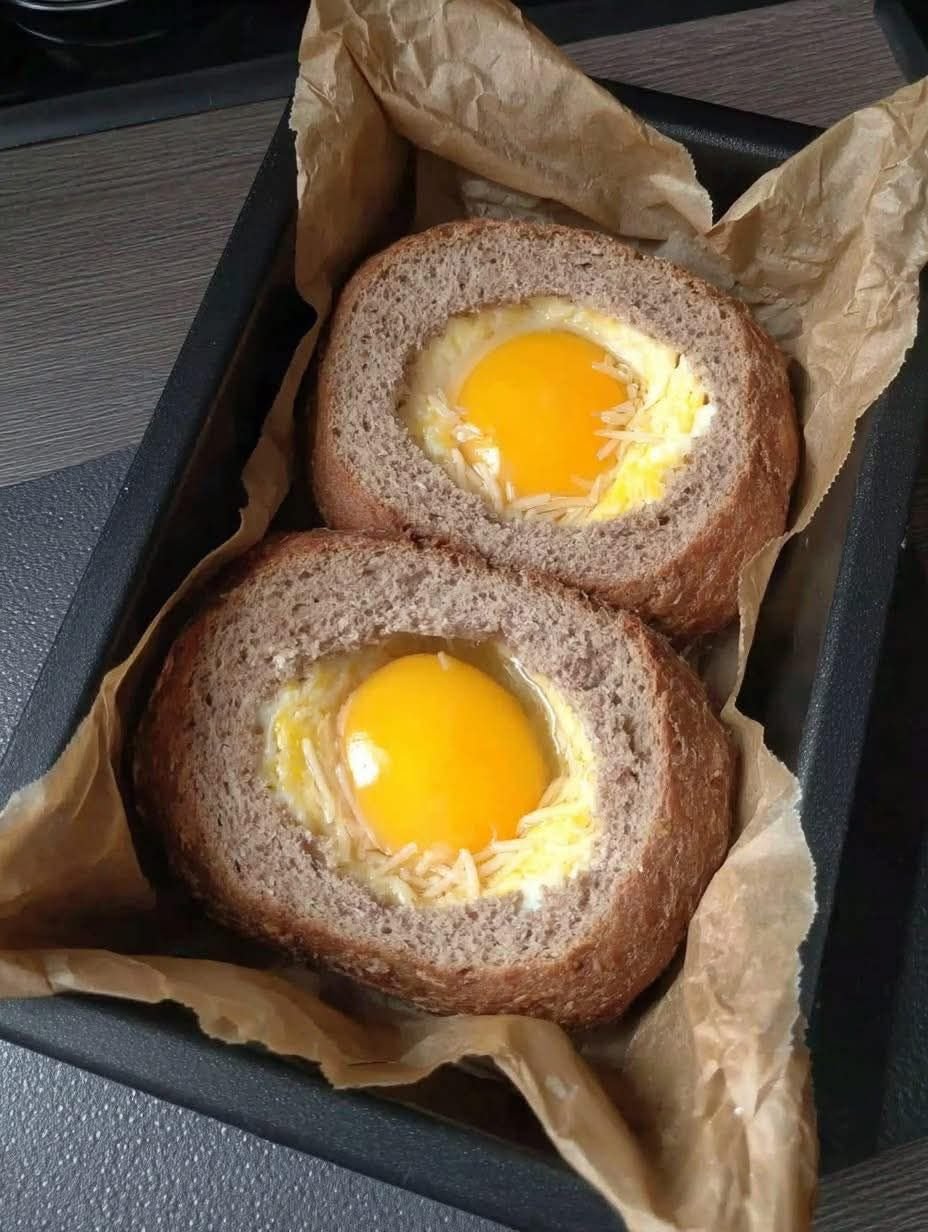
Quick & Simple: Air Fryer Egg-in-Bread with a Gooey Yolk

Print it, save it, or add it to your recipe binder.
Air Fryer Egg-in-Bread Nest with Cheese
Sometimes the simplest ideas are the most delicious. The classic egg-in-a-basket gets a modern update in this recipe for Air Fryer Egg-in-Bread Nests. This is a quick, easy, and incredibly satisfying breakfast or light meal that brings together a perfectly cooked egg, a nest of melted cheese, and a crispy piece of bread, all made effortlessly in your air fryer. It’s a comforting dish that feels like a classic, yet is ready in minutes, making it a perfect solution for a busy morning.
Why I love This Recipe
I’m a huge fan of recipes that are both fun to make and delicious to eat, and this one has quickly become a favorite. What I love most about it is the perfect texture you get from the air fryer. The bread becomes wonderfully crispy and golden-brown, while the egg cooks to your exact preference—from a runny, gooey yolk to a firm, fully-cooked one. The shredded cheese melts into a delicious, savory nest around the egg, adding a rich flavor that makes this feel like a truly special breakfast. It’s a fantastic, single-serving meal that requires minimal cleanup and is ready in under 15 minutes.
Ingredients
- 2 thick slices of whole grain or artisan bread (or round sandwich rolls)
- 2 eggs
- 2 tablespoons shredded cheese (cheddar, mozzarella, or your choice)
- Butter or oil spray (optional, for crispier edges)
- Salt & pepper to taste
- Parchment paper (for lining tray)
Swaps and Notes
- Bread: Using a thick-cut, sturdy bread like rye, sourdough, or a good artisan loaf is highly recommended. Thinner or softer bread may become soggy from the egg. You can also use a biscuit or a larger sandwich roll.
- Cheese: Cheddar cheese is a classic choice for a savory, sharp flavor, while mozzarella offers a stringy, gooey texture. Feel free to use any cheese you like, such as Gruyère, Monterey Jack, or a spicy pepper jack for a kick.
- Add-ins: This recipe is a blank canvas for creativity. You can add a little bit of crumbled, cooked bacon, diced ham, or chopped chives on top of the cheese for extra flavor. A pinch of red pepper flakes would also be a great addition.
- The “Hole”: A cookie cutter works perfectly for cutting the hole in the bread. Don’t throw away the cut-out bread! You can toast it and use it for dipping into the yolk.
List of Steps for the Recipe
- Prepare the Bread Nests: Cut a circular hole in the center of each slice of bread. A cookie cutter that is about 2−2.5 inches in diameter is ideal. Lightly spread a little butter on the edges of the bread if you want them to become extra golden and crisp in the air fryer.
- Line the Air Fryer: Line your air fryer basket or a small tray that fits inside with a piece of parchment paper. This will make cleanup a breeze. Place the two bread slices on the lined tray.
- Add the Filling: Carefully crack one egg into the hole of each slice of bread. Try to keep the yolk intact. Sprinkle about a tablespoon of your chosen shredded cheese around the yolk, but avoid covering it so you can see when the yolk is cooked to your liking. Season lightly with salt and pepper.
- Air Fry: Preheat your air fryer to 350°F (175°C) for about 2−3 minutes. Place the tray with the bread nests into the air fryer basket. Air fry for 7−10 minutes, depending on how you like your yolk cooked.
- Serve: Once cooked, carefully lift the egg-in-bread nests with a spatula and serve them immediately while they are still hot.
Tips for Success
- Pre-Toast the Bread: For an extra crispy base, toast the bread in the air fryer for 1−2 minutes before adding the egg and cheese.
- Watch Your Time: Cooking time will vary depending on your air fryer model and how well you like your yolk. Start checking the egg at the 7-minute mark. For a soft, runny yolk, 7-8 minutes is usually perfect. For a firmer yolk, aim for 9-10 minutes.
- Don’t Overcrowd: This recipe is designed for single servings. Cook one or two nests at a time to ensure even cooking and a crispy texture.
- Add a Topping: A light sprinkle of chopped chives or fresh herbs at the end adds a touch of freshness and color that makes the dish feel even more special.
Serving Suggestions and Pairings
This air fryer egg-in-bread nest is a complete meal on its own. However, you can make it part of a bigger breakfast by serving it with a side of fruit salad or some crispy bacon. A hot cup of coffee or tea would be the perfect accompaniment.
Nutritional Information
(Please note that this is an estimate and will vary based on specific brands and portion sizes)
This meal is a great source of protein from the eggs and cheese, as well as complex carbohydrates from the whole grain bread. While it is a satisfying breakfast, the calories and fat can be higher depending on the amount of butter and cheese used.
Storage and Leftover Tips
This dish is best served immediately, as the eggs and bread lose their texture upon cooling. Leftovers can be stored in an airtight container in the refrigerator for up to a day, but the bread will likely be soggy, and the yolk will be fully cooked upon reheating.
Final Thoughts
This Air Fryer Egg-in-Bread Nest is a fun and delicious way to start your day. It’s a simple recipe that yields a beautiful, comforting, and perfectly cooked result every time. I hope you enjoy this easy and satisfying breakfast. Let me know in the comments if you added any special toppings to yours!