The Stunning No-Bake Berry-Layered Mousse Cake That Demands Attention
By Jason Griffith
When the weather warms up, my oven tends to go into hibernation. I want desserts that are cool, refreshing, and, most importantly, don’t require me to stand over a hot stove or heat the entire kitchen. That’s how I perfected this incredible Berry-Layered Mousse Cake—a showstopper dessert that layers creamy, fruity flavors over a simple cookie crust.
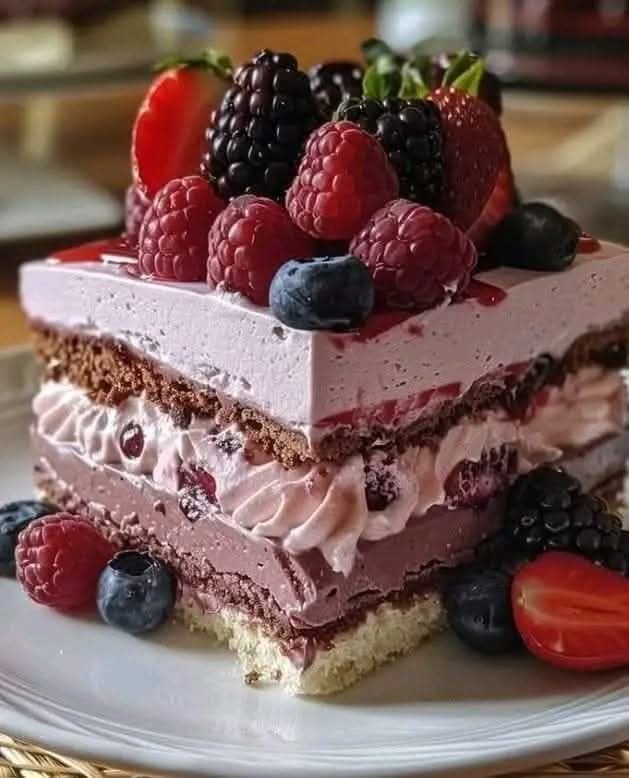
This isn’t just a cake; it’s an edible centerpiece. We’re talking five distinct, delicious layers: a buttery biscuit crust, a warm cherry compote, a smooth cream cheese filling, and light, airy strawberry and blueberry mousses. It takes a little patience for the chilling, but the active prep time is minimal, and the result is absolutely worth every minute of anticipation.
Why I Love This Recipe
This mousse cake captures the essence of summer berries in a way no other dessert can. Beyond the dazzling visual appeal of the vibrant red, white, and purple layers, it offers a perfect balance of textures and tastes:
- No-Bake Wonder: Seriously, zero baking required after the crust is pressed. Perfect for hot days or when you need a dessert with minimal fuss.
- Layered Flavor Profile: The buttery crust provides a grounding texture, the tangy cherry compote offers a rich, deep fruit flavor, the cream cheese layer adds a hint of cheesecake luxury, and the airy berry mousses are purely refreshing.
- Crowd-Pleaser Status: This cake is always the first thing people ask about at a gathering. It’s elegant enough for a fancy dinner party but comforting enough for a casual weekend get-together. It has the same celebratory feeling as my favorite Unicorn Poke Cake, but with a sophisticated, fruity twist.
🍰 Ingredients You Will Need
This recipe is broken down into four sections for clarity: the crust, the compote, the cream cheese layer, and the two mousse layers.
Crust
- 1 1/2 cups crushed digestive biscuits (or graham crackers/vanilla wafers)
- 6 tablespoons unsalted butter, melted
- 2 tablespoons sugar
Cherry Compote Layer
- 2 cups fresh cherries, pitted and halved
- 1/2 cup sugar
- 2 tablespoons cornstarch
- 1/4 cup water
Cream Cheese Layer
- 2 cups cream cheese, softened
- 1/2 cup powdered sugar
- 1 teaspoon vanilla extract
Strawberry Mousse Layer
- 1 1/2 cups fresh strawberries, pureed
- 1 tablespoon gelatin, dissolved in 3 tablespoons warm water
- 1 cup whipped cream (store-bought or fresh)
Blueberry Mousse Layer
- 1 1/2 cups fresh blueberries, pureed
- 1 tablespoon gelatin, dissolved in 3 tablespoons warm water
- 1 cup whipped cream (store-bought or fresh)
Garnish
- Fresh strawberries, halved
- Fresh blueberries
- Mint leaves
Swaps and Notes
- Crust Alternatives: Digestive biscuits are traditional for a light crumb, but graham crackers or vanilla wafers work perfectly too. For a gluten-free crust, use almond flour or a gluten-free cookie blend.
- Berries: You can swap the berries in the compote and mousses based on what’s in season. Raspberries or blackberries would be equally delicious in either layer.
- Gelatin: Make sure your water is truly warm—not boiling or cold—to ensure the gelatin dissolves completely and smoothly. If you need a vegan option, you can try substituting Agar-Agar, but the texture will be slightly different.
- Whip it Good: For the whipped cream, make sure it’s stiffly whipped before folding it into the fruit and gelatin mixture. This is key to achieving that light, airy mousse consistency.
👩🍳 Step-by-Step Directions
Follow these steps carefully, paying attention to the chilling times for perfectly defined layers.
1. Make the Crust
- Stir together the crushed digestive biscuits, melted butter, and sugar in a bowl until everything is well mixed.
- Press the mixture firmly into the bottom of a 9-inch springform pan, ensuring it’s even and compact.
- Chill for about 20 minutes to set.
2. Create the Cherry Compote Layer
- Add the cherries, sugar, cornstarch, and water to a saucepan.
- Cook over medium heat, stirring occasionally. Let it simmer until it thickens up, which should take around 5 to 8 minutes.
- Take it off the heat and let it cool slightly until it is just warm.
- Spread the compote evenly over your chilled crust.
- Put the pan back in the fridge and chill for another 30 minutes.
3. Prepare the Cream Cheese Layer
- In a mixing bowl, beat the softened cream cheese, powdered sugar, and vanilla extract until the mixture is fluffy and completely smooth.
- Spread this creamy layer evenly over the chilled cherry compote.
- Let the pan chill for 1 more hour.
4. Mix and Set the Strawberry Mousse
- Combine the strawberry puree and the dissolved gelatin. Let it sit for about 5 minutes to bloom slightly.
- Gently fold in the whipped cream until the mixture is uniform and airy.
- Spread this mousse mixture over the cream cheese layer, smoothing out the top.
- Return the cake to the fridge and chill for another hour.
5. Finish with the Blueberry Mousse Layer
- Using the same method as the strawberry layer: mix the blueberry puree with the dissolved gelatin, let it rest 5 minutes, then fold in the whipped cream.
- Pour this blueberry mousse over the strawberry layer, smoothing the top.
- Chill for at least 2 hours, or until the cake is fully set. I often leave mine overnight.
6. Garnish and Serve
- When you’re ready to serve, gently release the springform ring.
- Top the cake with fresh strawberries, blueberries, and a few mint leaves for a fresh, colorful finish. Slice and enjoy!
💡 Tips for Success
- Puree Consistency: When pureeing your berries for the mousse, try to strain the purees through a fine-mesh sieve. This removes seeds and ensures the final mousse is silky smooth.
- Folding is Key: The most important step for the mousse is gently folding the whipped cream into the fruit/gelatin mix. If you beat it aggressively, you’ll deflate the air and lose the light, fluffy texture. Use a spatula and an upward, circular motion.
- The Gelatin Test: If you aren’t confident in your gelatin dissolving, place the bowl over a saucepan of simmering water (a double boiler) and stir until it is completely clear, then cool it slightly before mixing with the puree.
🍽 Serving Suggestions and Pairings
This Berry-Layered Mousse Cake is a dessert in itself, but a few pairings can elevate the experience:
- Beverages: Serve alongside a chilled glass of sparkling Rosé or a sweet digestif. For a non-alcoholic option, try a glass of iced tea or a sparkling water infused with lemon. The complex fruitiness also pairs perfectly with a sweet sipper like The Slippery Drank.
- Sauces: A light drizzle of raspberry or strawberry sauce can be added to the plate before serving for extra visual impact.
- The After-Party: The lightness of the cake makes it an ideal follow-up to a rich, savory dinner like Classic Spaghetti with Homemade Sauce.
📊 Nutritional Information Per Serving
(Estimate based on 12 servings)
| Component | Per Serving (Estimate) |
| Calories | 320 kcal |
| Protein | 6g |
| Fat | 22g |
| Carbohydrates | 25g |
| Fiber | 2g |
| Sugar | 18g |
Export to Sheets
Note: This is an estimated nutritional breakdown and can vary based on specific ingredients and portion sizes.
📦 Storage and Leftover Tips
This cake is best stored in the refrigerator in the springform pan or an airtight container. Because of the gelatin, it holds its shape beautifully.
- Shelf Life: It will last for 3 to 4 days in the fridge. The texture may slightly soften after the first day, but the flavor remains excellent.
- Freezing: I do not recommend freezing this cake, as the mousse layers tend to weep or become grainy upon thawing, compromising the smooth, light texture.
More Recipes You Will Love
If you’re a fan of easy, decadent desserts that don’t require an oven, you need to check out these favorites:
- For another easy, creamy dessert, try this delicious No-Bake Oreo Cream Pie.
- If you’re craving a festive, classic treat, these Pecan Pie Bars are a must-make.
- For a fun, minty twist, you can’t go wrong with Grasshopper Pie.
Final Thoughts
This Berry-Layered Mousse Cake is a labor of love, but the “labor” mostly involves opening and closing the refrigerator door. The satisfaction you get when you slice into those perfectly defined, colorful layers is immense. It’s truly a dessert that brings joy. Give it a try this weekend!
Let me know what you thought of the recipe in the comments below, and don’t forget to follow me on Instagram for more kitchen tricks and easy recipes!


Leave a Reply