How to Dye Easter Eggs: A Fun & Colorful DIY Tradition

Print it, save it, or add it to your recipe binder.
How to Dye Easter Eggs: A Fun & Colorful DIY Tradition
Dyeing Easter eggs is one of those timeless traditions that brings out creativity, joy, and a little bit of mess—but that’s all part of the fun! Whether you’re doing this with kids, family, or just for yourself, making beautifully colored eggs is an easy and exciting way to celebrate the season.
With just a few simple ingredients, you can create a vibrant assortment of Easter eggs that will brighten up any basket or holiday table. Let’s get started on this fun and festive craft that’s perfect for all ages!
Why You’ll Love This Activity
✔️ Perfect for All Ages – Whether you’re 3 or 93, decorating Easter eggs is always fun.
✔️ Super Simple & Budget-Friendly – Uses ingredients you probably already have at home.
✔️ Endless Color Possibilities – Mix and match dyes for unique egg designs.
✔️ Great for Family Bonding – A creative way to spend time together during Easter.
What You’ll Need
(Yields 12 Dyed Eggs | Prep Time: 5 mins | Cook Time: 12 mins | Dyeing Time: 5+ mins per color)
Ingredients:
- 1 dozen large eggs
- Vinegar (white vinegar works best)
- Food Coloring (McCormick® Assorted or Neon Food Colors & Egg Dye)
- ½ cup boiling water per color
Tools:
- Saucepan (for boiling eggs)
- Cups or bowls (one for each dye color)
- Slotted spoon, wire egg holder, or tongs (for dipping eggs)
- Paper towels or drying rack (to let the eggs dry)
Step-by-Step Instructions
1. Hard-Boil the Eggs
To get perfectly cooked eggs without cracking, follow these steps:
✅ Place eggs in a single layer in a large saucepan.
✅ Add enough cold water to cover the eggs by at least 1 inch.
✅ Cover the saucepan and bring to a boil over high heat.
✅ Once boiling, remove from heat and let the eggs sit for 12 minutes.
(Adjust time by 3 minutes for larger or smaller eggs.)
2. Cool the Eggs Quickly
After the eggs have cooked:
✅ Pour off the hot water and immediately run cold water over the eggs.
✅ You can also place them in an ice water bath for a few minutes.
✅ Let them cool completely before dyeing—this helps prevent cracked shells.
3. Prepare the Dye Colors
For each color you want to create:
✅ Mix ½ cup boiling water, 1 teaspoon vinegar, and 10-20 drops of food coloring in a cup.
✅ Stir well to ensure even color distribution.
💡 Pro Tip: Combine different food coloring drops to create unique shades!
4. Dip & Dye the Eggs
✅ Use a wire egg holder, slotted spoon, or tongs to lower eggs into the dye.
✅ Let them sit for about 5 minutes, or longer for deeper color.
✅ Carefully remove and place on a drying rack or paper towels to dry.
💡 Want More Intense Colors? Let the eggs soak longer or apply multiple layers of dye!
Fun Ways to Decorate Your Dyed Eggs
🎨 Marble Effect – Add a few drops of oil to the dye and gently swirl before dipping the eggs.
🖌 Speckled Look – Flick a toothbrush dipped in dye over the eggs for a splattered effect.
📝 Write Messages – Use a white crayon to draw on the eggs before dyeing—the design will resist the color!
💎 Glitter Eggs – Brush the eggs with glue and sprinkle glitter for extra sparkle.
🌈 Ombre Effect – Gradually dip the egg in deeper layers of dye for a gradient effect.
Pro Tips for Perfect Dyed Easter Eggs
✔ Use Room Temperature Eggs – Helps prevent cracking when boiling.
✔ White Vinegar is Key – It helps the dye adhere to the eggshell better.
✔ Let the Eggs Fully Dry – Rushing this step can cause smudges.
✔ Mix Colors for Unique Hues – Try blending different food coloring drops.
How to Store Dyed Easter Eggs
🥚 Refrigerate dyed eggs if you plan to eat them.
⏳ Eat within 1 week if stored properly in the fridge.
🎨 For Decorative Use – Leave them out for display, but don’t eat after a day.
💡 Want to Make Eggs Last Longer? Use hollowed-out eggshells instead of hard-boiled eggs.
What to Do with Dyed Easter Eggs?
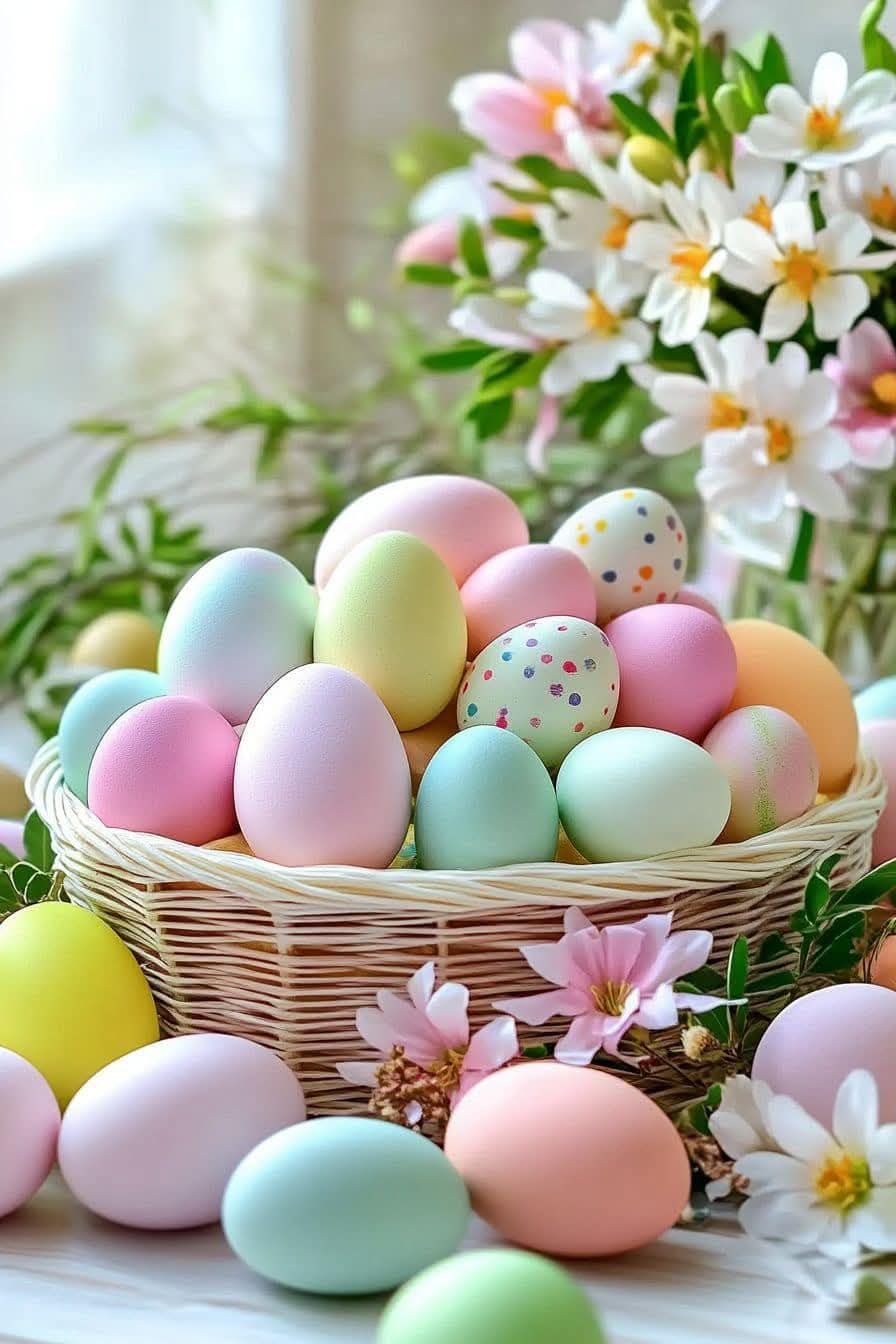
✔ Display in an Easter Basket – A beautiful centerpiece for your holiday table.
✔ Use for an Easter Egg Hunt – Perfect for kids (just be sure to refrigerate if eating).
✔ Make Deviled Eggs or Egg Salad – A delicious way to enjoy your colorful eggs.
✔ Give as Gifts – Hand-decorated eggs make thoughtful Easter presents!
FAQs
Q: Can I use natural ingredients to dye eggs?
A: Yes! Try beet juice (pink), turmeric (yellow), or red cabbage (blue).
Q: How do I prevent eggs from cracking while boiling?
A: Start with cold water and bring to a gentle boil—avoid sudden temperature changes.
Q: Do I have to use vinegar?
A: Yes, vinegar helps the dye stick better to the eggshells for brighter colors.
Q: Can I use brown eggs instead of white?
A: Absolutely! The colors will be richer and earthier, giving them a unique look.
Why You Should Try This Easter Egg Dyeing Guide
Dyeing Easter eggs is a fun, creative, and budget-friendly tradition that brings joy to all ages. Whether you’re making simple solid-colored eggs or experimenting with cool designs, this activity is a perfect way to celebrate the seasonwith family and friends.
So grab your eggs, colors, and creativity—it’s time to make some Easter magic! If you try this, let me know how your eggs turned out. Happy Easter! 🐣🎨🌸

How to Dye Easter Eggs: A Fun & Colorful DIY Tradition
How to Dye Easter Eggs: A Fun & Colorful DIY Tradition
Prep: 5 min | Cook: 12 min | Total: 17 min
Servings:
Ingredients
- 1 dozen large eggs
- Vinegar (white vinegar works best)
- Food Coloring (McCormick® Assorted or Neon Food Colors & Egg Dye)
- ½ cup boiling water per color
- Tools:
- Saucepan (for boiling eggs)
- Cups or bowls (one for each dye color)
- Slotted spoon, wire egg holder, or tongs (for dipping eggs)
- Paper towels or drying rack (to let the eggs dry)
- Step-by-Step Instructions:
- 1. Hard-Boil the Eggs:
- 2. Cool the Eggs Quickly:
- 3. Prepare the Dye Colors:
- 4. Dip & Dye the Eggs:
- Fun Ways to Decorate Your Dyed Eggs:
- Pro Tips for Perfect Dyed Easter Eggs:
- How to Store Dyed Easter Eggs:
- What to Do with Dyed Easter Eggs?:
- FAQs:
- Why You Should Try This Easter Egg Dyeing Guide:
Instructions
- Hard-Boil the Eggs: To get perfectly cooked eggs without cracking, follow these steps:✅ Place eggs in a single layer in a large saucepan.✅ Add enough cold water to cover the eggs by at least 1 inch.✅ Cover the saucepan and bring to a boil over high heat.✅ Once boiling, remove from heat and let the eggs sit for 12 minutes.(Adjust time by 3 minutes for larger or smaller eggs.)
- Cool the Eggs Quickly: After the eggs have cooked:✅ Pour off the hot water and immediately run cold water over the eggs.✅ You can also place them in an ice water bath for a few minutes.✅ Let them cool completely before dyeing—this helps prevent cracked shells.
- Prepare the Dye Colors: For each color you want to create:✅ Mix ½ cup boiling water, 1 teaspoon vinegar, and 10-20 drops of food coloring in a cup.✅ Stir well to ensure even color distribution.
- 💡 Pro Tip: Combine different food coloring drops to create unique shades!
- Dip & Dye the Eggs: ✅ Use a wire egg holder, slotted spoon, or tongs to lower eggs into the dye.✅ Let them sit for about 5 minutes, or longer for deeper color.✅ Carefully remove and place on a drying rack or paper towels to dry.
- 💡 Want More Intense Colors? Let the eggs soak longer or apply multiple layers of dye!
- Fun Ways to Decorate Your Dyed Eggs: 🎨 Marble Effect – Add a few drops of oil to the dye and gently swirl before dipping the eggs.🖌 Speckled Look – Flick a toothbrush dipped in dye over the eggs for a splattered effect.📝 Write Messages – Use a white crayon to draw on the eggs before dyeing—the design will resist the color!💎 Glitter Eggs – Brush the eggs with glue and sprinkle glitter for extra sparkle.🌈 Ombre Effect – Gradually dip the egg in deeper layers of dye for a gradient effect.
- Pro Tips for Perfect Dyed Easter Eggs: ✔ Use Room Temperature Eggs – Helps prevent cracking when boiling.✔ White Vinegar is Key – It helps the dye adhere to the eggshell better.✔ Let the Eggs Fully Dry – Rushing this step can cause smudges.✔ Mix Colors for Unique Hues – Try blending different food coloring drops.
- How to Store Dyed Easter Eggs: 🥚 Refrigerate dyed eggs if you plan to eat them.⏳ Eat within 1 week if stored properly in the fridge.🎨 For Decorative Use – Leave them out for display, but don’t eat after a day.
- 💡 Want to Make Eggs Last Longer? Use hollowed-out eggshells instead of hard-boiled eggs.
- What to Do with Dyed Easter Eggs?: ✔ Display in an Easter Basket – A beautiful centerpiece for your holiday table.✔ Use for an Easter Egg Hunt – Perfect for kids (just be sure to refrigerate if eating).✔ Make Deviled Eggs or Egg Salad – A delicious way to enjoy your colorful eggs.✔ Give as Gifts – Hand-decorated eggs make thoughtful Easter presents!
- FAQs: Q: Can I use natural ingredients to dye eggs?A: Yes! Try beet juice (pink), turmeric (yellow), or red cabbage (blue).
- Q: How do I prevent eggs from cracking while boiling?A: Start with cold water and bring to a gentle boil—avoid sudden temperature changes.
- Q: Do I have to use vinegar?A: Yes, vinegar helps the dye stick better to the eggshells for brighter colors.
- Q: Can I use brown eggs instead of white?A: Absolutely! The colors will be richer and earthier, giving them a unique look.
- Why You Should Try This Easter Egg Dyeing Guide: Dyeing Easter eggs is a fun, creative, and budget-friendly tradition that brings joy to all ages. Whether you're making simple solid-colored eggs or experimenting with cool designs, this activity is a perfect way to celebrate the seasonwith family and friends.
- So grab your eggs, colors, and creativity—it’s time to make some Easter magic! If you try this, let me know how your eggs turned out. Happy Easter! 🐣🎨🌸
Nutrition
- Calories:
- Fat:
- Carbs:
- Protein:
Rate This Recipe
Average Rating: 0 (0 votes)