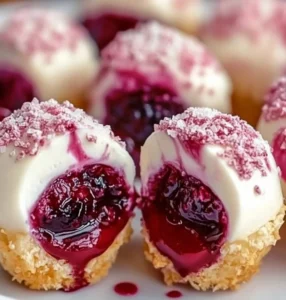
Craving that classic combination of sweet, chewy coconut and rich chocolate? These Homemade Mounds are your answer! With just three simple ingredients, you can whip up incredibly delicious, no-bake coconut candies that taste just like your favorite store-bought bar. They’re quick to prepare, easy to customize, and perfect for satisfying any sweet tooth!
Why I Love This Recipe
I’m absolutely obsessed with these Homemade Mounds! What I love most is the sheer simplicity and the incredibly delicious payoff. It’s amazing how just three ingredients can transform into such a satisfying and indulgent treat. The shredded coconut mixes with the sweetened condensed milk to create a perfectly sweet and chewy center, which is then encased in a luscious layer of melted chocolate. They’re no-bake, quick to chill, and totally customizable, making them perfect for a last-minute dessert or a fun project with the kids. Plus, they disappear fast, which is always a sign of a good treat!
Ingredients
Here’s what you’ll need to create these incredibly easy Homemade Mounds:
- 2 cups melted milk or dark chocolate (high quality chocolate chips or melting wafers recommended)
- 3 cups of coconut flakes (shredded, unsweetened or sweetened depending on preference)
- 1 cup sweetened condensed milk
Swaps and Notes
- Chocolate: Choose your favorite! Milk chocolate will give you that classic, sweeter Mounds bar experience, while dark chocolate offers a richer, less sweet contrast. Use good quality chocolate chips or melting wafers for the best melting and coating results.
- Coconut Flakes: Shredded coconut (also called desiccated coconut) is typically used for its fine texture. You can use unsweetened for a less sweet final product, or sweetened if you prefer a very sweet Mounds bar (adjust condensed milk if using sweetened).
- Sweetened Condensed Milk: This is crucial for the binding and sweetness of the coconut filling. Do not substitute with evaporated milk, as it’s unsweetened and will not provide the same texture.
Instructions
Let’s get these delicious Homemade Mounds chilled and dipped!
- Prepare Coconut Filling: In a medium mixing bowl, combine the 3 cups of coconut flakes with the 1 cup of sweetened condensed milk. Stir well with a spoon or spatula until all the coconut is thoroughly moistened and combined with the condensed milk. The mixture should be sticky and cohesive.
- Shape the Mounds: Take spoonfuls of the coconut mixture (about 1-2 tablespoons per mound). Shape them into an oblong (oval) shape, similar to a traditional Mounds bar. You can also make them into small balls if you prefer. Place the shaped coconut mounds onto a baking sheet lined with parchment paper or wax paper.
- Freeze for Firmness: Place the baking sheet with the shaped coconut mounds into the freezer. Freeze them for at least 20 minutes, or longer, until they are firm enough to handle and dip easily. This quick freeze prevents them from falling apart in the warm melted chocolate.
- Melt Chocolate & Dip: While the coconut mounds are chilling, melt your chocolate. In a microwave-safe bowl, melt the 2 cups of milk or dark chocolate in 30-second intervals, stirring well after each interval, until completely smooth and melted. (Alternatively, melt over a double boiler.)
- Remove the firm coconut mounds from the freezer. One at a time, dip each frozen coconut mound into the melted chocolate. Use a fork or a dipping tool to fully submerge and then gently tap off any excess chocolate.
- Set & Enjoy: Place the chocolate-dipped mounds back onto the parchment-lined baking sheet. If desired, you can sprinkle with a tiny pinch of flaky sea salt (optional, for a sweet and salty touch). Place the baking sheet back into the refrigerator or freezer for another 5-10 minutes, or until the chocolate coating is completely set.
Tips for Success
- Firm Coconut Filling: Freezing the coconut mounds for at least 20 minutes is crucial. This makes them firm, preventing them from falling apart when dipped into warm chocolate.
- Melt Chocolate Properly: Melt chocolate slowly and stir frequently to avoid scorching. Ensure it’s smooth and fluid for easy dipping.
- Work Quickly: Once the coconut mounds are out of the freezer, work relatively quickly when dipping, as they will start to soften.
- Tap Off Excess Chocolate: This ensures a thin, even chocolate coating without thick pools at the bottom.
- Line Baking Sheet: Parchment or wax paper is essential for easy removal of the set mounds.
- Store Properly: Store in an airtight container to keep them fresh and prevent them from drying out.
Serving Suggestions and Pairings
Homemade Mounds are a fantastic standalone sweet treat, perfect for satisfying a sweet craving:
- Coffee or Milk: A classic pairing with a glass of cold milk or a hot cup of coffee.
- Dessert Platter: Add them to a dessert platter for parties or holiday gatherings.
- Homemade Gift: Package them in decorative boxes or bags for a thoughtful homemade gift.
- Ice Cream Topping: Chop into small pieces and sprinkle over vanilla ice cream.
- For other incredibly easy no-bake treats, you might love our This Edible Cookie Dough Is My Favorite No-Bake Treat for Late Night Cravings or These Old-School No-Bake Cookies Never Fail Me and I’ve Made Them 100 Times.
Storage and Leftover Tips
Homemade Mounds store wonderfully, making them great for prepping ahead!
- Room Temperature: Store completely set Homemade Mounds in an airtight container at room temperature for up to 1 week, in a cool environment.
- Refrigeration: For a firmer texture or in warmer climates, store in an airtight container in the refrigerator for up to 2-3 weeks.
- Freezing: You can freeze Homemade Mounds for up to 2 months. Store in an airtight, freezer-safe container, separating layers with parchment paper. Thaw in the refrigerator for a few minutes before enjoying.
More Recipes You Will Love
If you loved the sweet, chocolatey, and easy no-bake nature of these Homemade Mounds, you’ll definitely want to explore some of our other fantastic dessert and treat recipes:
- For another utterly decadent sweet obsession, check out These Chocolate Chip Cookie Dough Brownie Bombs Are My Favorite Sweet Obsession.
- If you’re a fan of rich, classic chocolate desserts, our Chocolate Cookie Delight is a must-try!
- And for a beloved classic baked good, don’t miss The Best Peanut Butter Brownies I’ve Ever Made and I’ve Made a Lot.
- Finally, for a delicious and comforting bake that uses ripe fruit, check out This Chocolate Chip Banana Bread Is My Favorite Way to Use Up Overripe Bananas!
Final Thoughts
These Homemade Mounds are a brilliant solution for bringing a truly addictive, flavorful, and incredibly satisfying sweet treat to your table with minimal effort. They’re easy to make, packed with that perfect coconut-chocolate combination, and guaranteed to be a huge hit.
Give this recipe a try and let the deliciousness transport you! What’s your favorite classic candy bar to make at home? Share your ideas in the comments below!