The Best Classic Tuna Sandwich with Crispy Vegetables: A 15-Minute Lunch Staple
By Jason Griffith
Sometimes, the simplest recipes are the ones we crave the most. And when it comes to a fast, satisfying, and utterly delicious lunch, nothing beats a Classic Tuna Sandwich. But let’s be honest, a good tuna sandwich needs texture. It needs that satisfying crunch to balance the creamy filling.
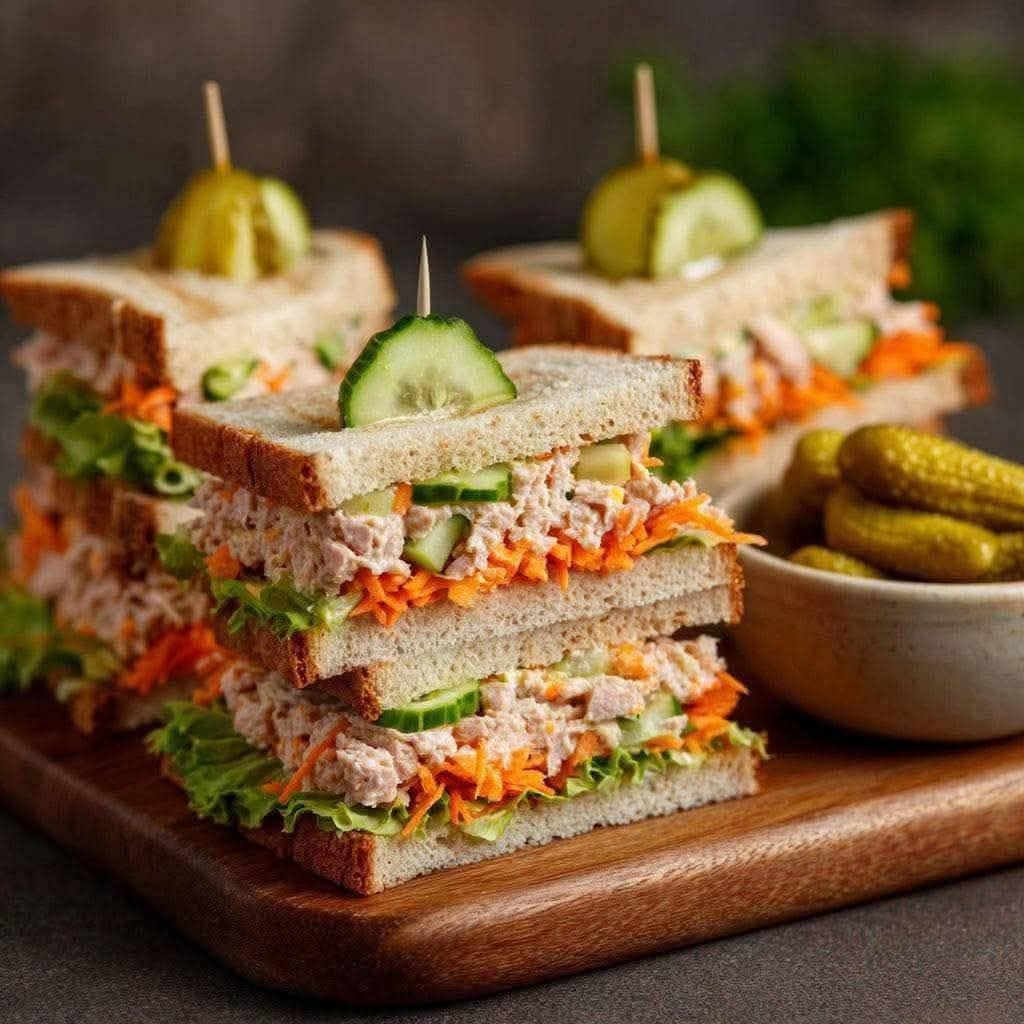
That’s why I’ve taken this timeless classic and elevated it with the addition of crispy grated carrot and thinly sliced cucumber. It’s a game-changer. These fresh additions cut through the richness of the mayonnaise and lemon, transforming a simple meal into something truly exciting. Plus, it only takes 15 minutes from start to finish!
If you’re looking for a quick fix that tastes like comfort and freshness all at once, this is the recipe you need on rotation.
Why I Love This Recipe
I’ve made countless tuna sandwiches in my life, but this version has become my absolute favorite for several key reasons:
- The Crunch Factor: The cucumber and carrot aren’t just for color—they provide a phenomenal crunch that combats any potential sogginess and makes every bite irresistible.
- The Zing of Lemon: A little lemon juice is the secret ingredient. It brightens up the tuna and mayonnaise mixture, adding a necessary tang that separates this from the average, dull recipe.
- Speed and Simplicity: In just 15 minutes, you have a wholesome meal ready to go. It’s perfect for busy weeknights, grab-and-go lunches, or an easy weekend meal.
- Family-Friendly: This is a classic comfort food that everyone at the table, from kids to grandparents, will appreciate.
Classic Tuna Sandwich with Crispy Vegetables Recipe
This recipe is designed to yield four hearty sandwiches.
Ingredients
| Ingredient | Quantity | Notes |
| Canned Tuna | 2 cans, drained | Use tuna packed in water or oil, just ensure it is completely drained. |
| Whole Slices of Bread | 8 slices | Sourdough, whole wheat, or white bread all work well. |
| Mayonnaise | 3 tablespoons | Use your favorite brand—full-fat is recommended for the best flavor. |
| Lemon Juice | 1 teaspoon | Freshly squeezed is always best for maximum brightness. |
| Carrot | 1, grated | Grate finely for even distribution and max crunch. |
| Cucumber | 1, sliced | Thin slices are key here. |
| Lettuce Leaves | 4-8 leaves | Butter lettuce or romaine for a tender or crispy bite. |
Export to Sheets
Swaps and Notes
- Bread: Swap the bread for pita pockets, croissants, or even serve the tuna mix on a large bed of fresh greens for a low-carb option.
- Veggies: You can easily swap the carrot and cucumber for thinly sliced celery, diced red onion, or chopped bell peppers to change the flavor profile and crunch.
- Mayonnaise Alternative: For a lighter option, substitute half of the mayonnaise with plain Greek yogurt or a creamy avocado mash.
- Seasoning: Feel free to add a pinch of black pepper, a dash of hot sauce, or a sprinkle of dried dill to the tuna mixture for an extra layer of flavor.
Instructions (Cooking Time: 15 Minutes)
Following these simple steps will ensure you achieve the perfect creamy, crunchy sandwich every time.
Step 1: Prep the Tuna Mixture
In a medium bowl, combine the thoroughly drained tuna, the 3 tablespoons of mayonnaise, and the 1 teaspoon of fresh lemon juice. Use a fork to mix everything together, breaking up the tuna into flakes until the mixture is uniform and creamy. Taste and adjust the lemon juice or mayo as needed.
Step 2: Prepare the Vegetables
Grate one carrot and set it aside. Slice the cucumber into thin rounds. Having the vegetables prepped and ready is crucial for a fast assembly.
Step 3: Assemble the Sandwich Base
Lay out four slices of bread. Place 1-2 lettuce leaves on each of these slices. The lettuce acts as a barrier, preventing the creamy tuna mixture from making the bread soggy too quickly.
Step 4: Layer the Filling
Generously spread the tuna mixture evenly over the lettuce-lined slices of bread. Next, gently top the tuna mixture with the grated carrot and cucumber slices, distributing them across the surface.
Step 5: Close and Serve
Close each sandwich with a second slice of bread and cut diagonally.
👨🍳 Tips for Success
- Drain the Tuna Completely: This is the most crucial step! Excess liquid (whether oil or water) will make your sandwich mushy. Press the tuna firmly in a sieve or use paper towels to remove as much moisture as possible before mixing.
- Toast the Bread (Optional): Lightly toasting the bread adds an extra layer of crispness and acts as a better barrier against the creamy filling, making the sandwich hold up longer.
- Chill for Flavor: While this is a fast recipe, if you have 10-15 minutes to spare, chilling the tuna mixture allows the flavors to meld beautifully.
Serving Suggestions and Pairings
This classic sandwich is already a meal in itself, but a great pairing can turn lunch into an experience.
- For the Perfect Crunch: Serve fresh with a side of dill pickles (my personal favorite) or a bag of your favorite potato chips.
- Light Side: A simple side salad, or perhaps a bowl of hot tomato soup, is always a winner.
- Refreshing Drink: Nothing cuts through the richness of mayo like a bright, fruity beverage. Try pairing this with my recipe for refreshing blueberry lemonade.
Nutritional Information Per Serving (Estimate)
- Calories: ~350-400 kcal
- Protein: ~25-30g
- Fat: ~15-20g
- Carbohydrates: ~30-35g
Note: This is an approximation and can vary significantly based on the type of bread, tuna (in water vs. oil), and the amount of mayonnaise used.
Storage and Leftover Tips
The assembled sandwich is best enjoyed immediately for maximum crunch. If you are prepping this ahead of time, follow these tips:
- Store the Mixture Separately: Keep the tuna-mayonnaise-lemon mixture in an airtight container in the refrigerator for up to 3 days. Do not mix in the grated carrot until you are ready to assemble, as the moisture from the carrot can be released over time.
- Prep Veggies: You can slice the cucumber and grate the carrot a day ahead and store them in separate containers in the fridge.
- Assembly: When you’re ready for lunch, simply pull out your prepped ingredients, spread the mix, add the fresh veggies, and enjoy!
More Recipes You Will Love
If you enjoyed this fast, satisfying lunch, you might enjoy these other quick and easy recipes from my kitchen:
- For an easy crowd-pleasing dinner, try these Sheet Pan Quesadillas.
- If you’re craving a classic comfort dish, check out my recipe for Classic Spaghetti Recipe with Homemade Sauce.
- Need an easy sweet fix? You can’t go wrong with this No-Bake Oreo Cream Pie.
- Looking for a quick, wholesome snack? These No-Bake Monster Cookie Energy Balls are my go-to.
Final Thoughts
This Classic Tuna Sandwich with Crispy Vegetables is a testament to how small changes can make a big difference in a classic. The simple addition of fresh cucumber and carrot transforms a basic lunch into a truly exciting meal. Give it a try this week and let me know how much you love the extra crunch!
Did you try this recipe? Let me know in the comments how you customized your perfect tuna sandwich! Don’t forget to follow me on social media for more simple, delicious meal ideas.


Leave a Reply