Hillbilly Pie – The Old-Fashioned Cherry Dessert That Feels Like Home
Print it, save it, or add it to your recipe binder.
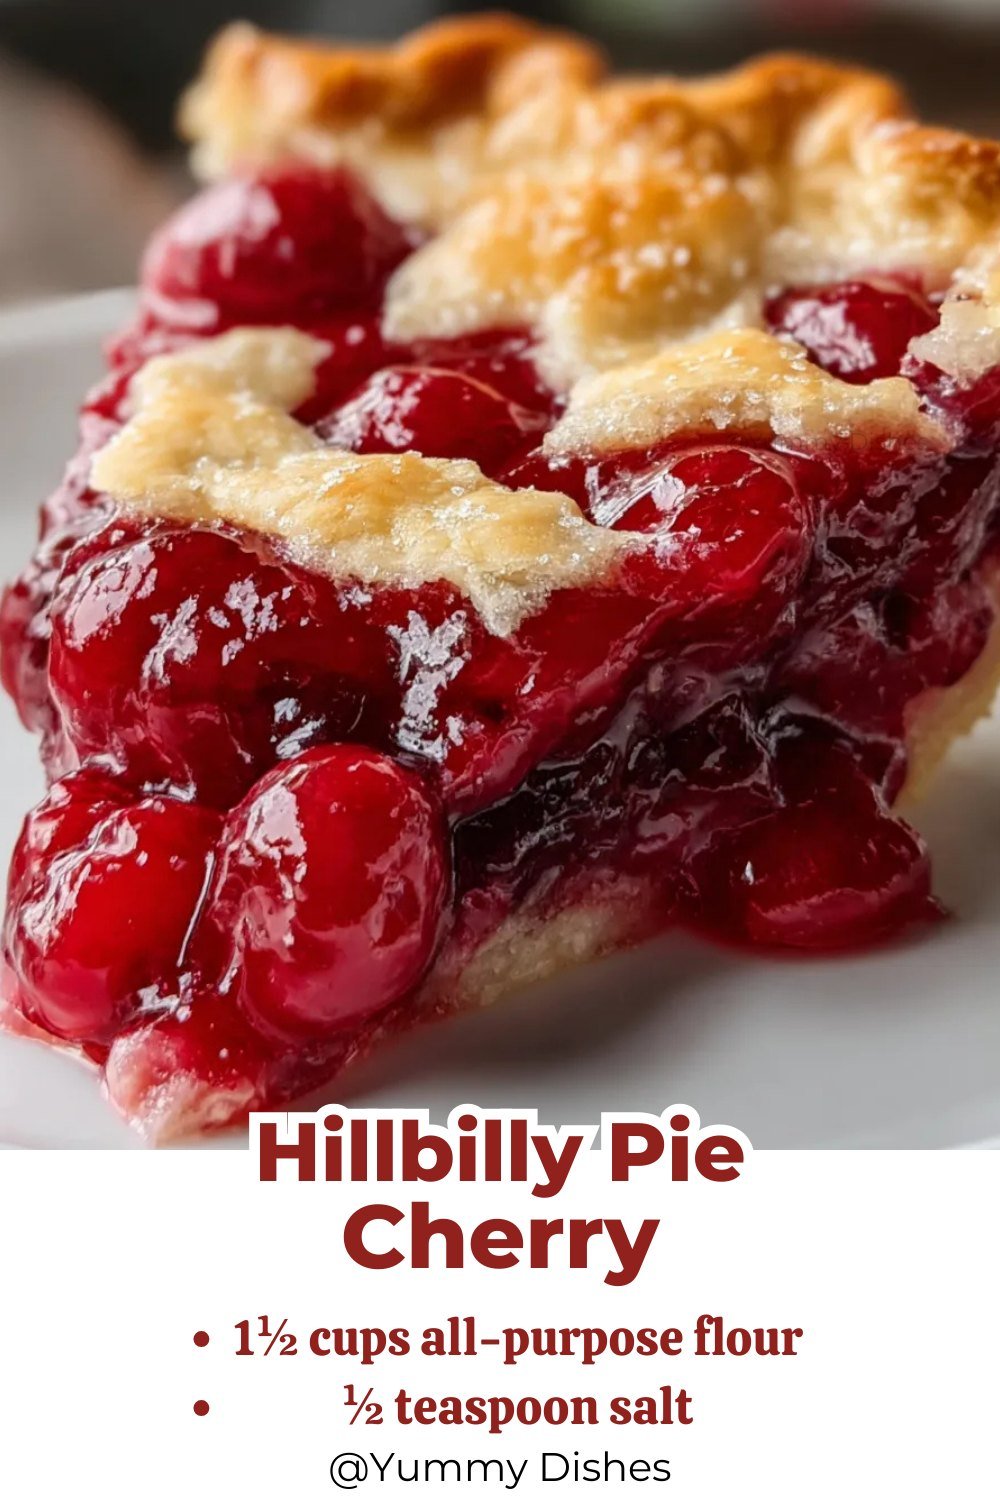
Hillbilly Pie
Author: Jason Griffith
Introduction
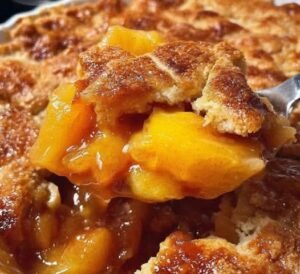
Hillbilly Pie is the kind of old-fashioned dessert that proves simple ingredients can still make something unforgettable. It’s a rustic cherry pie baked in a square dish with a flaky bottom crust, a thick layer of glossy cherry filling, and a soft golden topping that lands somewhere between pie crust and cobbler. It’s cozy, unfussy, and exactly the kind of dessert that feels like it belongs at a family table.
This recipe has that nostalgic, homemade quality people love. It doesn’t rely on fancy techniques or elaborate decoration. Instead, it leans into classic comfort: buttery crust, sweet-tart cherries, and a warm baked finish that looks beautiful in its own imperfect way.
Why I Love This Recipe
I love this recipe because it feels like something passed down. It’s practical, comforting, and made from ingredients most home bakers already know how to use. The single bottom crust keeps it easier than a traditional double-crust cherry pie, while the batter-style topping gives it a soft, golden finish that makes it stand out.
I also love that it cuts into neat squares, which makes it perfect for potlucks, holiday dessert tables, or casual weekend baking. It’s humble in the best way, but once you taste that buttery topping over jammy cherries, it still feels special.
Ingredients
For the bottom crust:
- 1 1/2 cups all-purpose flour
- 1/2 teaspoon salt
- 1/2 cup unsalted butter, cold and cubed
- 3–4 tablespoons ice water
For the filling:
- 1 can (21 ounces) cherry pie filling
- 1 tablespoon cornstarch
For the top layer:
- 1 cup all-purpose flour
- 1/2 cup granulated sugar
- 1/2 teaspoon baking powder
- 1/2 cup milk
- 1/2 cup unsalted butter, melted
Swaps and Notes
This pie keeps things simple, which is part of its charm. Canned cherry pie filling makes the recipe easy and consistent, while the added cornstarch helps the filling stay thick and sliceable. The topping should be thick but pourable, so it settles naturally over the cherries instead of forming a perfectly smooth layer. That rustic finish is part of what makes Hillbilly Pie look so inviting.
A few helpful notes: keep the butter cold for the bottom crust, chill the crust before baking, and do not skip the blind bake. Those small steps help prevent a soggy base and give the pie its clean layers.

Hillbilly Pie – The Old-Fashioned Cherry Dessert That Feels Like Home
A few helpful notes: keep the butter cold for the bottom crust, chill the crust before baking, and do not skip the blind bake. Those small steps help prevent a soggy base and give the pie its clean layers.
Prep: min | Cook: min | Total: min
Servings:
Ingredients
- 1 1/2 cups all-purpose flour
- 1/2 teaspoon salt
- 1/2 cup unsalted butter, cold and cubed
- 3–4 tablespoons ice water
- 1 can (21 ounces) cherry pie filling
- 1 tablespoon cornstarch
- 1 cup all-purpose flour
- 1/2 cup granulated sugar
- 1/2 teaspoon baking powder
- 1/2 cup milk
- 1/2 cup unsalted butter, melted
Instructions
- In a bowl, mix the flour and salt for the crust. Cut in the cold butter until the mixture is crumbly.
- Add the ice water a little at a time until the dough just comes together.
- Press the dough evenly into an 8x8-inch baking dish. Chill for 15 minutes.
- Preheat the oven to 350°F (175°C).
- Blind bake the crust for 10 minutes.
- Stir the cornstarch into the cherry pie filling, then spoon the filling over the warm crust.
- In another bowl, whisk together the flour, sugar, and baking powder for the topping.
- Stir in the milk, then the melted butter, until the batter is smooth and pourable.
- Gently pour the topping over the cherries without spreading it too much.
- Bake for 40 to 45 minutes, until the topping is deeply golden and the cherries are bubbling.
- Let the pie cool for at least 30 minutes before slicing.
Nutrition
- Calories:
- Fat:
- Carbs:
- Protein:
Rate This Recipe
Average Rating: 0 (0 votes)
How to Make Hillbilly Pie
- In a bowl, mix the flour and salt for the crust. Cut in the cold butter until the mixture is crumbly.
- Add the ice water a little at a time until the dough just comes together.
- Press the dough evenly into an 8×8-inch baking dish. Chill for 15 minutes.
- Preheat the oven to 350°F (175°C).
- Blind bake the crust for 10 minutes.
- Stir the cornstarch into the cherry pie filling, then spoon the filling over the warm crust.
- In another bowl, whisk together the flour, sugar, and baking powder for the topping.
- Stir in the milk, then the melted butter, until the batter is smooth and pourable.
- Gently pour the topping over the cherries without spreading it too much.
- Bake for 40 to 45 minutes, until the topping is deeply golden and the cherries are bubbling.
- Let the pie cool for at least 30 minutes before slicing.
Tips for Success
The biggest key to success is blind baking the bottom crust first. That step helps the crust stay sturdy instead of turning soft under the cherry filling. Another important tip is letting the topping settle naturally rather than smoothing it out. That’s what creates the soft waves and cherry pockets that give this dessert its signature rustic look.
Cooling matters too. If you cut into the pie too soon, the filling won’t have time to set properly. Give it a little rest, and the slices will come out cleaner and prettier.
Serving Suggestions and Pairings
Hillbilly Pie is wonderful served warm or at room temperature. It’s especially good with a scoop of vanilla ice cream or a spoonful of whipped cream, which adds a cool, creamy contrast to the warm cherries and buttery topping.
For more comforting dessert inspiration, pair it with This Big Family Banana Pudding Is My Favorite Classic Dessert to Feed a Crowd or These Pecan Pie Bars Are My Favorite Make-Ahead Holiday Dessert.
If you want to build a full dessert spread, it also fits beautifully alongside This No-Bake Oreo Cream Pie Is My Favorite Quick Dessert Hack, This Easy Ice Cream Sandwich Cake Is My Favorite No-Bake Summer Dessert, and This Grasshopper Pie Is My Favorite No-Bake Dessert With a Mint Chocolate Twist.
Nutritional Information Per Serving
The visible source page did not show a complete nutrition panel I could verify, so I do not want to invent exact numbers. Based on the ingredients, this is a classic dessert with butter, flour, sugar, and cherry filling, so it’s best enjoyed as a generous but moderate slice.
Storage and Leftover Tips
Store Hillbilly Pie covered at room temperature for up to 1 day, or refrigerate it for up to 4 days. You can also freeze the baked and cooled pie for up to 2 months. To serve later, reheat gently to bring back that fresh-baked feel.
This pie also tastes great the next day, once the flavors have had a little more time to settle together.
More Recipes You Will Love
If Hillbilly Pie sounds like your kind of dessert, here are a few more Chef Maniac favorites to try next:
- This Big Family Banana Pudding Is My Favorite Classic Dessert to Feed a Crowd
- This No-Bake Oreo Cream Pie Is My Favorite Quick Dessert Hack
- This Easy Ice Cream Sandwich Cake Is My Favorite No-Bake Summer Dessert
- These Pecan Pie Bars Are My Favorite Make-Ahead Holiday Dessert
- This Grasshopper Pie Is My Favorite No-Bake Dessert With a Mint Chocolate Twist
Final Thoughts
Hillbilly Pie is exactly the kind of dessert that reminds you why old-fashioned baking still matters. It’s simple, cozy, and full of that homemade charm you just can’t fake. Between the flaky crust, jammy cherries, and golden buttery topping, every bite feels warm, familiar, and satisfying.
If you make it, I’d love to hear whether you served it warm with ice cream or let it shine all on its own.