Introduction
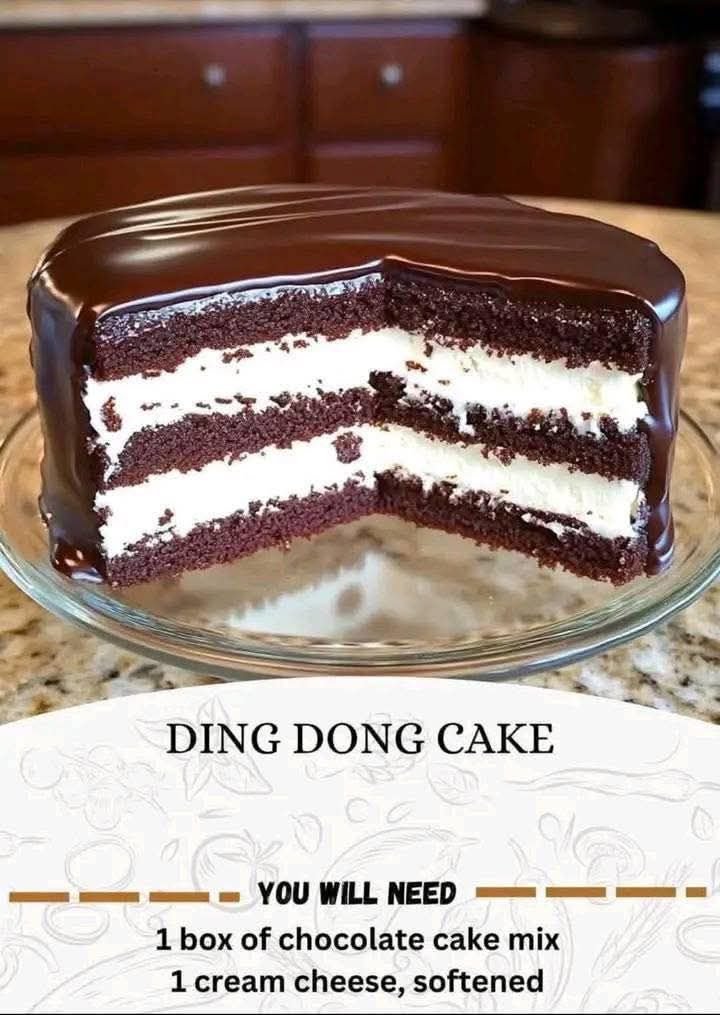
If you grew up with a sweet tooth, the classic Hostess Ding Dong was likely a nostalgic staple. That perfect trifecta of rich chocolate cake, a dreamy, snowy-white cream filling, and a glossy chocolate ganache coating is pure comfort. But honestly, nothing beats a homemade version. This Chocolate Ding Dong Cake recipe takes all that iconic flavor and supersizes it into a decadent layer cake that’s surprisingly easy to make, thanks to a simple cake mix base.
This isn’t just a dessert; it’s a slice of childhood delivered with a serious dose of sophistication. Whether you’re baking for a birthday party, a holiday gathering, or just curing a serious chocolate craving, this cake is guaranteed to be the centerpiece of the dessert table. Trust me, once you taste that velvety marshmallow-cream filling sandwiched between moist chocolate layers and topped with a shiny ganache, you’ll never look at a pre-packaged snack cake the same way again.
Why I Love This Recipe
I’m a big believer that baking should be fun, not frustrating. What I adore about this Chocolate Ding Dong Cake is that it delivers an over-the-top, impressive result without requiring a culinary degree. The box cake mix does the heavy lifting for the layers, ensuring a perfect, moist crumb every time.
The real magic, however, is in the filling and the ganache. The filling is a unique blend of marshmallow fluff and whipped cream—it’s lighter, dreamier, and more stable than a simple vanilla cream. And the glossy, mirror-like ganache? It’s only three ingredients and takes minutes to make, transforming a simple cake into a bakery-quality masterpiece. It’s the perfect recipe for anyone who wants maximum “wow” factor with minimum effort. For more effortless dessert hacks, you might also like this no-bake Oreo cream pie.
Ingredients List
| Component | Ingredient | Quantity | Notes |
| Cake | Chocolate Cake Mix | 1 box | Use your favorite brand. |
| Eggs, Oil, Water | As directed | Follow the box instructions. | |
| Cream Filling | Heavy Cream | 1 cup | Must be cold for whipping. |
| Powdered Sugar | ½ cup | Also known as confectioners’ sugar. | |
| Vanilla Extract | 1 tsp | Use a good quality extract for the best flavor. | |
| Marshmallow Layer | Marshmallow Fluff | 1 cup | For the classic “cream” texture. |
| Cornstarch | 1 tbsp | Helps stabilize the fluff. | |
| Water | ¼ cup | To thin the fluff slightly. | |
| Chocolate Ganache | Semi-Sweet Chocolate Chips | 1 cup | Quality matters here! |
| Butter | 2 tbsp | Unsalted is preferred. | |
| Heavy Cream | ¼ cup | For a pourable, glossy ganache. |
Export to Sheets
Swaps and Notes
- Cake Mix: While a standard devil’s food or dark chocolate mix is best for authenticity, you can easily swap it for a red velvet or even a yellow cake mix for a fun twist.
- Ganache: If you prefer a richer, slightly less sweet topping, swap the semi-sweet chips for dark chocolate chips. If you need a quick alternative, use canned chocolate frosting, warmed slightly in the microwave to a pourable consistency.
- Filling: If you don’t have marshmallow fluff, you can substitute with a standard cream cheese frosting, but the texture won’t be as true to the original Ding Dong.
- Gluten-Free: Easily make this gluten-free by using a gluten-free chocolate cake mix. The rest of the recipe remains the same!
Steps for the Chocolate Ding Dong Cake
Step 1: Bake the Cake Layers
- Preheat & Prep: Preheat your oven to the temperature specified on your cake mix box. Grease and flour a 9-inch round cake pan.
- Mix Batter: In a large bowl, combine the cake mix, eggs, oil, and water as directed on the box. Mix until just combined.
- Bake: Pour the batter into the prepared pan and bake for the time instructed on the box, typically 30-35 minutes. A toothpick inserted into the center should come out clean.
- Cool: Allow the cake to cool in the pan for 10 minutes before inverting it onto a wire rack to cool completely. This is crucial before slicing and filling.
Step 2: Prepare the Marshmallow Layer
- Combine: In a small bowl, whisk together the marshmallow fluff, cornstarch, and ¼ cup water until the mixture is completely smooth and slightly thinned. Set aside.
Step 3: Make the Cream Filling
- Whip Cream: In a separate, chilled bowl, combine the heavy cream, powdered sugar, and vanilla extract.
- Beat: Use an electric mixer to beat the mixture on high speed until stiff peaks form. Stiff peaks hold their shape when the beater is lifted.
Step 4: Assemble the Cake
- Slice: Once the cake is completely cool, use a long, serrated knife to carefully slice the cake in half horizontally, creating two even layers.
- Spread Marshmallow: Place the bottom cake layer on a serving plate. Evenly spread the entire marshmallow mixture over this bottom layer.
- Top with Cream: Gently spread the whipped cream mixture over the marshmallow layer.
- Stack: Carefully place the top cake layer on top of the whipped cream.
Step 5: Make and Apply the Ganache
- Melt: In a microwave-safe bowl, combine the semi-sweet chocolate chips and butter. Microwave in 30-second intervals, stirring between each, until the chocolate is mostly melted.
- Stir in Cream: Add the ¼ cup of heavy cream to the melted chocolate mixture and stir until the ganache is smooth, glossy, and pourable.
- Glaze: Pour the warm ganache directly over the center of the cake, allowing it to slowly drip down the sides. Use an offset spatula to gently smooth the top if necessary.
- Set: Let the cake sit at room temperature for 1 hour to allow the ganache to set slightly before slicing.
Tips for Success
- Completely Cool Cake: This is the most critical step. If the cake is even slightly warm, the cream filling and marshmallow will melt and ooze out. Cool it completely!
- Cold Cream: Ensure your heavy cream and your mixing bowl are cold before whipping. This helps the cream whip up faster and hold stiff peaks.
- Ganache Consistency: If your ganache is too thick, add another tablespoon of warm heavy cream and stir. If it’s too thin, let it sit for a few minutes to cool and thicken slightly.
- Sharp Knife: Use a very sharp, long serrated knife to cut the cake layers evenly. A gentle sawing motion is better than pressing down.
Serving Suggestions and Pairings
This rich chocolate cake is the star, so keep the pairings simple and complementary.
- Beverages: Serve a tall glass of cold milk for the classic snack cake experience. For adults, a hot cup of black coffee or a rich espresso cuts through the sweetness nicely. For a fun, dessert-inspired cocktail, check out The Slippery Drank.
- Sides: A simple scoop of vanilla bean ice cream or a dollop of fresh, unsweetened whipped cream is all you need. You could also pair it with a refreshing Blueberry Lemonade for contrast.
- Presentation: Garnish the top with a few shaved chocolate curls or miniature chocolate chip cookie bites before the ganache sets.
Nutritional Information Per Serving (Estimate)
- Calories: 450-550 kcal
- Total Fat: 25-35g
- Carbohydrates: 50-70g
- Protein: 5-8g
Note: This is a rough estimate based on standard box mix and ingredient portions. For an exact count, use a nutritional calculator with your specific brand of ingredients.
Storage and Leftover Tips
- Storage: Because of the cream filling, this cake must be stored in the refrigerator. Keep it in an airtight container. It will stay fresh for up to 4 days.
- Serving: For the best texture and flavor, take the cake out of the refrigerator about 30 minutes before serving to allow the layers to soften slightly.
- Freezing: You can freeze leftover slices. Wrap individual slices tightly in plastic wrap, then aluminum foil, and place them in a freezer bag. Freeze for up to 2 months. Thaw overnight in the refrigerator.
More Recipes You Will Love
If you’re a fan of rich, nostalgic chocolate desserts, you absolutely need to try some of my other favorites:
- The Best Peanut Butter Brownies I’ve Ever Made (And I’ve Made a Lot) – A killer combination of chocolate and peanut butter.
- These Chocolate Chip Cookie Dough Brownie Bombs Are My Favorite Sweet Obsession – Pure indulgence in a bite-sized treat.
- This Edible Cookie Dough Is My Favorite No-Bake Treat for Late-Night Cravings – Perfect for when you need instant gratification.
- These Chocolate Oreo Hearts Are My Favorite No-Bake Valentine’s Treat – Another simple, chocolate-covered classic.
Final Thoughts
Baking this Chocolate Ding Dong Cake is a journey back in time, and every bite is pure, decadent pleasure. It’s proof that sometimes, the simplest ingredients can create the most memorable desserts. Don’t be intimidated by the layers or the glossy ganache—it’s easier than it looks, and the result is truly spectacular.
Go ahead, try it out, and let me know how it goes! Tag us on social media and share your photos. What’s your favorite nostalgic snack cake? I’d love to hear your feedback in the comments below! Happy baking!


Leave a Reply