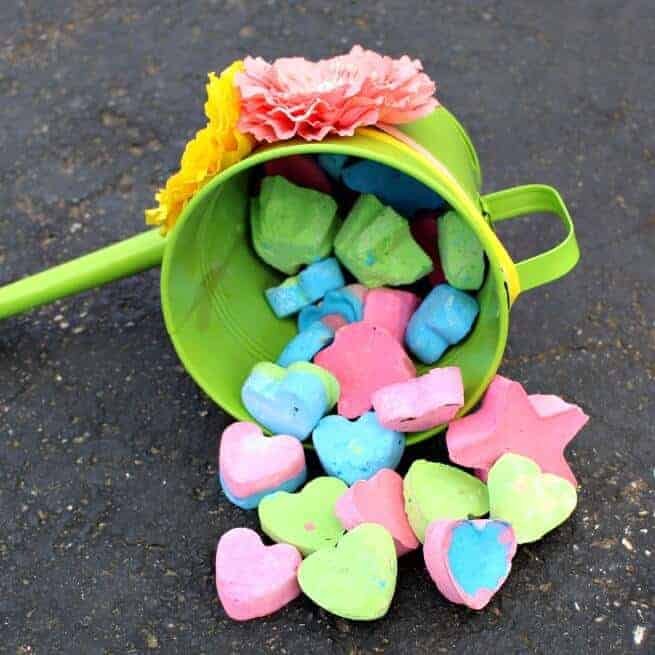
When the weather warms up and school’s out, I’m always looking for screen-free ways to keep the kids entertained. That’s when this DIY Sidewalk Chalk recipe comes to the rescue. It’s not just an easy project—it’s a total win for creativity, messiness (the good kind), and getting everyone outside.
I first tried making sidewalk chalk at home during a summer when boredom hit hard and craft supplies were running low. What surprised me most? How simple it was. Just a few basic ingredients, some food coloring, and silicone molds, and suddenly we had an afternoon art project and a batch of colorful chalk to use on the driveway for days.
If you’re looking for a low-effort, high-impact activity that gets the kids involved, this one’s for you. Let me show you how I make it and how you can turn a few pantry staples into hours of outdoor fun.
Why This DIY Sidewalk Chalk Recipe Works
This isn’t just about making something cute—it’s about building a hands-on experience that kids actually love. Here’s why it’s a go-to in our house:
- Simple ingredients: Most of it is already in your kitchen or easy to find at the store.
- Totally customizable: You can use any colors, shapes, or themes you want.
- Perfect for all ages: Little ones can help mix, older kids can design and decorate.
- Great rainy-day activity: Make it inside, use it outside when the sun returns.
What You’ll Need
(Makes about 8–10 chalk shapes, depending on mold size)
- 1 cup plaster of Paris
- 1/2 cup cold water
- Tempera paint or food coloring (liquid or gel)
- Silicone molds or small paper cups
- Mixing bowl + spoon (use disposable if you don’t want to clean up hardened plaster)
- Plastic spoons or craft sticks for stirring
- Gloves and apron (optional but helpful for messy helpers)
How I Make DIY Sidewalk Chalk
1. Prep the Workstation
I always start by covering the table with newspaper or an old plastic tablecloth. Plaster of Paris can get messy, and once it sets, it doesn’t budge.
Then I set out the molds—I’ve used everything from silicone ice cube trays to cupcake liners and even toilet paper rolls lined with wax paper.
2. Mix the Base
In a disposable bowl, I combine 1 cup of plaster of Paris with 1/2 cup of cold water. Stir until smooth—it thickens quickly, so work fast. If the kids are helping, I mix the plaster and water first and let them handle the coloring.
3. Add Color
Once the mixture is smooth, I separate it into smaller bowls and add a few drops of tempera paint or food coloring to each. Stir well until the color is fully blended. The more color you add, the more vibrant the chalk will be.
4. Pour Into Molds
I spoon or pour the colored plaster into the molds and gently tap the tray to release air bubbles. If I’m using paper cups, I let them fill about halfway and use a stick to level off the tops.
You can layer colors for a tie-dye effect or swirl them with a toothpick for a marbled look—this part is where creativity really kicks in.
5. Let It Set
I let the chalk dry completely in the molds for at least 12–24 hours. Once dry, I pop them out and let them cure for another day just to be safe. They’ll feel hard to the touch and be ready for action.
My Best Tips for Success
- Use silicone molds: They’re easiest for unmolding without cracking the chalk.
- Avoid adding too much water: Too much liquid can make the chalk brittle.
- Label each color batch: Especially helpful when kids want to make a rainbow set.
- Wear gloves: Especially when using food coloring—your hands will thank you later.
- Add sparkle: Stir in a pinch of glitter for chalk that shimmers in the sunlight.
How I Use and Store the Chalk
Once the chalk is fully dried, I store it in a plastic bin or cardboard box with a lid. It holds up well if kept in a dry place. I’ll hand out a few pieces at a time for sidewalk art, hopscotch, or driveway messages, and the kids go wild.
We’ve even made sets as homemade gifts—just wrap a handful in a clear treat bag with a ribbon and a tag that says “You color my world!” It’s a sweet and simple idea for birthdays, Valentine’s Day, or summer camp parties.
FAQs From My Craft Table
Q: Can I use acrylic paint instead of tempera?
A: I don’t recommend it. Acrylic paint can stain sidewalks and clothes, and it’s not as kid-safe. Stick to tempera or food coloring for easy cleanup.
Q: How long does the chalk last?
A: A long time! As long as you keep it dry and stored in a cool place, it won’t go bad.
Q: Can I make it in big batches?
A: Yes, just scale up the plaster and water ratio, and mix in separate bowls if you’re using multiple colors.
Q: Does it wash off the sidewalk easily?
A: Absolutely. A quick spray from the hose or a little rain, and it’s gone.
Why You’ll Want to Make This Again
This DIY sidewalk chalk is more than just a craft—it’s an experience. It gets kids excited to create, gives them a sense of accomplishment, and best of all, it turns into outdoor play without any screen time. It’s one of those rare activities that hits all the right notes: simple, affordable, hands-on, and genuinely fun.
So next time you hear “I’m bored,” skip the store and head to the kitchen. A little plaster, a splash of color, and you’ve got a homemade activity that’s as fun to make as it is to use.

DIY Sidewalk Chalk
Ingredients
- 1 cup plaster of Paris
- 2 cups cold water
- Optional: food coloring
Instructions
- In a large bowl, mix 1 cup of plaster of Paris with 2 cups of cold water until well combined.
- If desired, add food coloring to the mixture and stir until the color is evenly distributed.
- Pour the mixture into molds or containers of your choice.
- Let the chalk set for about 24 hours until fully hardened.
- Once hardened, remove the chalk from the molds and let it dry completely before use.


Leave a Reply