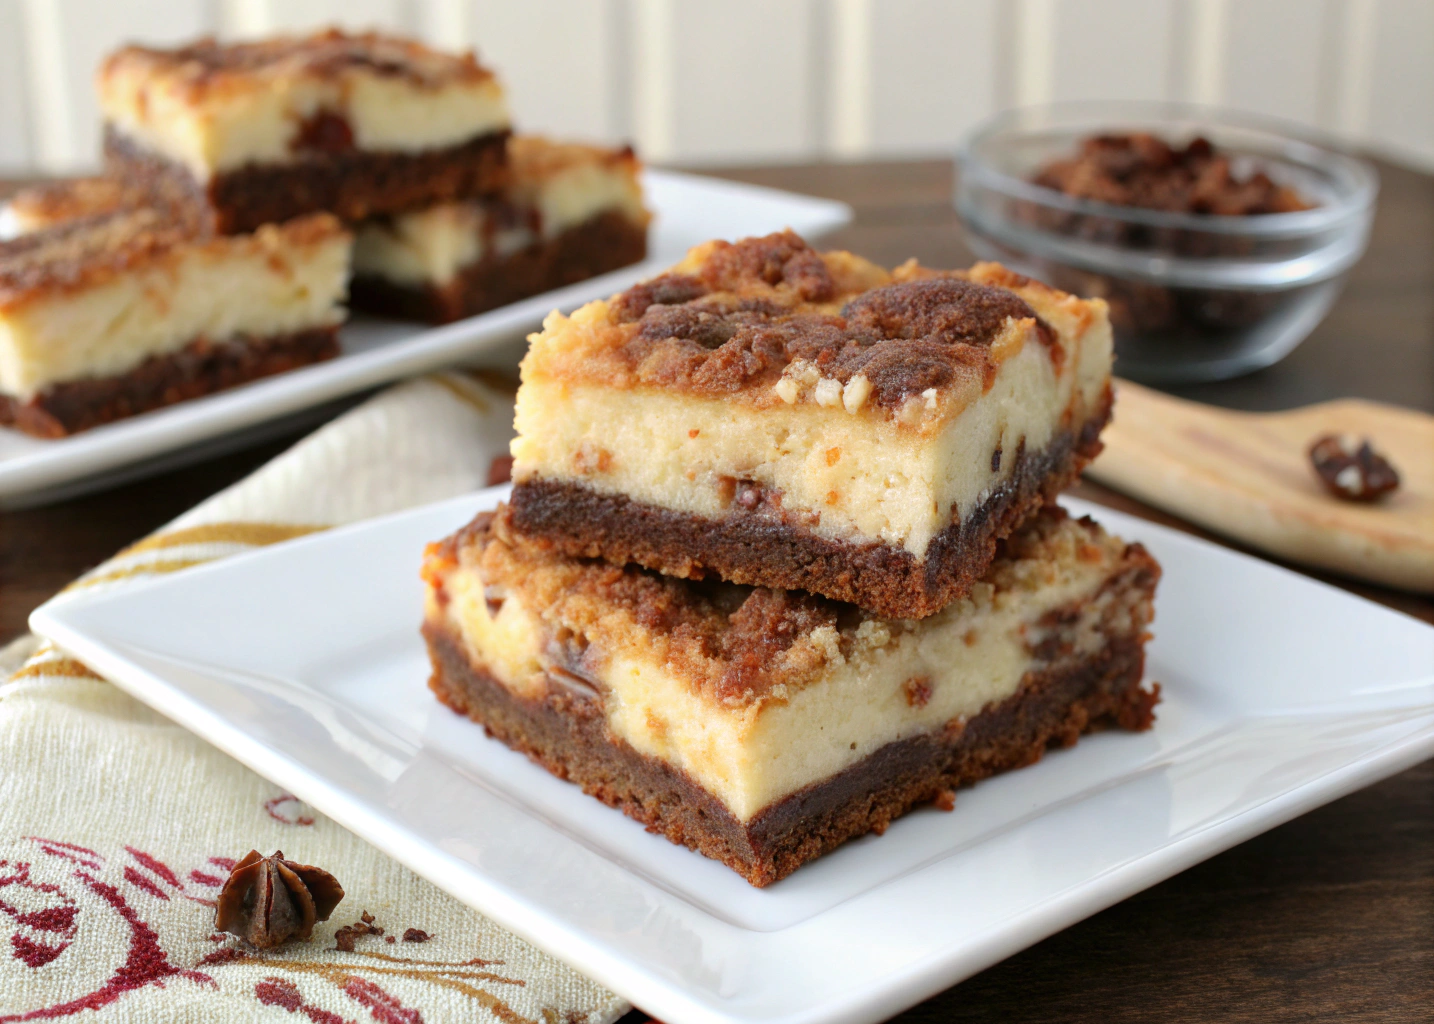
Magic Cheesecake Bars: A Layered Delight
Growing up, my family had a tradition of gathering every Sunday for dessert. My grandmother would whip up her famous cheesecake, a recipe passed down through generations. One day, she decided to experiment, and that’s how these Magic Cheesecake Bars were born. They became an instant hit, combining the creamy goodness of cheesecake with a gooey, layered twist. Every bite takes me back to those warm, laughter-filled Sundays.
What Makes It Special
These cheesecake bars are not just any dessert; they are a celebration of flavors and textures. Here’s why they stand out:
- Layered Perfection: Each bar features a buttery crust, a rich cheesecake layer, and a gooey topping that creates a delightful contrast.
- Easy to Make: Unlike traditional cheesecakes, these bars are simple to prepare and don’t require a water bath.
- Versatile Flavor: You can easily customize the flavors by adding fruits, chocolate, or even spices to the mix.
Gather Your Ingredients
Prep Time: 20 minutes | Cook Time: 40 minutes | Servings: 12
- 1 ½ cups graham cracker crumbs
- ½ cup unsalted butter, melted
- 2 (8 oz) packages cream cheese, softened
- 1 cup granulated sugar
- 2 large eggs
- 1 teaspoon vanilla extract
- 1 cup sour cream
- ½ cup chocolate chips (optional)
Step-by-Step Instructions
-
Preheat your oven to 325°F (160°C) and grease a 9×13 inch baking dish.
-
In a bowl, combine graham cracker crumbs and melted butter. Press the mixture into the bottom of the prepared dish to form the crust.
-
In a large mixing bowl, beat the cream cheese and sugar until smooth. Add eggs one at a time, mixing well after each addition. Stir in vanilla and sour cream until fully combined.
-
Pour the cheesecake mixture over the crust and spread evenly. If using, sprinkle chocolate chips on top.
-
Bake for 30-40 minutes, or until the edges are set and the center is slightly jiggly. Let it cool completely before slicing into bars.
My Pro Tips
-
For a fruity twist, add a layer of fresh berries on top before baking.
-
Let the bars chill in the refrigerator overnight for the best flavor and texture.
What to Serve With It
- Fresh fruit salad
- Vanilla ice cream
- A cup of coffee or tea
FAQs
Q: Can I make these bars ahead of time?
A: Absolutely! They store well in the refrigerator for up to 5 days.
Q: Can I freeze these cheesecake bars?
A: Yes, you can freeze them for up to 3 months. Just make sure to wrap them tightly.
The Heart of the Dish
These Magic Cheesecake Bars are more than just a dessert; they are a reminder of family, love, and the joy of sharing good food. Each bite is a little piece of nostalgia that brings warmth to my heart. I hope they bring you as much joy as they have brought to my family.
Your Turn
Now it’s your turn to create these delightful bars! I encourage you to try the recipe, make it your own, and share your experiences. I can’t wait to hear how they turn out for you!