There’s something irresistibly fun and undeniably delicious about a “Dirt Cake.” And when you make it a frozen dirt cake with no baking required? You’ve got yourself a dessert that’s not only incredibly satisfying but also ridiculously easy to prepare, especially perfect for those warm days when turning on the oven is the last thing you want to do. This delightful treat layers crushed chocolate sandwich cookies (the “dirt”) with a rich, creamy, and wonderfully sweet filling, all chilled to a refreshing perfection. It’s a nostalgic nod to childhood fun that adults will love just as much as kids!
Why I Love This Recipe
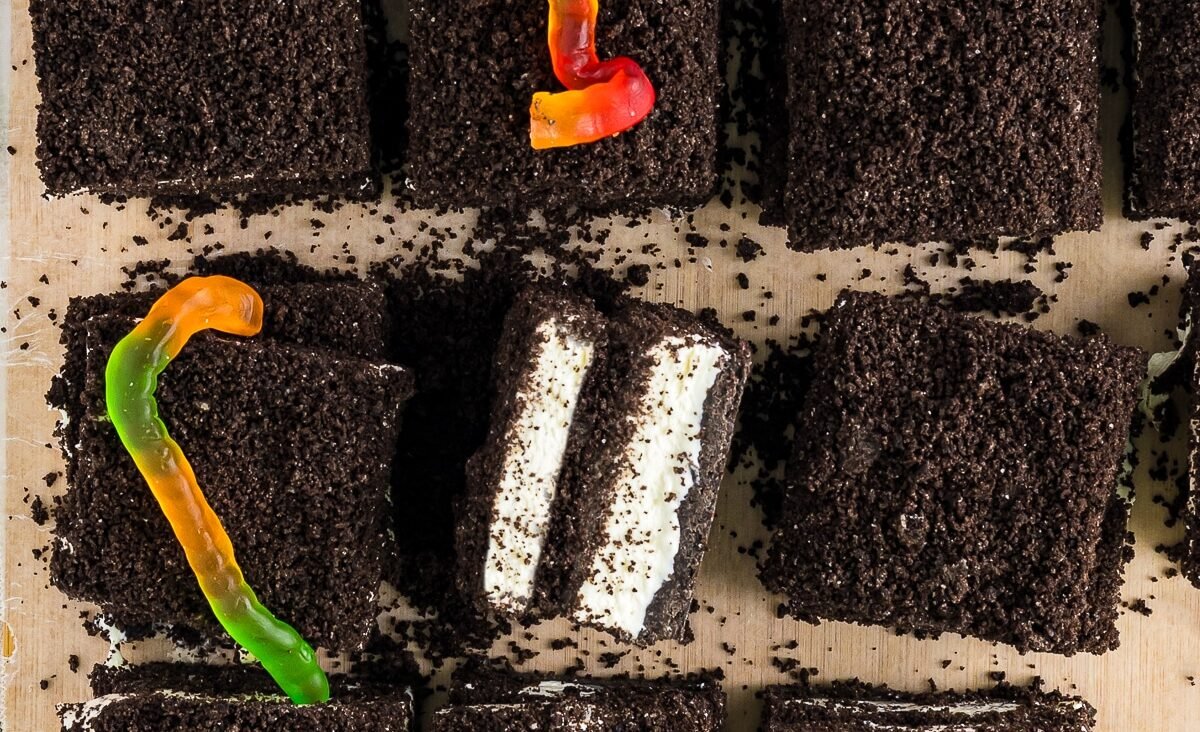
What’s not to love about a dessert that comes together with minimal effort and maximum deliciousness? This Easy No-Bake Frozen Dirt Cake is a dream come true for anyone who loves rich, chocolatey, and creamy treats without the fuss of baking. The combination of crunchy “dirt” (crushed Oreo cookies!) and the luscious, smooth, and slightly tangy cream cheese filling is pure magic. It’s refreshing when frozen, offering a delightful texture contrast that keeps you coming back for more. It’s also incredibly versatile – you can serve it in a large dish for a crowd, or in individual cups for a charming presentation. Plus, the “dirt” theme makes it a fantastic hit with kids, especially if you add a few gummy worms or candy rocks!
List of Ingredients
To create this delightfully simple and satisfying No-Bake Frozen Dirt Cake, you’ll need:
- 1 (14.3-ounce) package chocolate sandwich cookies (like Oreos), finely crushed (about 3 1/2 to 4 cups crumbs)
- 1/2 cup (1 stick) unsalted butter, melted
For the Creamy Filling:
- 1 (8-ounce) package cream cheese, softened
- 1/2 cup (1 stick) unsalted butter, softened
- 1 1/2 cups powdered sugar, sifted
- 1 teaspoon vanilla extract
- 1 (8-ounce) container frozen whipped topping (like Cool Whip), thawed
Optional Garnish & Fun Additions:
- Gummy worms or candy rocks
- Extra chocolate sandwich cookie crumbs
- Chocolate syrup for drizzling
Swaps and Notes
- Chocolate Sandwich Cookies: Oreo cookies are the classic choice and provide the best “dirt” flavor. You can use regular or double-stuffed.
- Butter: The melted butter helps bind the cookie crumbs, preventing them from being too powdery.
- Cream Cheese: Make sure your cream cheese is fully softened to room temperature for a smooth, lump-free filling.
- Powdered Sugar: Sifting the powdered sugar prevents lumps in your creamy filling. Don’t skip this step for the best texture.
- Whipped Topping: Thaw the whipped topping in the refrigerator before using. Do not substitute with homemade whipped cream, as it tends to deflate more easily and may not freeze as well in this recipe.
- Flavor Variations:
- Mint Dirt Cake: Use mint-flavored chocolate sandwich cookies and add 1/2 teaspoon of mint extract to the filling.
- Peanut Butter: Add 1/2 cup of creamy peanut butter to the cream cheese mixture for a peanut butter twist.
- Espresso: Add 1-2 teaspoons of instant espresso powder (dissolved in a tiny bit of hot water) to the cream cheese mixture for a mocha flavor.
- Presentation: This cake can be made in a 9×13-inch dish, an 8×8-inch dish for a thicker cake, or individual serving cups. A clean, new flower pot is also a fun way to serve it!
List of Steps for the Recipe
This no-bake recipe comes together quickly with just a few simple steps:
- Prepare the “Dirt” Crust:
- Finely crush the chocolate sandwich cookies. You can do this by placing them in a large Ziploc bag and crushing them with a rolling pin, or by pulsing them in a food processor until fine crumbs form.
- In a medium bowl, combine the finely crushed cookie crumbs with the 1/2 cup melted butter. Stir until all the crumbs are moistened.
- Press about two-thirds of the mixture evenly into the bottom of a 9×13-inch baking dish (or an 8×8-inch dish for a thicker cake). Reserve the remaining crumbs for the top layer.
- Make the Creamy Filling:
- In a large bowl, using an electric mixer, beat the softened cream cheese and softened butter together on medium speed until smooth and creamy, with no lumps (about 2-3 minutes).
- Gradually add the sifted powdered sugar, beating on low speed until combined, then increase to medium and beat until light and fluffy.
- Beat in the vanilla extract until well combined.
- Gently fold in the thawed whipped topping using a spatula until no streaks remain. Be careful not to deflate the whipped topping.
- Assemble the Dirt Cake:
- Carefully spread the creamy filling evenly over the crushed cookie crust in the prepared dish.
- Sprinkle the remaining reserved cookie crumbs generously over the top of the creamy filling, creating the “dirt” layer.
- Freeze and Chill:
- Cover the dish tightly with plastic wrap.
- Place the dirt cake in the freezer for at least 4 hours, or preferably overnight, until completely firm. This allows it to set and become nicely frozen.
- Serve and Garnish:
- Remove the dirt cake from the freezer 10-15 minutes before serving to allow it to soften slightly for easier slicing.
- Slice into squares and serve. For fun, add gummy worms or candy rocks to the top of each serving, or a drizzle of chocolate syrup.
Tips for Success
- Finely Crush Cookies: The finer the crumbs, the better the “dirt” texture will be. A food processor is highly recommended for this.
- Softened Ingredients are Key: Ensure both cream cheese and butter are at true room temperature for a smooth, lump-free creamy filling. Cold ingredients will result in a lumpy texture.
- Sift Powdered Sugar: This step is important to prevent lumps in your filling.
- Gentle Folding: When incorporating the whipped topping, fold it in gently to maintain its airy texture and volume.
- Don’t Rush the Freezing: A properly frozen dirt cake will be firm and easy to slice, with a delightful frosty texture.
- Portioning: For easier serving and less mess, consider making this in individual clear cups. Layer crumbs, then filling, then more crumbs, and freeze.
- Creative Presentation: If using a clean, new flower pot, layer the “dirt” and “filling” as you would in a dish. A spade or small shovel can be used for serving.
Serving Suggestions and Pairings
This Frozen Dirt Cake is fantastic on its own, but here are some fun ways to serve it:
- Gummy Worms & Candy Rocks: The classic “dirt” cake adornments are a must for a playful presentation, especially for kids’ parties.
- Chocolate Syrup Drizzle: A simple drizzle of chocolate syrup over individual servings adds extra chocolatey goodness.
- Fresh Berries: While not traditional, a few fresh raspberries or sliced strawberries can offer a nice color contrast and a hint of tartness.
- Whipped Cream: A dollop of extra whipped cream on the side is always welcome.
- Ice Cream Alternative: Serve it as a refreshing alternative to traditional ice cream on a hot day.
- Party Dessert: Its make-ahead nature and fun appeal make it perfect for birthday parties, BBQs, or potlucks.
Nutritional Information
A single serving of this Easy No-Bake Frozen Dirt Cake (approximately 1/12th of a 9×13-inch cake) contains:
- Calories: Approximately 450−550 calories
- Fat: Approximately 30−40g
- Carbohydrates: Approximately 45−55g
- Protein: Approximately 5−8g
- Fiber: Approximately 2−3g
- Sodium: Approximately 250−350mg
Please note that these are approximate values and can vary based on specific brands of ingredients (especially cookies and whipped topping), precise measurements, and whether optional garnishes are included.
Storage and Leftover Tips
This frozen dessert stores beautifully, making it an excellent make-ahead option!
- Freezer Storage: Keep the dirt cake tightly covered with plastic wrap in the freezer for up to 2-3 weeks. For best texture, beyond that, it can sometimes get a bit icy.
- Refrigeration (Short Term): While it’s a frozen cake, you can keep leftovers in the refrigerator for a day or two after it’s been frozen, but it will soften significantly and lose its frozen texture.
- Serving from Frozen: As noted in the steps, allow it to sit out for 10-15 minutes before slicing directly from the freezer to make it easier to cut.
Final Thoughts
This Easy No-Bake Frozen Dirt Cake is more than just a dessert; it’s a delightful experience that brings a smile to everyone’s face. Its simplicity belies its incredible taste, combining satisfying textures with a rich, creamy, and wonderfully chocolatey flavor profile. It’s the perfect treat for any occasion, especially when you want something impressive without the hassle of baking. So go ahead, whip up a batch, add a few gummy worms, and let the fun begin!
We’d love to hear how this fun and delicious recipe turns out for you! Share your comments, photos, and any creative additions in the comments section below. And don’t forget to follow Chefmaniac.com for more fantastic no-bake delights and culinary inspiration!


Leave a Reply