Peanut Butter Cup Dump Cake: The Ultimate Gooey Chocolate Dessert
By Jason Griffith
Introduction
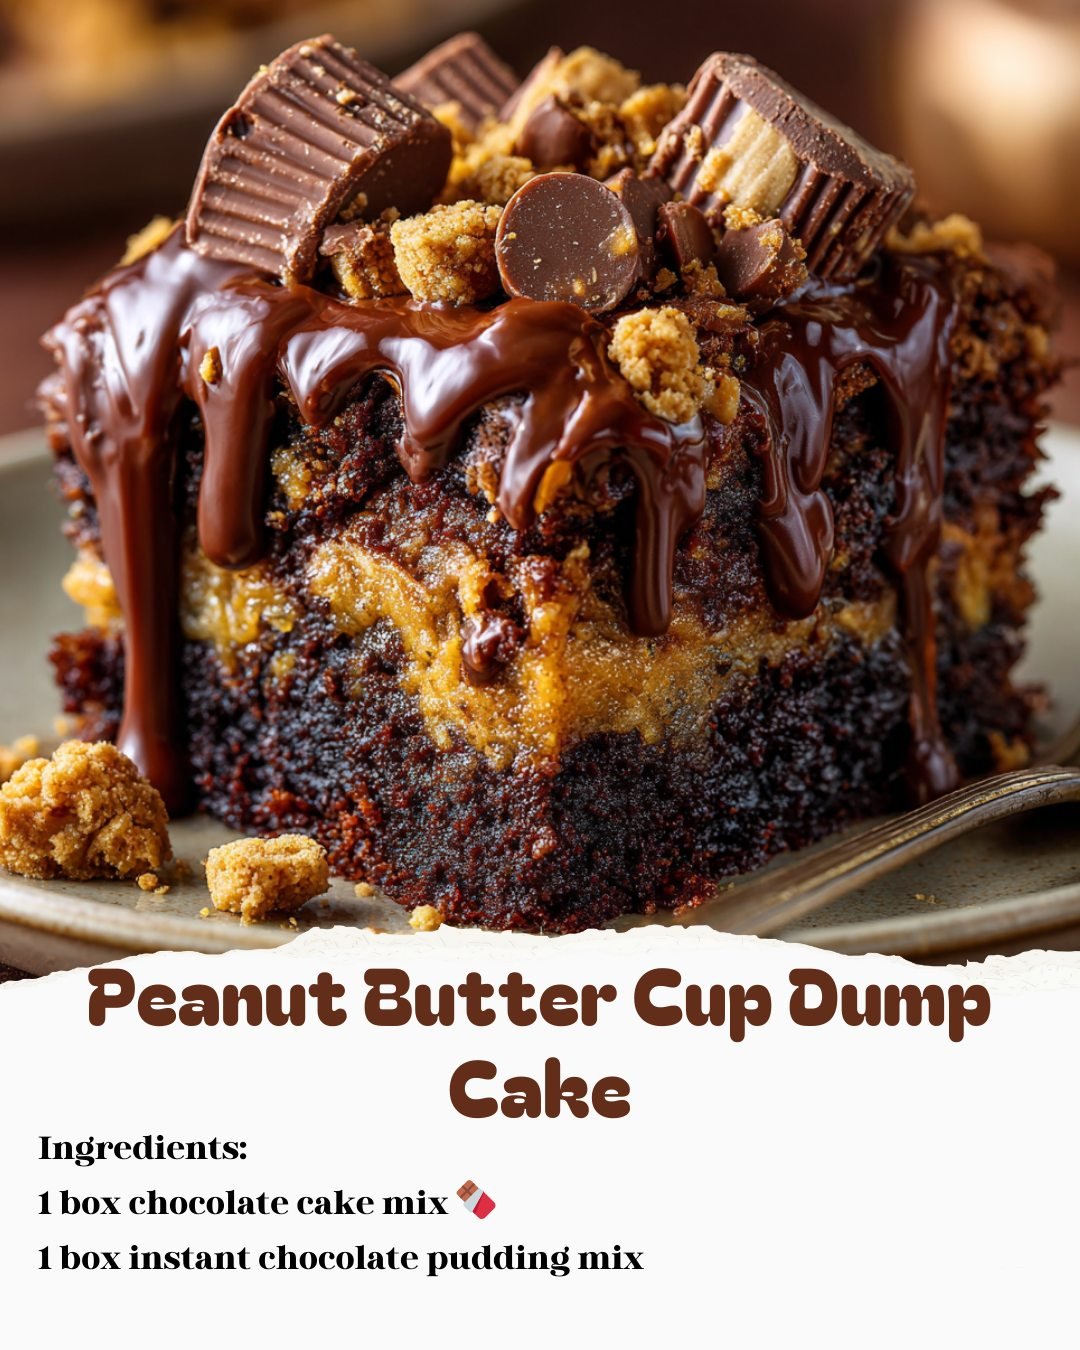
If you’re anything like me, you live for that perfect marriage of salty peanut butter and sweet, rich chocolate. It’s a classic for a reason. And what if I told you that you could have a dense, unbelievably gooey, and ridiculously easy chocolate cake bursting with peanut butter cups, with almost zero effort?
Enter the Peanut Butter Cup Dump Cake. This isn’t your grandma’s refined layer cake; this is a pure, unadulterated comfort food masterpiece. A dump cake, by definition, is a dessert where you simply dump all the ingredients into a pan and bake—no fussy mixing, no multiple bowls, and definitely no stress. It’s the ultimate dessert shortcut, and the results are so phenomenal, your friends will swear you spent hours on it. Rich, moist chocolate cake surrounding pockets of melted peanut butter cups and chips? Trust me, this is the dessert you’ll crave on a lazy Sunday.
Why I Love This Recipe
I’ve made a lot of desserts in my time—from fancy French pastries to my simple but legendary The Best Peanut Butter Brownies I’ve Ever Made and I’ve Made a Lot. But this Peanut Butter Cup Dump Cake has earned a permanent spot in my rotation for a few key reasons.
First, the ease factor is unmatched. We’re talking five minutes of prep, maximum. You’re using a cake mix and a pudding mix, which ensures a ridiculously moist, tender crumb that’s nearly impossible to mess up. Second, the texture. Because of the milk, oil, and eggs combining with the dry mixes, the center remains incredibly gooey and almost pudding-like, especially right out of the oven. Third, the peanut butter cup payload. We don’t skimp here. Chopped peanut butter cups are layered inside and scattered on top, guaranteeing a hit of that sweet-and-salty goodness in every single forkful. Serve it warm with a scoop of vanilla ice cream, and you’ve reached peak dessert euphoria.
Ingredients List
| Ingredient | Amount | Notes |
| Chocolate Cake Mix | 1 box (standard size) | Use any brand you prefer. |
| Instant Chocolate Pudding Mix | 1 box (small, about 3.9 oz) | Make sure it’s instant, not cook and serve. |
| Large Eggs | 3 | Room temperature is best, but cold works too. |
| Vegetable Oil | 1/2 cup | Can substitute with an equal amount of melted butter. |
| Milk | 2 cups | Whole milk offers the richest results. |
| Chopped Peanut Butter Cups | 1 cup | Chop standard-sized cups or use mini cups. |
| Peanut Butter Chips | 1/2 cup | Optional but highly recommended for extra peanut flavor. |
| Whipped Cream or Ice Cream | For topping | Vanilla ice cream is the classic choice. |
Export to Sheets
Swaps and Notes
- Cake Mix Swap: For an even more intense chocolate flavor, swap the standard chocolate cake mix for a Devil’s Food Cake mix. You can also try a yellow or butter cake mix if you want the peanut butter to be the main star.
- Dairy-Free Option: Use non-dairy milk (like almond or oat milk) and an equal amount of melted coconut oil in place of the vegetable oil. Ensure your cake mix and pudding mix are dairy-free as well.
- For Extra Gooeyness: If you really want that melt-in-your-mouth center, decrease the baking time by 3-5 minutes. The center will look slightly underbaked when you pull it out, but it will set as it cools.
- Peanut Butter Chips: If you can’t find chips, you can use an extra 1/4 cup of chopped peanut butter cups mixed into the batter.
Step-by-Step Instructions
- Prep: Preheat your oven to 175∘C (350∘F). Lightly grease a 9×13 inch baking dish. This prevents the rich, gooey cake from sticking to the pan.
- Mix the Batter: In a large bowl, whisk together the chocolate cake mix, instant chocolate pudding mix, large eggs, vegetable oil, and milk until the batter is smooth and well combined. A whisk works better than an electric mixer here to prevent overmixing.
- Layer the Cake: Pour about half of the prepared batter into your greased baking dish. Spread it out gently with a spatula.
- Add the Filling: Sprinkle 1/2 cup of the chopped peanut butter cups evenly over the batter in the dish.
- Finish the Layering: Pour the remaining batter over the top layer of peanut butter cups. It’s okay if the top layer isn’t perfectly smooth.
- The Final Topping: Sprinkle the remaining 1/2 cup of chopped peanut butter cups and the optional peanut butter chips over the very top of the batter.
- Bake: Bake for 35–40 minutes. The cake is done when the edges are set and a toothpick inserted near the center comes out with moist, gooey crumbs (not raw batter). You want it to be dense and moist, not dry.
- Serve: Let the cake cool on a wire rack for about 10–15 minutes before serving. This allows the center to set up slightly, but it will still be wonderfully warm and gooey. Serve with a dollop of whipped cream or a generous scoop of vanilla ice cream.
Tips for Success
- Don’t Overbake! This is the golden rule for this recipe. The key to a great dump cake is that dense, moist, and slightly gooey interior. Start checking at 35 minutes, and remember that an extra minute or two can turn it from perfectly gooey to just “cake.”
- Room Temperature Ingredients: While not strictly necessary for this recipe, using room temperature eggs and milk will help them incorporate into the batter more smoothly, resulting in a slightly better texture.
- Use Quality Peanut Butter Cups: Since the peanut butter cups are the star, use your favorite brand. Using mini cups is a great idea as they distribute more evenly throughout the cake layers.
- The Pudding is Essential: Don’t skip the instant pudding mix! It’s what gives this cake its signature incredible moisture and density.
Serving Suggestions and Pairings
This rich dessert pairs beautifully with a few simple additions.
- Beverage Pairings: A tall glass of cold milk is the classic pairing. For the adults, a glass of dark roast coffee or a rich, creamy liqueur like Bailey’s (for 21+ only, please) cuts through the sweetness nicely.
- Topping Ideas: Beyond the whipped cream or vanilla ice cream, consider a drizzle of hot fudge sauce or a sprinkle of flaky sea salt to enhance the peanut butter’s flavor.
- Appetizer Counterpoint: If you’re serving this after a meal, a lighter appetizer beforehand would be perfect, like these simple Easy Cheesy Chicken Sliders with Marinara Garlic Butter.
Nutritional Information (Per Serving)
Disclaimer: This is an estimated value based on standard product packaging and is intended for informational purposes only. Values will vary based on specific brands and ingredients used.
A single serving (assuming 12 servings from a 9×13 pan):
- Calories: Approximately 450–500 kcal
- Fat: 20–25g
- Carbohydrates: 60–70g
- Protein: 7–9g
Storage and Leftover Tips
This cake keeps wonderfully, and some argue it’s even better the next day!
- Storage: Store any leftovers tightly covered with plastic wrap or in an airtight container in the refrigerator for up to 4 days.
- Reheating: To enjoy that warm, gooey center again, reheat individual slices in the microwave for 15-30 seconds, or cover the pan loosely with foil and warm it in a 175∘C (350∘F) oven for 10-15 minutes.
- Freezing: You can freeze slices of the baked cake for up to 3 months. Wrap them tightly in plastic wrap and then foil. Thaw them in the refrigerator overnight before reheating.
More Recipes You Will Love
If you’re a fan of easy, decadent desserts, be sure to check out some of my other favorites:
- Got a late-night craving? Try my This Edible Cookie Dough is My Favorite No-Bake Treat for Late-Night Cravings.
- If you love the flavor of a good batter, don’t miss out on this This Brownie Batter Dip is My Favorite No-Bake Dessert for Instant Chocolate Cravings.
- For the ultimate chocolate indulgence, you must make these These Chocolate Chip Cookie Dough Brownie Bombs are My Favorite Sweet Obsession. They are next-level!
Final Thoughts
The Peanut Butter Cup Dump Cake is the perfect example of how sometimes, the simplest recipes deliver the biggest flavor payoff. It’s rich, comforting, and an absolute home run every time. I’m already craving a slice!
Did you add peanut butter chips or swap out the cake mix? Let me know your favorite twist in the comments below! And don’t forget to follow me on social media for more easy, crowd-pleasing recipes!


Leave a Reply