Chewy Banana Bread Blondies: The 40-Minute Recipe That Beats Classic Banana Bread
By Jason Griffith
We all know the scenario: you bought a bunch of bananas with the best intentions, and now they’re sitting on the counter, slowly evolving into something suitable only for a smoothie… or is it?
I’ve made plenty of loaves of classic banana bread in my time—in fact, I have an entire ode to the original with my recipe for This Chocolate Chip Banana Bread Is My Favorite Way to Use Up Overripe Bananas. But sometimes, you want something a little faster, a little chewier, and something that screams “dessert bar” rather than “breakfast bread.”
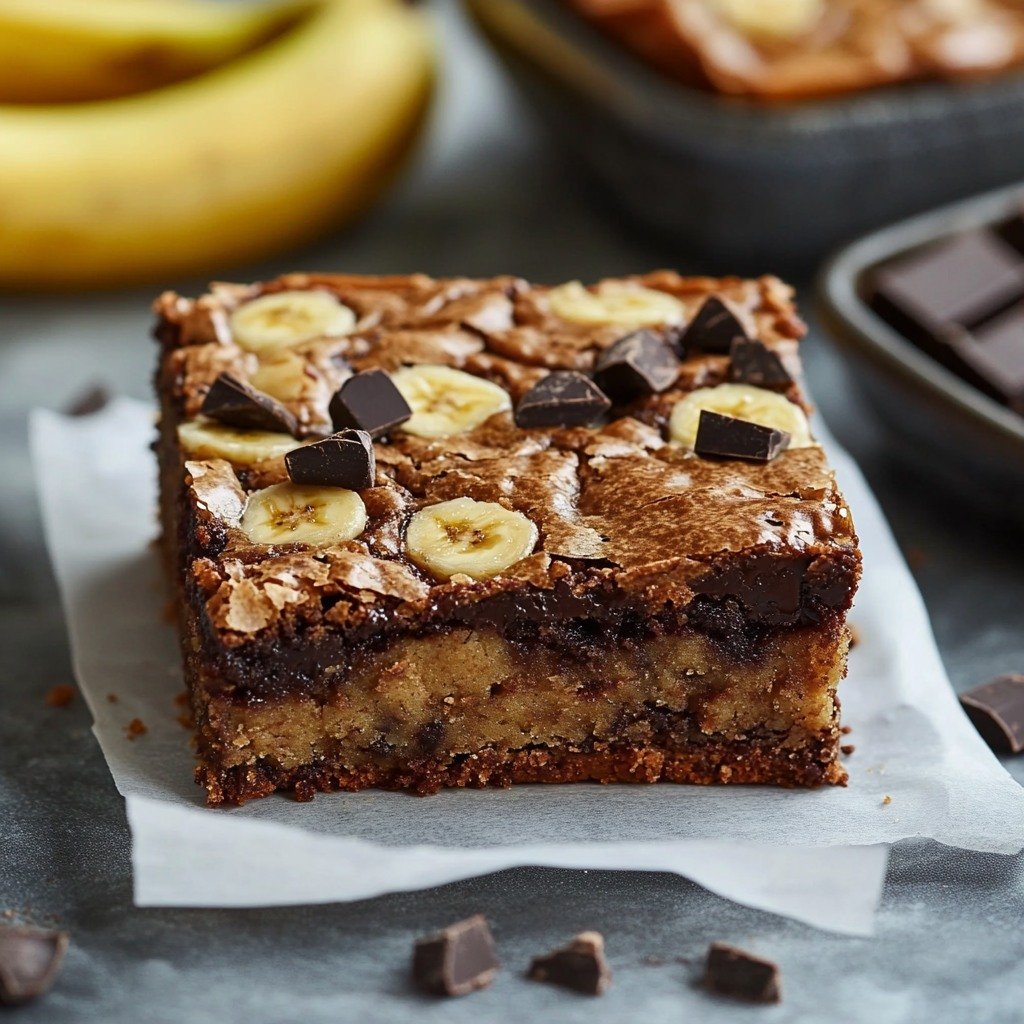
Enter the Banana Bread Blondie. It takes the rich, caramel chew of a classic brown sugar blondie and infuses it with the deep, unmistakable comfort of ripe banana. The result is a bar that’s moist, dense, and perfectly studded with melted pockets of dark chocolate. It’s a game-changer, and it’s ready in about 40 minutes flat.
Why I Love This Recipe
I’m a texture guy, and traditional banana bread can sometimes lean a little too far into the “cakey” territory. This blondie, however, delivers a supremely satisfying, chewy edge while maintaining a super moist center, thanks to the mashed banana.
It’s also an incredibly forgiving recipe. You can stir the batter a little more aggressively than you might with other baked goods, and it still comes out perfect. Plus, let’s be honest, it’s the fastest way to turn three sad, spotty bananas into a dessert that will genuinely impress people.
📜 Ingredients List
| Ingredient | Quantity | Notes |
| Mashed Ripe Bananas | 1 cup (about 2–3 bananas) | The spottier, the better for maximum flavor. |
| Brown Sugar | 1 cup | Light or dark brown sugar works; dark adds a deeper molasses flavor. |
| Unsalted Butter | 1/2 cup (1 stick), melted | Melting the butter is key to that chewy blondie texture. |
| Large Egg | 1 | Room temperature is ideal, but not strictly necessary here. |
| Vanilla Extract | 1 tsp | Use good quality vanilla for the best aroma. |
| All-Purpose Flour | 1 cup | Measure using the spoon-and-level method. |
| Baking Powder | 1/2 tsp | Helps with a slight lift. |
| Baking Soda | 1/4 tsp | Reacts with the brown sugar and bananas for tenderness. |
| Salt | 1/4 tsp | Crucial for balancing the sweetness. |
| Dark Chocolate Chunks or Chips | 1/2 cup | The bitter notes of dark chocolate contrast perfectly with the sweet banana. |
Export to Sheets
Swaps and Notes
- Flour: You can swap out a quarter of the all-purpose flour for whole wheat pastry flour for a slightly nuttier flavor, but keep most of it AP for the best chew.
- Chocolate: If dark chocolate isn’t your jam, use milk chocolate chips or even white chocolate chips. You could also mix in chopped walnuts or pecans for extra crunch.
- Butter: For a dairy-free version, use a plant-based butter substitute, but ensure it’s melted before mixing.
👩🍳 Step-by-Step Directions
Prep Time: 10 minutes | Cooking Time: 30 minutes | Total Time: 40 minutes
- Prep the Oven and Pan: Preheat your oven to 350∘F (175∘C). Grease and line an 8×8-inch baking pan with parchment paper, leaving an overhang on two sides (this makes removal much easier).
- Mix Wet Ingredients: In a large bowl, whisk together the mashed bananas, brown sugar, melted butter, egg, and vanilla extract until the mixture is smooth and well combined.
- Combine Dry Ingredients: In a separate medium bowl, whisk together the flour, baking powder, baking soda, and salt.
- Combine Batter: Gradually add the dry ingredients to the wet ingredients, mixing with a wooden spoon or rubber spatula until just combined. Stop mixing the moment you no longer see streaks of dry flour. Do not overmix!
- Add Chocolate: Gently fold in the dark chocolate chunks, reserving a few for topping if you want a professional look.
- Bake: Pour the batter into the prepared baking pan and spread it evenly. Sprinkle the remaining chocolate on top. Bake for 25–30 minutes, or until a toothpick inserted into the center comes out with a few moist crumbs attached. The edges should look set, but the center should be slightly soft.
- Cool: Allow the blondies to cool completely in the pan before lifting them out using the parchment paper overhang. This is essential for achieving a perfect, clean-cut, chewy texture. Slice into 9 squares.
Tips for Success
- Use Very Ripe Bananas: The blacker the spots, the better the flavor. Ripe bananas are sweeter and have a softer texture that incorporates better into the batter.
- Don’t Overbake: The biggest mistake with blondies is overbaking. The center should look slightly underdone and soft when you pull it out of the oven. It will continue to set as it cools, giving you that fudgy center.
- Cool Completely: Seriously, I mean it. If you cut into them warm, they will fall apart and lose their signature chew. Patience is a virtue, especially when it comes to blondies.
Serving Suggestions and Pairings
These Banana Bread Blondies are fantastic on their own, but they are absolutely transformative when served warm with a scoop of vanilla bean ice cream.
- Dessert Toppings: Drizzle a little caramel sauce or a spread of peanut butter on top for extra decadence.
- A Perfect Companion: Serve these alongside a refreshing glass of The Slippery Drank is My Favorite Sweet Sipper for Dessert-Inspired Vibes for a full dessert experience.
Nutritional Information (Per Serving)
| Metric | Amount |
| Kcal | 220 kcal |
| Servings | 9 blondies |
Export to Sheets
Note: This is an estimated nutritional breakdown based on the ingredients list.
Storage and Leftover Tips
Blondies are a fantastic make-ahead treat!
- Countertop: Store the cooled, uncut blondies in an airtight container at room temperature for up to 3 days.
- Freezing: Slice the cooled blondies, wrap each one individually in plastic wrap, and place them in a freezer-safe zip-top bag. They will keep in the freezer for up to 3 months. Thaw overnight on the counter or microwave briefly for a warm, gooey treat.
More Recipes You Will Love
If you’re a fan of easy, sweet treats, you need to check out a few of my other low-effort, high-reward dessert recipes:
- For an equally chewy treat: These Chocolate Chip Cookie Bites Are My Favorite Little Treat to Bake Anytime
- If you need a decadent no-bake option: This Brownie Batter Dip Is My Favorite No-Bake Dessert For Instant Chocolate Cravings
- Another summer no-bake winner: This Easy Ice Cream Sandwich Cake Is My Favorite No-Bake Summer Dessert
Final Thoughts
These Banana Bread Blondies are the perfect solution to two classic problems: a sudden craving for a chewy dessert and a counter full of ripe bananas. They require minimal effort, minimal time, and maximum gratification. Trust me, once you make these, you’ll start buying extra bananas just so they can ripen enough for the next batch.
Give this recipe a try, and let me know how it goes! Tag @chefmaniac on social media and tell me if you’re a purist or if you added nuts. Happy baking!


Leave a Reply