BBQ Bacon Cheddar Bombs: The Ultimate 30-Minute Appetizer
By Jason Griffith
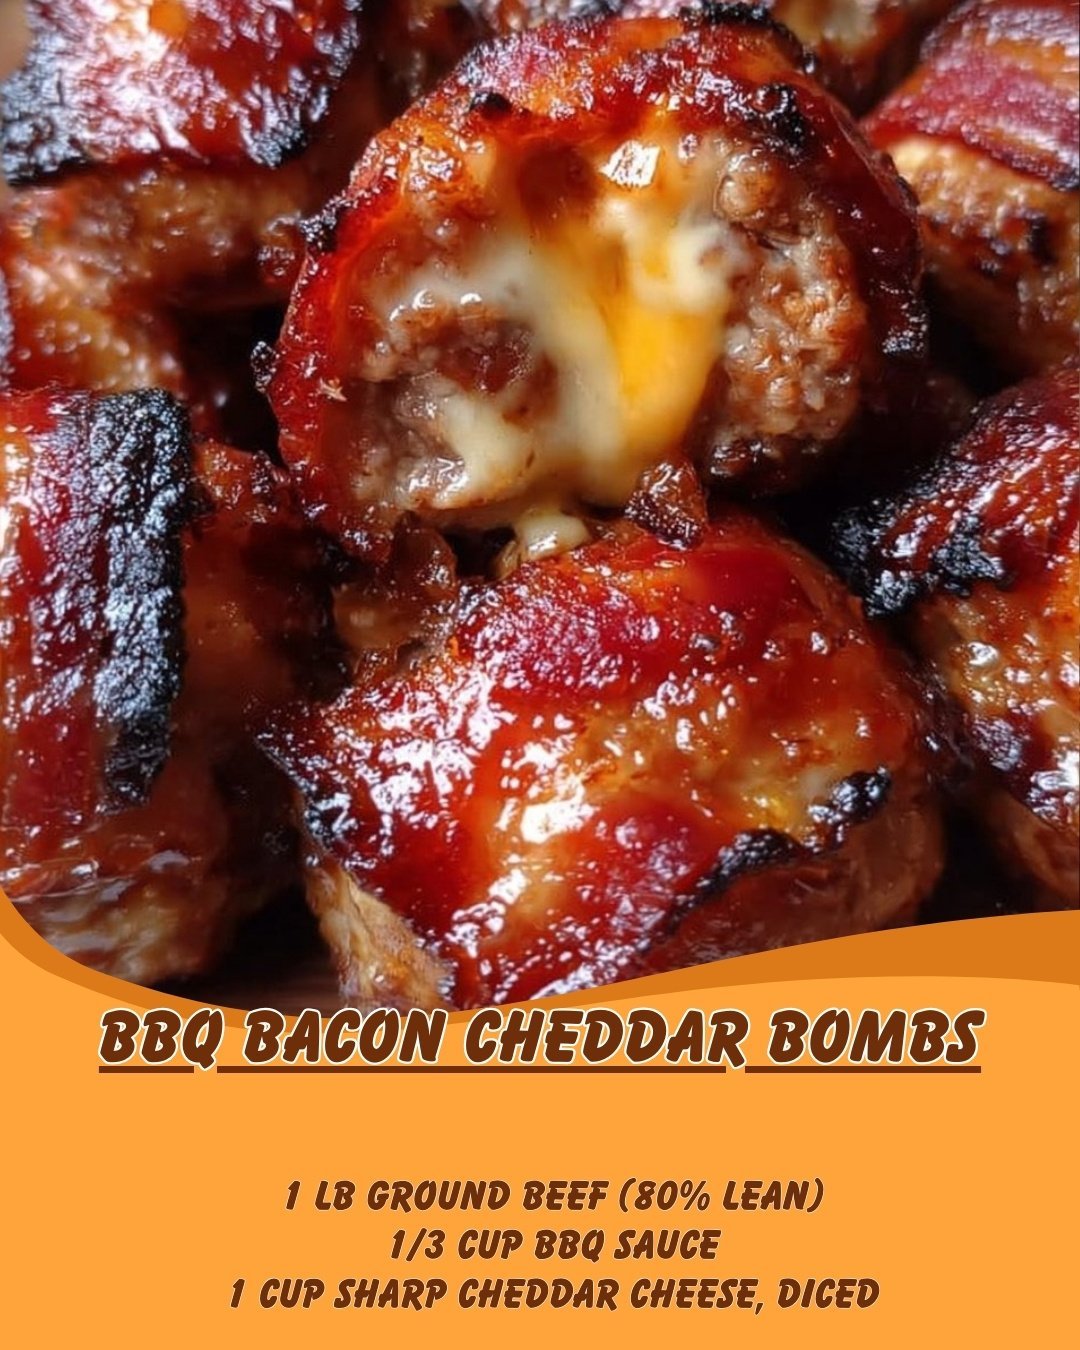
Some recipes are just meant to be. They hit all the right notes: savory meat, smoky bacon, tangy BBQ sauce, and a molten, gooey center of sharp cheddar cheese. These BBQ Bacon Cheddar Bombs are one of those recipes. They are, quite simply, my go-to appetizer for game days, parties, or any time I need a seriously satisfying, flavor-packed bite that disappears fast.
Forget complicated techniques. This is a five-ingredient wonder that comes together in minutes and bakes up into perfect little flavor explosions. You get the crunch of crisp bacon, the tang of barbecue, and that glorious cheese pull that makes everyone reach for another one.
Why I Love This Recipe
What’s not to love? I’ll break it down for you:
- Total Crowd-Pleaser: These bombs have universal appeal. They’re essentially miniature, elevated cheeseburgers wrapped in bacon. Kids love them, adults devour them.
- Easy & Fast: With just five ingredients and a simple assembly process, you can have these in the oven in under 15 minutes. It’s perfect for last-minute snacking or when you’re already juggling other dishes.
- Cheesy Surprise: The best part is the diced sharp cheddar tucked inside. It stays perfectly melted and gooey, making every bite a delightful surprise. You don’t get that from a standard meatball.
Ingredients
| Ingredient | Quantity | Notes |
| Ground Beef (80% lean) | 1 lb | The 80/20 blend is best for flavor and moisture. |
| BBQ Sauce | 1/3 cup | Use your favorite smoky and tangy variety. |
| Sharp Cheddar Cheese | 1 cup | Diced into 1/2 to 3/4-inch cubes for the center. |
| Bacon | 8 slices | Regular cut works best; thick-cut can be hard to wrap. |
| Salt and Pepper | To taste | Start with about 1/2 teaspoon of each. |
Export to Sheets
Swaps and Notes
- Cheese: Don’t like cheddar? Pepper Jack adds a little heat, or Monterey Jack offers a milder, extra-gooey melt.
- Meat: You can swap the ground beef for ground turkey or a 50/50 mix of beef and ground pork for a different flavor profile.
- BBQ Sauce: Want more heat? Stir in 1 teaspoon of Worcestershire sauce or a dash of hot sauce into the beef mixture. For a sweeter flavor, use a molasses-based BBQ sauce.
- Gluten-Free: This recipe is naturally gluten-free, but always check the label on your BBQ sauce to be sure.
Step-by-Step Directions
- Prep the Oven: Preheat your oven to 400°F (200°C) so it’s good and hot by the time you’re ready.
- Mix the Meat: In a mixing bowl, combine the ground beef, BBQ sauce, a sprinkle of salt, and some freshly ground pepper. Mix everything gently with your hands until it’s just blended. Be careful not to overmix, as this can make the bombs tough.
- Form the Patty: Take a bit of the beef mixture and flatten it right in your palm—think mini burger patty size, large enough to cup the cheese.
- Add the Cheese: Place a cube of sharp cheddar right in the center of that beef.
- Wrap the Bomb: Wrap the meat around the cheese, forming a nice, tight ball. You want the cheese totally tucked away in the middle so it doesn’t leak out during baking.
- Bacon Time: Take a slice of bacon and wrap it all the way around the meatball, overlapping the ends slightly. If the bacon tries to unwrap, just secure it with a toothpick.
- Bake: Nestle your bacon-wrapped balls onto a baking sheet, giving them a little space. Slide the baking sheet into your preheated oven, and let them bake for 20-25 minutes, until the bacon is crisp and the meatballs are perfectly cooked through (internal temperature should be 160°F/71°C).
- Serve: Let them cool for just a minute or two (the cheese will be molten!) and serve these BBQ Bacon Cheddar Bombs while they’re hot and gooey. Don’t forget to remove the toothpicks before serving!
Tips for Success
- Cold Cheese is Key: Make sure your cheddar cubes are cold when you wrap them. This helps them hold their shape and prevents them from melting out too quickly during assembly.
- Don’t Overmix: When combining the ground beef and BBQ sauce, mix just until combined. Overmixing compresses the meat fibers, resulting in a tougher meatball.
- Secure the Bacon: That toothpick isn’t just for looks. It’s a critical tool to ensure the bacon stays snugly wrapped around the bomb, giving you that perfect, crispy exterior.
- Baking Surface: For extra-crispy bacon, you can place a wire rack on top of your baking sheet. This allows the fat to drain away from the bombs, crisping the bottom of the bacon.
Serving Suggestions and Pairings
These savory bombs are amazing on their own, but they really shine when served with some great sides and drinks.
- Dipping Sauces: An extra bowl of your favorite BBQ sauce is a must! You can also serve them with ranch dressing or a tangy honey mustard.
- Appetizer Spread: If you’re building out a party menu, pair them with other easy-to-grab bites like This Crockpot Nacho Dip is the Reason I Never Have Leftovers or These Totchos are My Favorite Party Food Hack—Tater Tot Nachos for the Win!.
- Main Dish Pairing: Serving these as a side? They go perfectly with grilled chicken or even some Easy Cheesy Chicken Sliders with Marinara Garlic Butter.
- Drinks: A cold lager beer or a sweet, bright beverage like This Blueberry Lemonade is My Favorite Refreshing Drink for Sunny Days is the perfect contrast to the richness of the meat and bacon.
Nutritional Information (Approximate, Per Serving)
Note: This is an estimation and will vary based on specific ingredient brands and quantities used. Based on 8 servings.
| Nutrient | Amount |
| Calories | 280-300 kcal |
| Protein | 20g |
| Fat | 20-22g |
| Saturated Fat | 8-10g |
| Carbohydrates | 3-5g |
Export to Sheets
Storage and Leftover Tips
- Storage: Once cooled, store any leftover BBQ Bacon Cheddar Bombs in an airtight container in the refrigerator for up to 3 days.
- Reheating: The best way to reheat them is in a toaster oven or a standard oven at 350°F (175°C) for 10-15 minutes. This ensures the bacon gets crispy again and the cheese melts nicely without drying out the meat. The microwave will work, but the bacon will lose its crunch.
- Freezing (Uncooked): You can easily prep a batch and freeze them! Assemble the bombs completely (with bacon and toothpick), then place them on a baking sheet to freeze for about 1 hour. Once solid, transfer them to a freezer-safe bag or container. They will keep for up to 3 months. To bake from frozen, increase the cooking time by about 10-15 minutes.
More Recipes You Will Love
If you enjoy these easy, cheesy, crowd-pleasing appetizers, you’ll definitely want to try these other favorites:
- This Baked Brie Appetizer is My Favorite Effortless Way to Impress Guests
- Easy Cheesy Chicken Sliders with Marinara Garlic Butter
- These Totchos are My Favorite Party Food Hack—Tater Tot Nachos for the Win!
Final Thoughts
These BBQ Bacon Cheddar Bombs are a prime example of simple food done perfectly. They prove that you don’t need a massive ingredient list or hours of prep time to create something truly memorable. They deliver a massive punch of flavor in a handheld package, making them the MVP of any appetizer lineup.
Try these out at your next gathering and let me know how quickly they disappear! What’s your favorite sauce to dunk them in? Drop a comment below and share your success stories!
— Jason Griffith, Chef Maniac


Leave a Reply