Easy Cherry Bars Recipe for a Buttery, Sweet, and Festive Dessert
Print it, save it, or add it to your recipe binder.
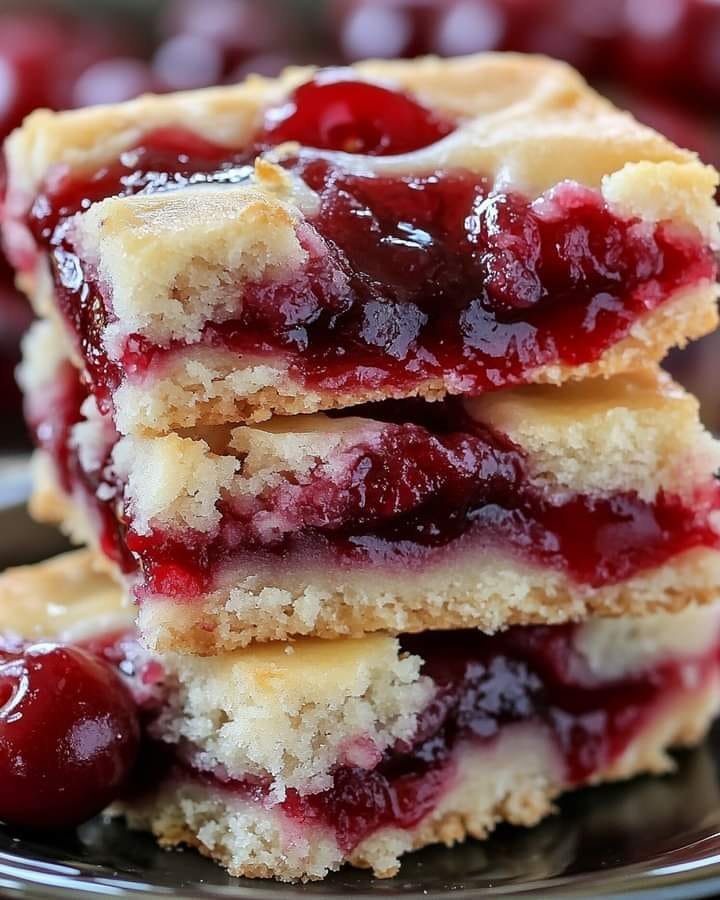
Cherry Bars
There is something about Cherry Bars that feels instantly festive. Maybe it is the bright ruby-red filling peeking through the buttery layers, or maybe it is how easily they fit into any dessert spread, from holiday gatherings to cookie swaps to casual weekend baking. Whatever the reason, these bars have a way of standing out on the table while still being wonderfully simple to make.
What I love most about this recipe is the balance of textures and flavors. The base is soft and buttery, the cherry layer brings sweetness with a little tartness, and the crumble topping bakes up golden and tender with just the right amount of richness. Add a light glaze on top, and you have a dessert that looks bakery-worthy without requiring complicated steps or specialty ingredients.
These bars are perfect when you want something sliceable, shareable, and dependable. They travel well, they look beautiful arranged on a platter, and they taste just as good with coffee in the afternoon as they do after a big holiday meal.
Why I Love This Recipe
I love this recipe because it delivers big seasonal dessert energy with very little stress. Using cherry pie filling keeps things easy, while the almond extract gives the fruit layer that extra special flavor that makes people ask what your secret is.
It is also one of those desserts that works for nearly every occasion. You can dress it up with glaze for a holiday tray or keep it simple for an everyday treat. If you enjoy handheld desserts with a comforting, crowd-pleasing feel, recipes like These Pecan Pie Bars Are My Favorite Make-Ahead Holiday Dessert prove just how useful bar desserts can be during busy baking seasons.
Ingredients
For the Base
- 1 cup (2 sticks) unsalted butter, softened
- 1/2 cup granulated sugar
- 1 large egg
- 2 cups all-purpose flour
- 1/2 teaspoon salt
For the Cherry Layer
- 1 can (21 oz) cherry pie filling
- 1/4 teaspoon almond extract
For the Crumble Topping
- 1 cup all-purpose flour
- 1/2 cup granulated sugar
- 1/2 cup (1 stick) unsalted butter, chilled and cubed
Optional Glaze
- 1 cup powdered sugar
- 2 tablespoons milk or lemon juice
Swaps and Notes
Cherry pie filling is the easy star here, but you can absolutely experiment with other fruit fillings when you want a variation. Raspberry or blueberry would also be delicious, though cherry has that classic holiday look and flavor that makes these especially eye-catching.
The almond extract is a small ingredient that makes a big difference. Cherry and almond are a natural pairing, and even a quarter teaspoon adds warmth and depth without overpowering the fruit.
For the glaze, milk gives you a classic sweet finish, while lemon juice adds a brighter flavor that helps balance the richness of the butter. Either works beautifully depending on the flavor profile you want.

Easy Cherry Bars Recipe for a Buttery, Sweet, and Festive Dessert
1 cup (2 sticks) unsalted butter, softened
Prep: min | Cook: min | Total: min
Servings:
Ingredients
- For the Base:
- 1 cup (2 sticks) unsalted butter, softened
- 1/2 cup granulated sugar
- 1 large egg
- 2 cups all-purpose flour
- 1/2 teaspoon salt
- For the Cherry Layer:
- 1 can (21 oz) cherry pie filling
- 1/4 teaspoon almond extract
- For the Crumble Topping:
- 1 cup all-purpose flour
- 1/2 cup (1 stick) unsalted butter, chilled and cubed
- Optional Glaze:
- 1 cup powdered sugar
- 2 tablespoons milk or lemon juice
Instructions
- Prepare the base: Preheat your oven to 350°F (175°C). Grease and line a 9x13-inch baking pan with parchment paper for easy removal later.
- In a large mixing bowl, cream together the softened butter and granulated sugar until light and fluffy. Beat in the egg. Gradually add the flour and salt, mixing until a soft dough forms. Press the dough evenly into the bottom of the prepared pan.
- Add the cherry layer: In a small bowl, stir the cherry pie filling together with the almond extract. Spread the mixture evenly over the dough, making sure the fruit reaches all the corners.
- Make the crumble topping: In another bowl, combine the flour and sugar. Cut in the chilled butter with a pastry cutter or fork until the mixture looks like coarse crumbs. Sprinkle the crumble evenly over the cherry layer.
- Bake: Bake for 35 to 40 minutes, or until the top is lightly golden brown and the filling is bubbling slightly around the edges. Let the bars cool completely in the pan before glazing or slicing.
- Glaze if desired: In a small bowl, whisk together the powdered sugar and milk or lemon juice until smooth. Drizzle the glaze over the cooled bars.
- Slice and serve: Cut into squares or rectangles and serve. These bars are especially pretty on a dessert tray because of their vibrant cherry layer and delicate glaze.
Nutrition
- Calories: 390
- Fat: 21g
- Carbs: 48g
- Protein: 3g
Rate This Recipe
Average Rating: 0 (0 votes)
How to Make Cherry Bars
1. Prepare the base
Preheat your oven to 350°F (175°C). Grease and line a 9×13-inch baking pan with parchment paper for easy removal later.
In a large mixing bowl, cream together the softened butter and granulated sugar until light and fluffy. Beat in the egg. Gradually add the flour and salt, mixing until a soft dough forms. Press the dough evenly into the bottom of the prepared pan.
2. Add the cherry layer
In a small bowl, stir the cherry pie filling together with the almond extract. Spread the mixture evenly over the dough, making sure the fruit reaches all the corners.
3. Make the crumble topping
In another bowl, combine the flour and sugar. Cut in the chilled butter with a pastry cutter or fork until the mixture looks like coarse crumbs. Sprinkle the crumble evenly over the cherry layer.
4. Bake
Bake for 35 to 40 minutes, or until the top is lightly golden brown and the filling is bubbling slightly around the edges. Let the bars cool completely in the pan before glazing or slicing.
5. Glaze if desired
In a small bowl, whisk together the powdered sugar and milk or lemon juice until smooth. Drizzle the glaze over the cooled bars.
6. Slice and serve
Cut into squares or rectangles and serve. These bars are especially pretty on a dessert tray because of their vibrant cherry layer and delicate glaze.
Tips for Success
Make sure the butter for the base is properly softened, not melted. Soft butter creams better with sugar and helps create a tender, even crust.
When making the crumble topping, keep the butter chilled so the topping stays crumbly instead of turning into a paste. That is what gives you those lovely buttery clusters on top after baking.
Let the bars cool completely before slicing. This is one of the most important steps because it gives the cherry layer time to set and helps you get clean, neat bars instead of messy ones.
If you are making them for a party or holiday tray, a parchment-lined pan makes it much easier to lift the whole batch out before cutting.
Serving Suggestions and Pairings
Cherry Bars are wonderful on their own, but they also fit beautifully into a larger dessert spread. For a festive baking tray, pair them with These Snow Globe Cookies Are My Favorite Holiday Baking Project Ever for a fun holiday touch and These Chocolate Chip Cookie Bites Are My Favorite Little Treat to Bake Anytime for a classic favorite.
If you are building out a seasonal dessert table, they also go wonderfully alongside These Caramel Apple Pie Cookies Are My Favorite Fall Treat in Bite-Sized Form or a creamy make-ahead dessert like This Pumpkin Delight Dessert Is My Favorite No-Bake Fall Treat.
Serve these bars with hot coffee, tea, or even a cold glass of milk for a simple but satisfying dessert moment.
Nutritional Information Per Serving
Approximate nutritional values per bar:
- Calories: 390
- Fat: 21g
- Carbohydrates: 48g
- Protein: 3g
- Sugar: 28g
- Sodium: 130mg
These values are estimates and may vary depending on the specific pie filling and glaze ingredients used.
Storage and Leftover Tips
Store Cherry Bars in an airtight container at room temperature for up to 2 days or in the refrigerator for up to 5 days. If you are stacking them, place parchment paper between layers to keep the glaze and topping from sticking.
These bars are great for making ahead, which is one more reason they are so useful during the holidays. You can bake them a day in advance and glaze them once fully cooled, or wait and add the glaze just before serving for the freshest look.
They also freeze surprisingly well. Wrap individual bars or the full slab tightly, then freeze for up to 2 months. Thaw in the refrigerator overnight before serving.
More Recipes You Will Love
If you love fruity, festive, and crowd-friendly desserts, here are a few more favorites to try:
- These Pecan Pie Bars Are My Favorite Make-Ahead Holiday Dessert
- These Caramel Apple Pie Cookies Are My Favorite Fall Treat in Bite-Sized Form
- This Pumpkin Delight Dessert Is My Favorite No-Bake Fall Treat
- These Chocolate Chip Cookie Bites Are My Favorite Little Treat to Bake Anytime
- These Snow Globe Cookies Are My Favorite Holiday Baking Project Ever
Final Thoughts
Cherry Bars are one of those classic desserts that feel both nostalgic and dependable. They are buttery, sweet, easy to slice, and packed with bright cherry flavor that instantly makes any dessert table feel more festive. Whether you are baking for a holiday gathering, putting together a cookie swap platter, or just craving something cheerful and delicious, this recipe is a fantastic one to keep on hand.
If you make these Cherry Bars, I would love to hear how they turned out. Did you go with the lemon glaze or the milk glaze? Did you serve them for a holiday party or save them for a cozy weekend bake? Share your thoughts, leave your feedback, and follow along for more easy, crave-worthy recipes from Jason Griffith at Chef Maniac.