

Easy 5-Ingredient Chocolate Peanut Butter Crispy Treats
Print it, save it, or add it to your recipe binder.
There is a specific kind of magic that happens when you combine chocolate and peanut butter. It’s a flavor profile that transcends seasons, moods, and ages. But when you add the nostalgic crunch of toasted rice cereal? Now you’re talking about a masterpiece of textures. These Chocolate Peanut Butter Rice Krispie Cups are my answer to the craving for something sweet, salty, and satisfying without ever having to turn on the oven.
Why I Love This Recipe
If you’ve spent any time on Chefmaniac, you know I am a sucker for a solid no-bake dessert. Whether I’m whipping up this edible cookie dough or a batch of no-bake monster cookie energy balls, there is something so rewarding about a treat that comes together in minutes.
These cups are effectively a cross between a traditional Rice Krispie treat and a gourmet peanut butter cup. Unlike the standard marshmallow-based squares, these use honey and peanut butter as the binder, resulting in a richer, more sophisticated flavor. They are sturdy enough for lunchboxes but decadent enough for a holiday dessert spread.
Ingredients
To get the perfect balance of “crunch” and “melt-in-your-mouth,” you only need five simple pantry staples:
- 3 cups Rice Krispies: The backbone of the crunch. Ensure your cereal is fresh for the best texture.
- 1.5 cups Chocolate Chips: Semi-sweet is my go-to, but milk chocolate or dark chocolate works beautifully depending on your sugar preference.
- 1 cup Chunky Peanut Butter: I prefer chunky for the added texture, but creamy works perfectly if you want a smoother bite.
- 6 tbsp Honey: This acts as our natural sweetener and the “glue” that keeps the cereal together without being cloyingly sweet.
- 1/8 tsp Salt: Just a pinch to brighten the chocolate and balance the honey.
Swaps and Notes
- The Nut Butter: If you have an allergy, sunflower butter is a fantastic 1:1 swap. If you want to lean into the nuttiness, try using the base method from these no-bake peanut butter oatmeal bars.
- The Sweetener: While honey provides a great floral note, maple syrup can be substituted for a vegan-friendly version.
- Chocolate: If you want a “marbled” look, you can swirl in a bit of white chocolate or butterscotch chips.
Step-by-Step Instructions
1. Prepare the Pan
Line a standard 12-slot muffin tin with paper or silicone liners. This is a crucial step—these cups are sticky until they are fully set, and trying to pry them out of an unlined tin is a headache you don’t want.
2. Melt the Binder
In a medium saucepan over low heat, combine the peanut butter, honey, and salt. Stir constantly until the mixture is completely smooth and just begins to bubble slightly. Do not let it boil vigorously, or the honey may become too hard once cooled.
3. Add the Crunch
Remove the pan from the heat. Gently fold in the Rice Krispies. Use a spatula to ensure every single piece of cereal is coated in that golden peanut butter mixture.
4. Form the Cups
Spoon the mixture evenly into the prepared muffin liners. Use the back of a spoon (or a lightly greased measuring cup) to press the mixture down firmly. You want a solid base so the chocolate doesn’t just seep to the bottom.
5. Melt the Chocolate
In a microwave-safe bowl, heat the chocolate chips in 30-second intervals, stirring in between, until silky smooth. If the chocolate is too thick, you can add a half-teaspoon of coconut oil to thin it out.
6. Assemble and Chill
Pour a generous tablespoon of melted chocolate over the top of each peanut butter cereal cup. Use the back of a spoon to spread the chocolate to the edges.
7. The Final Set
Place the muffin tin in the refrigerator for at least one hour. This gives the honey-peanut butter base time to firm up and the chocolate time to snap. Once set, peel off the liners and enjoy!
Tips for Success
- Press Firmly: If you don’t press the cereal mixture down enough, the cups might crumble when you bite into them.
- Don’t Overheat the Honey: Over-boiling honey can lead to a very hard, “tooth-breaking” texture. Keep it to a gentle melt.
- Silicone Liners: If you make no-bake treats often, invest in silicone muffin liners. They pop right off without any sticking or wasted paper.
Serving Suggestions and Pairings
These cups are quite rich, so I love serving them alongside a cold glass of milk or a hot cup of coffee. If you are putting together a dessert board for a party, they pair excellently with other “bark” style treats like this smores bark.
If you’re looking to host a full “No-Bake Night,” consider serving these alongside a platter of the best peanut butter brownies for a true peanut butter lover’s dream.
Storage and Leftover Tips
- Room Temperature: These will stay fresh in an airtight container for about 3 days, though they may soften if your kitchen is warm.
- Refrigerated: My preferred method. Keep them in the fridge for up to 2 weeks. The cold keeps the chocolate crisp and the base chewy.
- Freezer: You can freeze these for up to 3 months! Just wrap them individually in plastic wrap and store them in a freezer bag. They are actually delicious eaten straight from the freezer.
Nutritional Information (Per Serving)
Estimate based on 12 servings
- Calories: 245 kcal
- Total Fat: 14g
- Saturated Fat: 5g
- Carbohydrates: 28g
- Sugar: 18g
- Protein: 5g
- Fiber: 2g
Final Thoughts
These Chocolate Peanut Butter Rice Krispie Cups are a testament to the fact that you don’t need a professional pastry kitchen to make something spectacular. They are reliable, customizable, and always the first thing to disappear at a potluck.
I’d love to hear how yours turned out! Did you use creamy or chunky peanut butter? Did you add a sprinkle of sea salt on top? Let me know in the comments below or tag us on social media. Happy “baking” (without the oven)!

Easy 5-Ingredient Chocolate Peanut Butter Crispy Treats
Chocolate Peanut Butter Rice Krispie Cups
Prep: min | Cook: min | Total: min
Servings:
Ingredients
Instructions
- Prepare the Pan: Line a standard 12-slot muffin tin with paper or silicone liners. This is a crucial step—these cups are sticky until they are fully set, and trying to pry them out of an unlined tin is a headache you don't want.
- Melt the Binder: In a medium saucepan over low heat, combine the peanut butter, honey, and salt. Stir constantly until the mixture is completely smooth and just begins to bubble slightly. Do not let it boil vigorously, or the honey may become too hard once cooled.
- Add the Crunch: Remove the pan from the heat. Gently fold in the Rice Krispies. Use a spatula to ensure every single piece of cereal is coated in that golden peanut butter mixture.
- Form the Cups: Spoon the mixture evenly into the prepared muffin liners. Use the back of a spoon (or a lightly greased measuring cup) to press the mixture down firmly. You want a solid base so the chocolate doesn't just seep to the bottom.
- Melt the Chocolate: In a microwave-safe bowl, heat the chocolate chips in 30-second intervals, stirring in between, until silky smooth. If the chocolate is too thick, you can add a half-teaspoon of coconut oil to thin it out.
- Assemble and Chill: Pour a generous tablespoon of melted chocolate over the top of each peanut butter cereal cup. Use the back of a spoon to spread the chocolate to the edges.
- The Final Set: Place the muffin tin in the refrigerator for at least one hour. This gives the honey-peanut butter base time to firm up and the chocolate time to snap. Once set, peel off the liners and enjoy!
Nutrition
- Calories: 245 kcal
- Fat: 14g
- Carbs: 28g
- Protein: 5g
Rate This Recipe
Average Rating: 0 (0 votes)
Related posts:
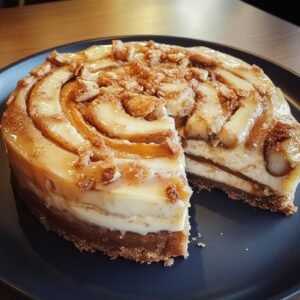 This Cinnamon Roll Honeybun Cheesecake Is the Ultimate Dessert Mashup You Didn’t Know You Needed
 Campfire Blueberry Peach French Toast Casserole – Your New Favorite Breakfast
 Easy Spinach and Ricotta Quiche Recipe for the Perfect Sunday Brunch
 The Secret to Fluffy Vanilla Custard Scones: A Bakery-Style Recipe

