Traditional Canadian Date Squares (Matrimonial Cake): The Ultimate Comfort Treat

Print it, save it, or add it to your recipe binder.
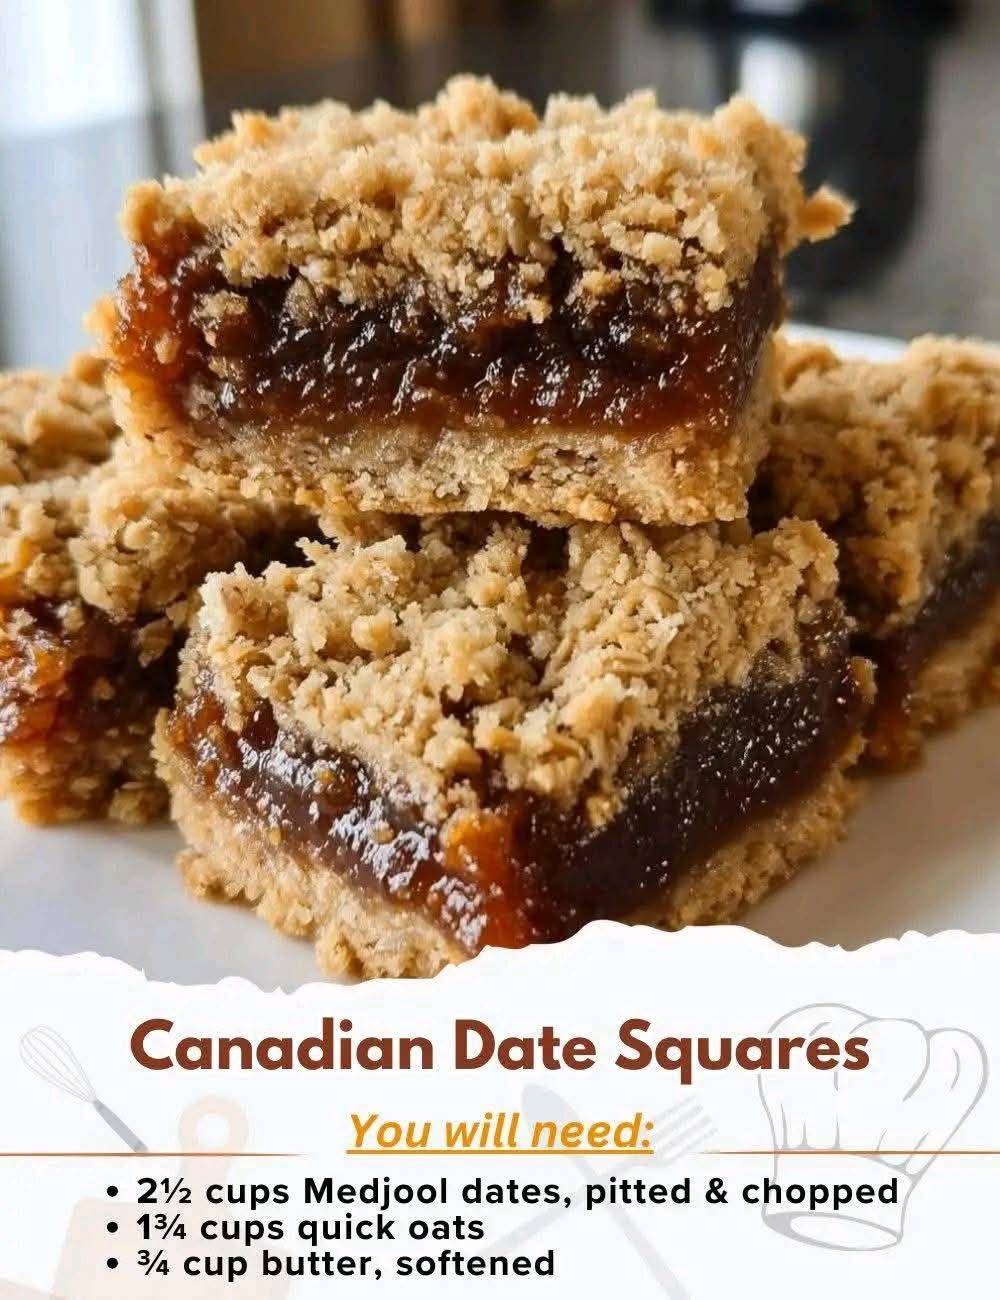
There is something deeply nostalgic about the smell of simmering dates and toasted oats wafting through a kitchen. If you grew up in Canada, you likely know these as Carrés de Dattes, but they are also affectionately known across the prairies as “Matrimonial Cake.” Whatever you call them, these bars are a staple of Canadian baking for a reason: they perfectly balance a rich, jammy fruit filling with a salty, buttery oat crumble.
Why I Love This Recipe
I’ve tasted a lot of desserts, from decadent Pecan Pie Bars to fudgy Peanut Butter Brownies, but I always come back to the date square.
What makes this recipe a winner is the texture. Using Medjool dates creates a filling that is naturally caramel-like without being cloyingly sweet. The addition of a little lemon juice brightens the fruit, while the baking soda helps break down the dates into a smooth, spreadable paste. It’s hearty enough for a mid-afternoon snack but sweet enough to serve as a proper dessert.
Ingredients
For the Date Filling:
- 2 1⁄2 cups Medjool dates: Pitted and roughly chopped.
- 1 cup water: To hydrate and soften the fruit.
- 2 tbsp lemon juice: Adds a necessary acidic zing.
- 2 tbsp brown sugar: Just enough to enhance the natural sugars.
- 1⁄2 tsp baking soda: This is the secret to a silky smooth filling.
For the Oat Layers:
- 1 3⁄4 cups quick oats: Provides the classic chewy texture.
- 1 cup all-purpose flour: The binding agent for our crumble.
- 3 ⁄4 cup brown sugar: Packed for a deep, molasses-like sweetness.
- 1 ⁄4 tsp baking powder: Gives the crumble a slight lift.
- 3 ⁄4 cup butter: Softened to room temperature for easy mixing.
Swaps and Notes
- The Oats: I recommend quick oats over large-flake rolled oats for this specific recipe. Quick oats create a tighter “crust” that holds together better when sliced.
- The Dates: While Medjool dates are the gold standard for their soft texture, regular Deglet Noor dates work too—just simmer them for an extra 2–3 minutes.
- Gluten-Free: You can easily swap the all-purpose flour for a 1:1 gluten-free flour blend and ensure your oats are certified GF.
- Vegan Option: Use a high-quality plant-based butter sticks in place of dairy butter.
Step-by-Step Instructions
- Prep the Station: Prick your oven to 350°F (175°C). Lightly grease an 8×8-inch baking pan and line it with parchment paper, leaving an overhang on the sides for easy removal.
- Simmer the Filling: In a medium saucepan, combine your chopped dates, water, lemon juice, and brown sugar. Cook over medium heat, stirring frequently. As the water evaporates, the dates will break down into a thick paste (about 10 minutes).
- The Secret Step: Remove the pan from the heat and stir in the baking soda. The mixture will foam slightly—this is normal! It softens the date skins perfectly. Set aside to cool.
- Make the Crumble: In a large mixing bowl, whisk together the oats, flour, brown sugar, and baking powder.
- Cut in the Butter: Add the softened butter. Use your fingers or a pastry cutter to work the butter into the dry ingredients until it looks like coarse, damp crumbs.
- Build the Base: Take exactly half of your oat mixture and press it firmly into the bottom of your prepared pan. Pro Tip: Use the bottom of a flat measuring cup to pack it down hard; this prevents the bars from falling apart.
- Layer the Fruit: Spread the cooled date mixture evenly over the base.
- The Topping: Sprinkle the remaining oat mixture over the top. Press down very lightly—just enough to make sure the oats adhere to the jam.
- Bake: Slide the pan into the oven for 30–35 minutes. You’re looking for a beautiful golden-brown color on the edges.
- The Hardest Part: Let the bars cool completely in the pan. If you cut them while warm, they will crumble into a (delicious) mess.
Tips for Success
- Firm Pressure: I can’t emphasize this enough—press that bottom layer firmly! It acts as the foundation for the entire bar.
- The “Clean Cut”: For those perfect bakery-style squares, chill the entire pan in the fridge for an hour after it has reached room temperature before slicing.
- Date Quality: If your dates feel very hard or dry before cooking, soak them in the water for 15 minutes before turning on the heat.
Serving Suggestions and Pairings
These squares are incredibly versatile. I love serving them slightly chilled with a sharp cheddar cheese on the side—a classic Canadian pairing!
If you’re looking for a drink to wash it down, try a Blueberry Lemonade for a summer vibe, or a hot cup of tea for a cozy winter afternoon. If you’re hosting a brunch, these pair beautifully alongside a savory 3-Ingredient Egg Wrap.
Nutritional Information (Per Serving)
- Calories: 280 kcal
- Fat: 11g
- Carbohydrates: 46g
- Fiber: 4g
- Protein: 3g
Storage and Leftover Tips
- Room Temperature: Store in an airtight container for up to 3 days.
- Refrigerated: These actually taste amazing cold! They will stay fresh in the fridge for up to a week.
- Freezer Friendly: These are the ultimate make-ahead treat. Wrap individual squares in plastic wrap and freeze for up to 3 months. Just thaw at room temperature for 20 minutes before enjoying.
More Recipes You Will Love
If you enjoyed these oaty, fruit-filled bars, you have to try these other favorites from the Chef Maniac kitchen:
- No-Bake Peanut Butter Oatmeal Bars – For when you want that oat fix without turning on the oven.
- Chocolate Chip Banana Bread – Another classic way to use up pantry staples.
- Pecan Pie Bars – If you love a buttery shortbread base, these are a must-try.
Final Thoughts
Carrés de Dattes are more than just a dessert; they are a piece of culinary history. Whether you call them date squares or matrimonial cake, they are sure to become a favorite in your household.
Did you try this recipe? I’d love to hear how it turned out! Leave a comment below or tag us on social media. Don’t forget to follow Chef Maniac for more foolproof recipes and kitchen tips!

Traditional Canadian Date Squares (Matrimonial Cake): The Ultimate Comfort Treat
There is something deeply nostalgic about the smell of simmering dates and toasted oats wafting through a kitchen. If you grew up in Canada, you likely know these as
Prep: min | Cook: min | Total: min
Servings:
Ingredients
- For the Date Filling:
- 2 1⁄2 cups Medjool dates: Pitted and roughly chopped.
- 1 cup water: To hydrate and soften the fruit.
- 2 tbsp lemon juice: Adds a necessary acidic zing.
- 2 tbsp brown sugar: Just enough to enhance the natural sugars.
- 1⁄2 tsp baking soda: This is the secret to a silky smooth filling.
- For the Oat Layers:
- 1 3⁄4 cups quick oats: Provides the classic chewy texture.
- 1 cup all-purpose flour: The binding agent for our crumble.
- 3 ⁄4 cup brown sugar: Packed for a deep, molasses-like sweetness.
- 1 ⁄4 tsp baking powder: Gives the crumble a slight lift.
- 3 ⁄4 cup butter: Softened to room temperature for easy mixing.
Instructions
- Prep the : Station: Prick your oven to 350°F (175°C). Lightly grease an 8x8-inch baking pan and line it with parchment paper, leaving an overhang on the sides for easy removal.
- Simmer the : Filling: In a medium saucepan, combine your chopped dates, water, lemon juice, and brown sugar. Cook over medium heat, stirring frequently. As the water evaporates, the dates will break down into a thick paste (about 10 minutes).
- The : Secret Step: Remove the pan from the heat and stir in the baking soda. The mixture will foam slightly—this is normal! It softens the date skins perfectly. Set aside to cool.
- Make the : Crumble: In a large mixing bowl, whisk together the oats, flour, brown sugar, and baking powder.
- Cut in the : Butter: Add the softened butter. Use your fingers or a pastry cutter to work the butter into the dry ingredients until it looks like coarse, damp crumbs.
- Build the : Base: Take exactly half of your oat mixture and press it firmly into the bottom of your prepared pan. Pro Tip: Use the bottom of a flat measuring cup to pack it down hard; this prevents the bars from falling apart.
- Layer the : Fruit: Spread the cooled date mixture evenly over the base.
- The : Topping: Sprinkle the remaining oat mixture over the top. Press down very lightly—just enough to make sure the oats adhere to the jam.
- Bake: Slide the pan into the oven for 30–35 minutes. You’re looking for a beautiful golden-brown color on the edges.
- The : Hardest Part: Let the bars cool completely in the pan. If you cut them while warm, they will crumble into a (delicious) mess.
Nutrition
- Calories: 280 kcal
- Fat: 11g
- Carbs: 46g
- Protein: 3g
Rate This Recipe
Average Rating: 0 (0 votes)