Homemade Payday Candy Bars ❤️❤️
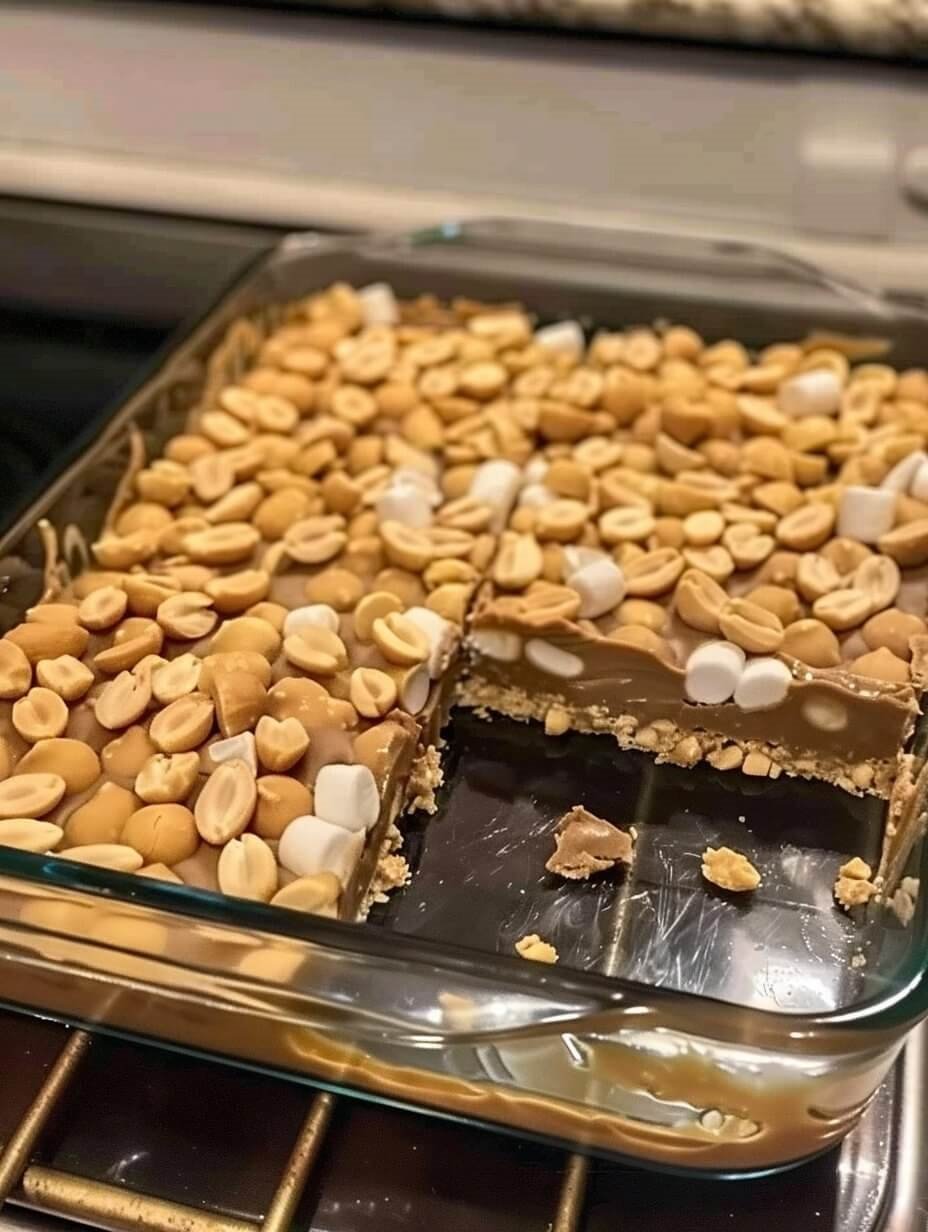
If you’re a fan of salty-sweet snacks that deliver major nostalgia, you’re going to fall in love with these Homemade Payday Candy Bars. With layers of salted peanuts, a creamy peanut butter filling, and gooey marshmallow richness, these bars are an easy no-bake treat that taste just like the original—maybe even better.
Whether you’re craving a childhood classic or need a quick dessert to please a crowd, these bars are the answer. Let’s get into how to whip them up in under 30 minutes, using simple pantry ingredients.
Why I Love This Recipe
Payday candy bars have always been one of my favorite underrated snacks. That mix of crunchy, salty peanuts and sweet, chewy filling hits every flavor and texture note. This homemade version gives you all of that, plus the satisfaction of knowing you made them yourself—with no oven required.
These are perfect for potlucks, lunchbox treats, movie nights, or midnight snacking sessions. Bonus? They store like a dream and taste even better the next day.
Ingredients You’ll Need
- 3 cups salted peanuts, divided
- 2 cups peanut butter chips
- 2 cups mini marshmallows
- 1 (14 oz) can sweetened condensed milk
- 3 tablespoons unsalted butter
- ½ teaspoon vanilla extract
Ingredient Swaps & Tips
- Salted vs. unsalted peanuts: Stick with salted for that signature flavor balance. Roasted peanuts add even more depth.
- Peanut butter chips: You must use these instead of regular peanut butter—they help the bars set with a candy-like texture.
- Add-ins: Want a little twist? Try adding a sprinkle of sea salt on top, or drizzle with melted chocolate for a peanut-chocolate vibe.
How to Make Homemade Payday Candy Bars
- Prep your pan:
Generously grease a 9×13-inch baking dish with butter or nonstick spray, or line it with parchment paper for easier lifting. - Lay down the base:
Spread half the peanuts evenly across the bottom of the prepared dish. - Make the candy filling:
In a large saucepan over medium heat, melt the butter and peanut butter chips, stirring until smooth.
Add the sweetened condensed milk, vanilla extract, and marshmallows, stirring until fully melted and smooth. - Layer it up:
Pour the warm peanut butter-marshmallow mixture evenly over the peanut base.
Immediately sprinkle the remaining 1½ cups of peanuts on top and gently press them in. - Set and slice:
Let the bars cool at room temperature or refrigerate until firm—about 2–3 hours.
Once set, cut into bars and enjoy!
Tips for Payday Bar Success
- Don’t walk away while melting—the peanut butter chips can scorch quickly.
- Press those top peanuts lightly into the surface to make sure they stick.
- Want cleaner cuts? Chill the bars for at least 2 hours, then slice with a hot, sharp knife.
Serving & Pairing Ideas
These bars are great all on their own, but here are some fun pairings:
- With coffee or cold brew for an afternoon pick-me-up
- Tucked into lunchboxes for kids or grown-ups
- As part of a dessert board alongside These Chocolate Chip Cookie Bites and This Edible Cookie Dough
Storage & Leftover Tips
- Room temperature: Store in an airtight container for up to 5 days.
- Fridge: Keeps well chilled for 1–2 weeks—just bring to room temp before eating if you like a softer texture.
- Freezer-friendly: Layer with parchment in a sealed container and freeze for up to 2 months.
More Recipes You’ll Love
- These No-Bake Peanut Butter Oatmeal Bars Are My Favorite Snack to Keep on Hand
- The Best Peanut Butter Brownies I’ve Ever Made (And I’ve Made a Lot)
- This Edible Cookie Dough Is My Favorite No-Bake Treat for Late Night Cravings
- These Chocolate Chip Cookie Bites Are My Favorite Little Treat to Bake Anytime
- This Brownie Batter Dip Is My Favorite No-Bake Dessert for Instant Chocolate Cravings
Final Thoughts
These Homemade Payday Candy Bars are the perfect combination of easy, craveable, and satisfying. They’re proof that with just a few pantry staples, you can whip up something truly irresistible—no oven, no fancy tools, no stress.
Tried this recipe? Let me know how it turned out! Leave a comment, share a photo, or tag @chefmaniac on your favorite social platform. Don’t forget to follow for more no-fuss dessert magic!


Leave a Reply