There is something universally comforting about a perfectly baked chocolate cupcake. It’s the ultimate “cheer up” food, the star of every birthday party, and the one dessert that never stays on the platter for long. But let’s be honest: we’ve all had those cupcakes that look beautiful but taste like dry sponges.
As a professional food writer for ChefManiac, I’ve spent years testing ratios of cocoa to flour, and I am here to tell you that the search for the perfect crumb ends right here. This isn’t just a cupcake; it’s a deep, dark, velvety experience. Whether you’re a seasoned baker or just looking for these cake mix cookies level of ease, this recipe will become your new gold standard.
Why I Love This Recipe
What sets this recipe apart from the thousands of others on the internet is the balance of texture and flavor. By using a combination of baking powder and baking soda, we achieve a lift that is airy yet sturdy enough to hold a mountain of buttercream.
I also love that this recipe uses simple, pantry-staple ingredients. While I’m a huge fan of creative bakes like these hot chocolate cookie cups, sometimes you just need a classic chocolate base that works every single time. The addition of milk provides a creamy richness that water-based recipes often lack, ensuring every bite is ultra-moist.
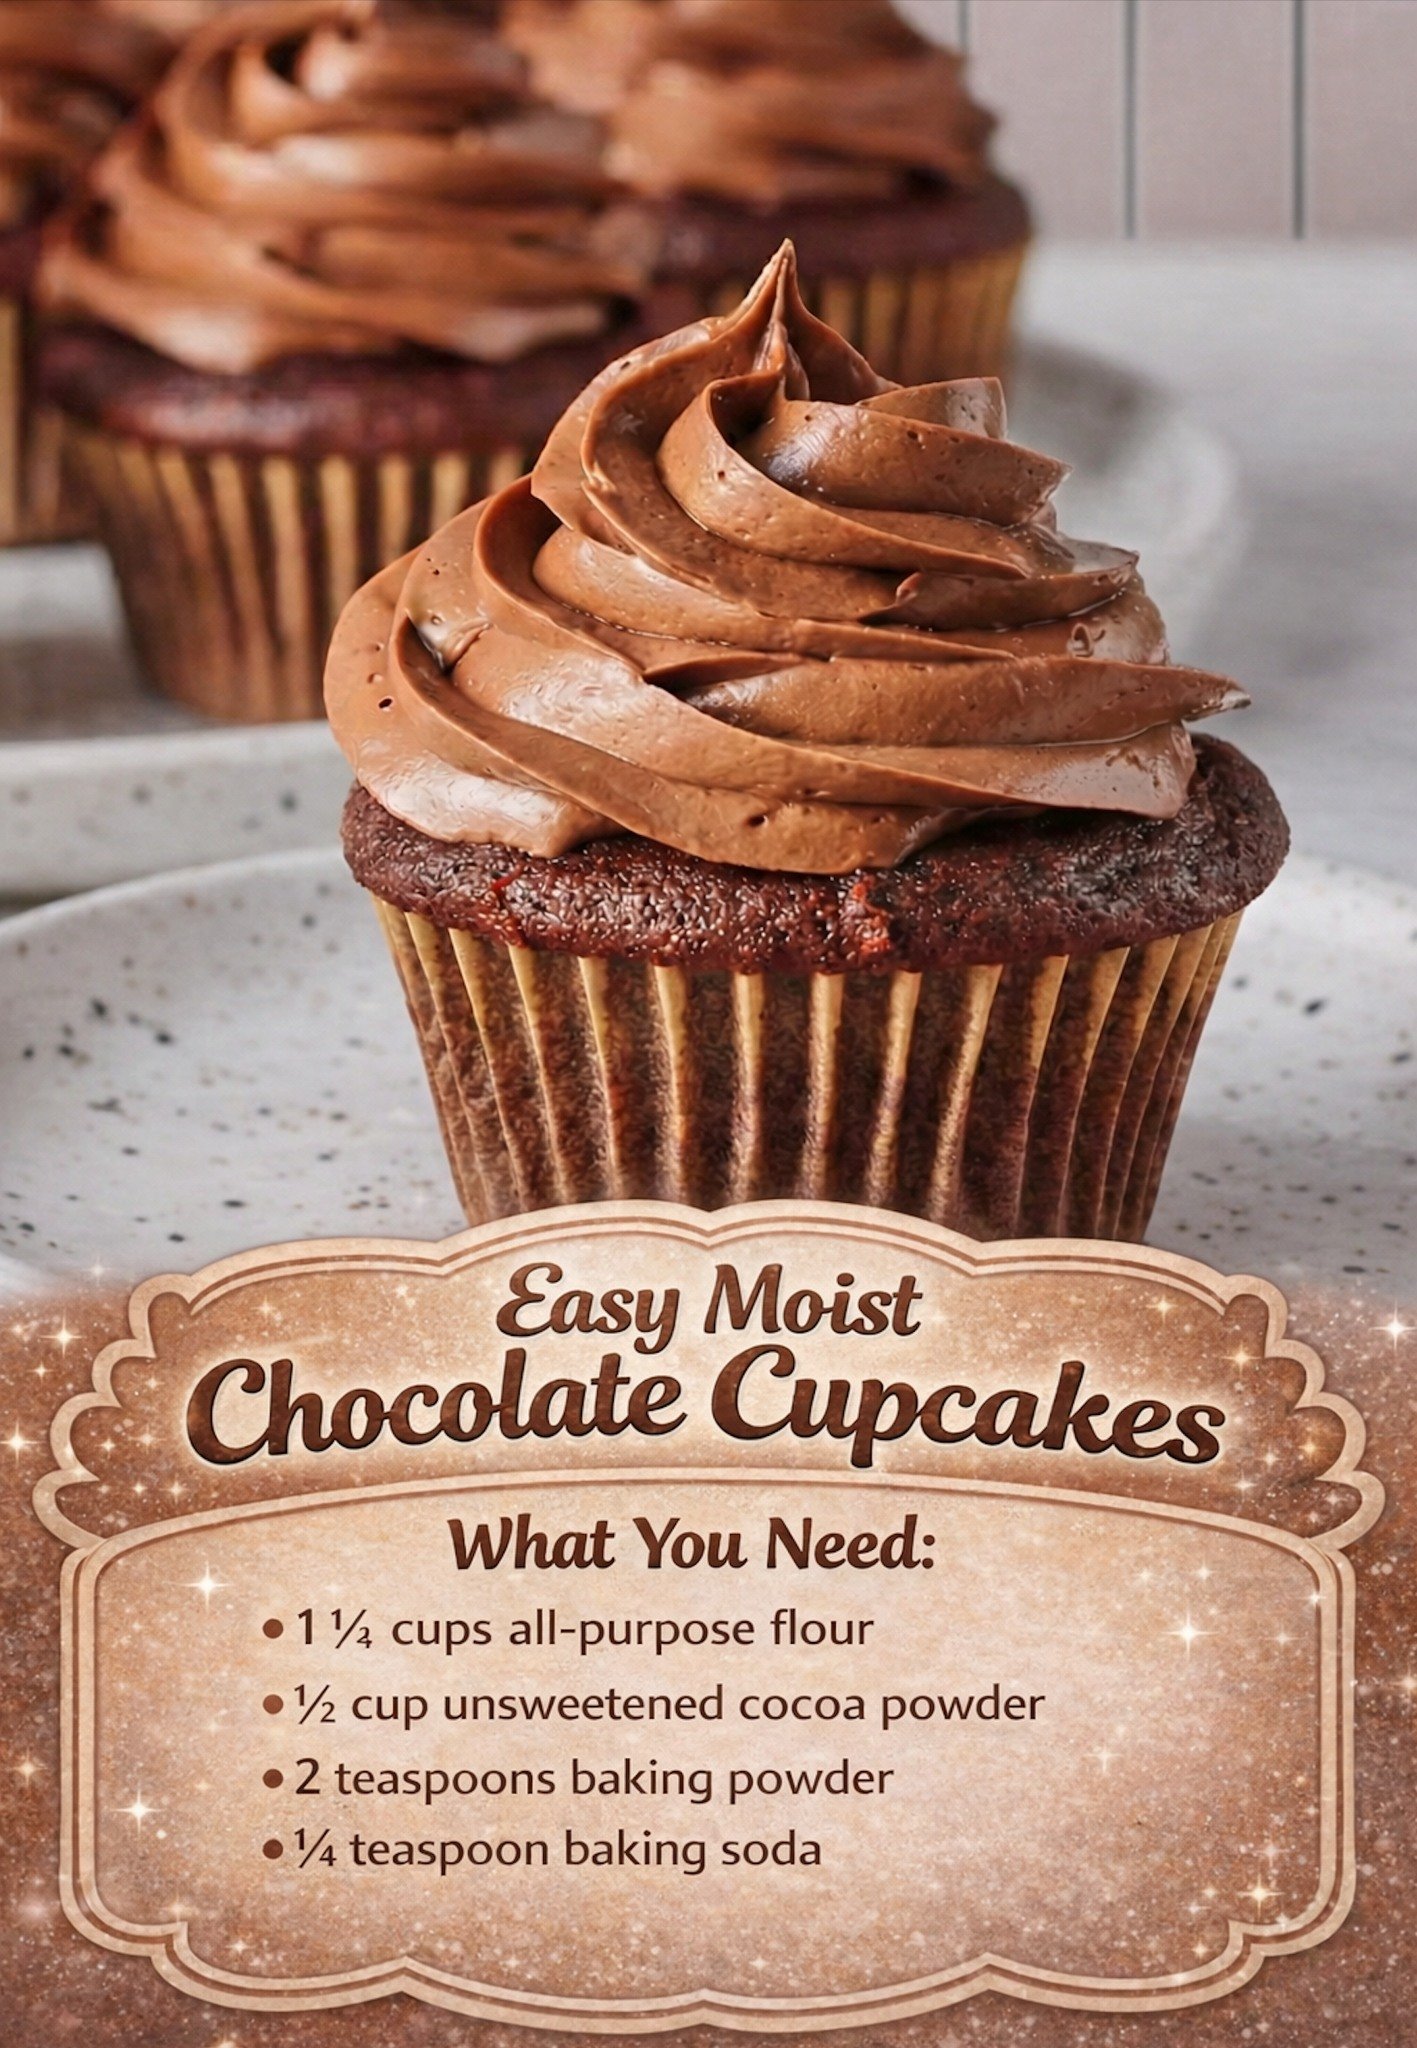
Ingredients You’ll Need
To get that signature bakery finish, quality matters. Ensure your cocoa powder is fresh and your butter is truly softened (not melted!).
- 1¾ cups all-purpose flour: The structural foundation.
- ½ cup unsweetened cocoa powder: For that intense chocolate hit.
- 2 tsp baking powder & ¼ tsp baking soda: Our dual-leavening agents for the perfect rise.
- ⅛ tsp salt: To enhance the sweetness and chocolate notes.
- 1½ cups white sugar: For sweetness and moisture retention.
- 6 tbsp butter, softened: Provides the fat needed for a tender crumb.
- 2 large eggs: Room temperature is best for emulsification.
- ¾ tsp vanilla extract: A flavor booster that rounds out the cocoa.
- 1 cup milk: Whole milk is preferred for the highest fat content and richest texture.
Swaps and Notes
- The Cocoa: You can use Dutch-processed cocoa for a darker, smoother flavor, but natural unsweetened cocoa works perfectly here.
- The Fat: If you are out of butter, you can substitute an equal amount of neutral oil (like vegetable or canola), though you will lose that slight buttery undertone.
- Dairy-Free: You can easily swap the milk for almond or oat milk, and use a vegan butter stick alternative.
- Extra Chocolate: If you are a true chocoholic, feel free to fold in 1/2 cup of mini chocolate chips—similar to the texture I love in these chocolate chip cookie bites.
Step-by-Step Instructions
- Prep the Oven: Preheat your oven to 350°F (175°C). Line a standard 12-cup muffin pan with paper liners. If you have extra batter, you may need a second pan!
- Sift the Dry: In a medium bowl, sift together the flour, cocoa powder, baking powder, baking soda, and salt. Sifting is crucial to prevent “cocoa clumps” in your finished cake.
- Cream the Base: In a separate large bowl (or stand mixer), beat the softened butter and sugar together on medium-high speed until the mixture is light, fluffy, and pale in color.
- Add Eggs & Vanilla: Mix in the eggs one at a time, ensuring the first is fully incorporated before adding the second. Stir in the vanilla extract.
- Combine Carefully: This is the most important step. Add your dry ingredients in two batches, alternating with the milk. Start with half the dry, then all the milk, then the remaining dry. Mix just until the white streaks disappear.
- Fill the Cups: Spoon the batter into the prepared liners. Only fill them about halfway. This prevents the batter from spilling over and creating “mushroom tops.”
- Bake: Place in the center rack and bake for 15–17 minutes. You’ll know they are done when a toothpick inserted into the center comes out clean or with just a few moist crumbs.
- Cool: Let the cupcakes rest in the pan for 5 minutes, then move them to a wire rack. They must be completely cool before you even think about frosting them!
Tips for Success
- Spoon and Level: When measuring your flour and cocoa, don’t scoop directly with the measuring cup. Use a spoon to fill the cup and level it off with a knife. This prevents “packing” the flour, which leads to dry cupcakes.
- Don’t Overmix: Once the flour hits the wet ingredients, gluten starts to develop. Over-mixing leads to a tough, bread-like texture rather than a cake-like one.
- Room Temp Ingredients: Cold eggs or cold milk can cause the softened butter to seize up, resulting in an uneven batter. Set your ingredients out 30 minutes before you start.
- The Secret Ingredient: If you want to take these to the next level, add 1 tsp of espresso powder to your dry ingredients. It won’t make them taste like coffee; it just makes the chocolate taste “more like chocolate.”
Serving Suggestions and Pairings
These cupcakes are versatile enough to handle any frosting, from a salty peanut butter swirl to a light whipped cream.
- For a Summer Party: Serve these alongside a cold glass of this blueberry lemonade to cut through the richness of the chocolate.
- The Ultimate Dessert Table: Pair these with this chocolate chip banana bread for a spread that celebrates everyone’s favorite flavors.
- Frosting Ideas: A classic vanilla bean buttercream or a rich chocolate ganache are the traditional choices.
Nutritional Information (Per Serving)
Based on 12 cupcakes without frosting
| Nutrient | Amount |
| Calories | 210 kcal |
| Total Fat | 7g |
| Saturated Fat | 4g |
| Cholesterol | 45mg |
| Sodium | 160mg |
| Total Carbohydrates | 34g |
| Dietary Fiber | 1.5g |
| Sugars | 22g |
| Protein | 3g |
Export to Sheets
Storage and Leftover Tips
- At Room Temperature: Keep frosted or unfrosted cupcakes in an airtight container for up to 3 days.
- In the Fridge: If your frosting contains cream cheese or heavy cream, store them in the fridge for up to 5 days. Let them sit at room temperature for 20 minutes before eating to soften the butter back up.
- Freezer Friendly: You can freeze unfrosted cupcakes! Wrap them individually in plastic wrap and place them in a freezer bag for up to 3 months. Thaw on the counter when a craving hits.
More Recipes You Will Love
If you enjoyed this baking session, you have to try these other fan-favorites from the ChefManiac kitchen:
- Chocolate Chip Cookie Bites – For when you want chocolate in a tiny, crunchy form.
- Easy Cake Mix Cookies – The ultimate hack for busy weeknights.
- Hot Chocolate Cookie Cups – A cozy, festive twist on the classic cookie.
Final Thoughts
Baking doesn’t have to be complicated to be delicious. This recipe proves that with a few simple techniques and the right ingredients, you can create something better than any store-bought alternative.
Did you try this recipe? I’d love to hear how they turned out! Tag us on social media or leave a comment below with your favorite frosting pairing. Happy baking!


Leave a Reply