The Art of the Swirl: Homemade Pain au Lait Tourbillon au Chocolat
By Jason Griffith
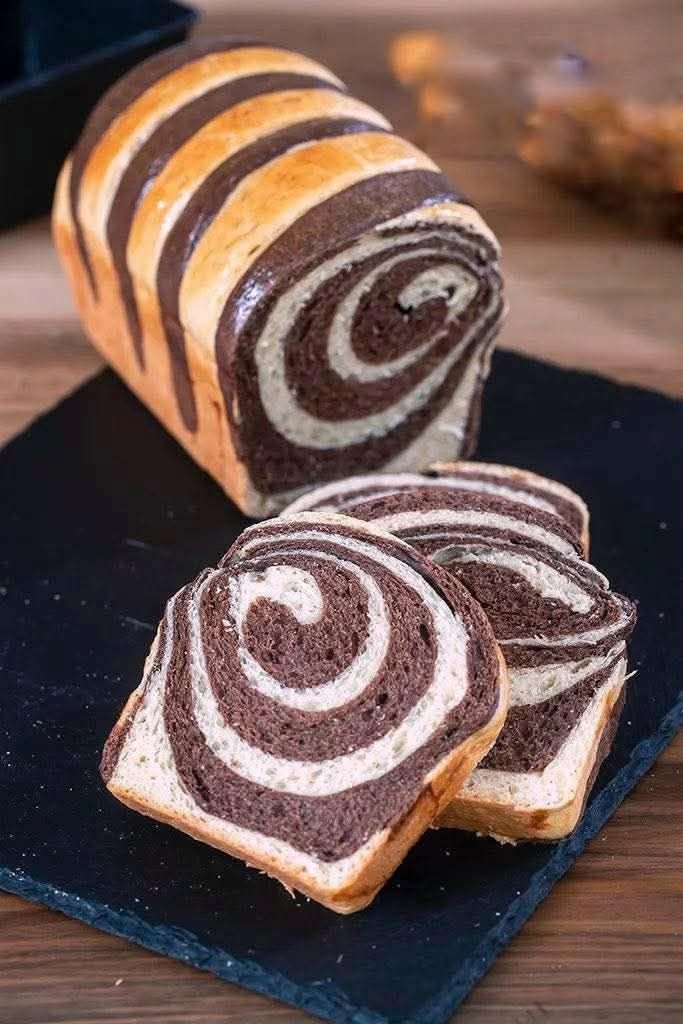
There is something undeniably magical about the aroma of fresh bread wafting through a kitchen, especially when that bread involves a buttery, French-style dough and a rich cocoa swirl. Pain au Lait Tourbillon au Chocolat—or Chocolate Swirl Milk Bread—is the ultimate fusion of comfort and elegance. While it looks like it belongs in a high-end Parisian window, this recipe is surprisingly approachable for the home baker.
Why I Love This Recipe
I’ve spent a lot of time perfecting my baking game at Chef Maniac, and this bread holds a special place in my heart. Unlike a standard loaf, the “tourbillon” (swirl) technique creates a beautiful visual pattern in every single slice. The texture is incredibly soft, thanks to the milk-based dough, and the chocolate paste isn’t overly sweet, making it the perfect companion for a morning coffee or an afternoon snack.
If you enjoy the moisture and texture of this chocolate chip banana bread, you are going to fall in love with the pillowy crumb of this milk bread.
Ingredients
For the Dough (Pâte)
- Bread Flour: 375g (3 cups) — High protein content is essential for that stretchy, airy texture.
- Granulated Sugar: 40g (3 tbsp)
- Salt: 1 tsp
- Instant Yeast: 2 tsp
- Warm Milk: 240ml (1 cup) — Aim for about 110°F.
- Unsalted Butter: 40g (3 tbsp), softened to room temperature.
- Egg: 1 large, room temperature.
For the Chocolate Swirl Paste
- Unsweetened Cocoa Powder: 15g (2 tbsp)
- Sugar: 25g (2 tbsp)
- Unsalted Butter: 15g (1 tbsp)
- Milk: 30ml (2 tbsp)
- All-Purpose Flour: 20g (2 tbsp) — This acts as the thickener for the paste.
Swaps and Notes
- Milk: You can use whole milk for the richest flavor, but 2% also works well. For a dairy-free version, oat milk is a great substitute.
- Yeast: If using active dry yeast instead of instant, be sure to proof it in the warm milk with a pinch of sugar for 5–10 minutes until foamy.
- Chocolate Paste: If you’re in a rush, you could technically use a chocolate hazelnut spread, but the homemade paste in this recipe holds its shape better during the bake, ensuring those distinct “swirl” lines.
Step-by-Step Instructions
1. Prepare the Chocolate Paste
In a small saucepan over low heat, combine the milk, cocoa powder, sugar, butter, and flour. Stir constantly until the mixture thickens into a smooth, spreadable paste. Remove from heat and let it cool completely. This is crucial; if it’s hot, it will melt your dough!
2. Mix the Dough
In a large mixing bowl or the bowl of a stand mixer, combine the flour, sugar, salt, and yeast. Pour in the warm milk, egg, and softened butter.
3. Knead to Perfection
Knead the dough until it is smooth and elastic. If using a stand mixer with a dough hook, this takes about 5 minutes. If kneading by hand, expect to put in about 10 minutes of work. The dough should be tacky but not stick to your fingers.
4. First Rise
Place the dough in a lightly greased bowl, cover with a damp cloth, and let it rise in a warm spot until it has doubled in size (usually 1 to 1.5 hours).
5. Shape and Swirl
Punch down the risen dough to release the air. On a lightly floured surface, roll the dough out into a large rectangle. Spread the cooled chocolate paste evenly across the surface, leaving a small border at the edges. Roll the dough up tightly, starting from the short end, to create a log.
6. Second Rise
Place the log into a greased loaf pan. Cover and let it rise again for about 30–45 minutes until it looks puffy and fills the pan.
7. Bake
Preheat your oven to 180°C (350°F). Bake for 25–30 minutes until the top is golden brown.
8. The Finishing Touch
Immediately after removing from the oven, brush the top with a little melted butter or milk. This keeps the crust soft and gives it a beautiful sheen. Let it cool in the pan for 10 minutes before transferring to a wire rack.
Tips for Success
- Temperature Matters: Make sure your milk is warm but not hot. Liquid over 120°F can kill the yeast, and your bread won’t rise.
- The Windowpane Test: To see if you’ve kneaded enough, stretch a small piece of dough. If it stretches thin enough to see light through it without breaking, the gluten is ready.
- Cool Before Slicing: I know it’s tempting, but let the bread cool before cutting. Slicing hot bread can squash the internal structure and smudge that beautiful chocolate swirl.
Serving Suggestions and Pairings
This bread is versatile! Serve a thick slice toasted with a smear of salted butter. For a truly decadent brunch, pair it with:
- A cold, refreshing glass of homemade blueberry lemonade.
- For those who prefer savory-to-sweet transitions, try a light 3-ingredient egg wrap before enjoying the bread as “dessert.”
Nutritional Information (Per Serving)
Based on 10 slices per loaf
| Nutrient | Amount |
| Calories | 215 kcal |
| Total Fat | 7g |
| Carbohydrates | 32g |
| Protein | 6g |
| Sugar | 8g |
Export to Sheets
Storage and Leftover Tips
- Room Temperature: Keep the bread in an airtight container or bread box for up to 3 days.
- Freezing: This bread freezes beautifully. Slice it first, wrap individual slices in plastic wrap, and store in a freezer bag. Toast directly from frozen!
- French Toast: If the bread gets a little dry after a few days, it makes the absolute best French toast you’ve ever had.
More Recipes You Will Love
If you enjoyed this baking project, check out these other favorites from the kitchen:
Final Thoughts
Baking Pain au Lait Tourbillon au Chocolat is more than just making food; it’s a therapeutic process that yields a stunning reward. Whether you’re a seasoned baker or a beginner, the swirl is always a “wow” moment.
Did you try this recipe? I’d love to hear how your swirl turned out! Tag us on social media or leave a comment below. Don’t forget to follow Chef Maniac for more weekly recipes and baking tips!


Leave a Reply