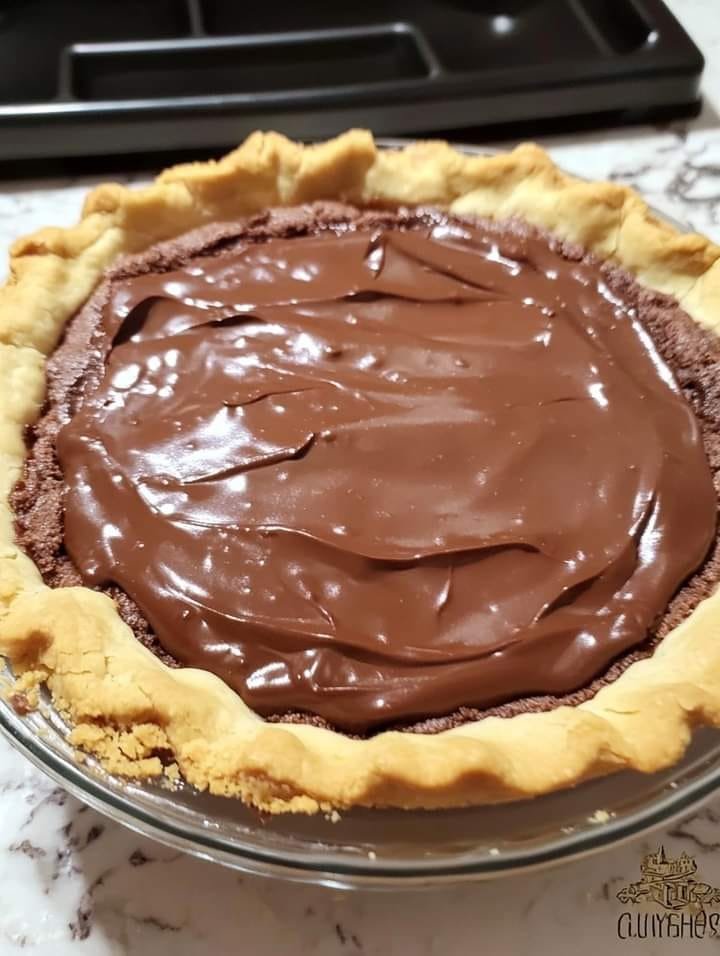
There’s something undeniably captivating about a classic chocolate pie. It’s a dessert that evokes nostalgia, promising a spoonful of pure, unadulterated bliss. This recipe delivers a silky-smooth, intensely rich chocolate filling nestled in your favorite pie crust, creating a dessert that is both elegant and profoundly comforting. Perfect for any occasion, from a family dinner to a special celebration, this chocolate pie is a timeless indulgence that truly satisfies.
Why I Love This Recipe
This chocolate pie recipe is a dream come true for any chocolate lover. What I adore most about it is the incredibly luxurious texture of the filling – it’s like a creamy, decadent chocolate cloud that melts in your mouth. The balance of sweetness with the bittersweet chocolate creates a depth of flavor that’s utterly satisfying without being overly rich. It’s also surprisingly straightforward to make, proving that homemade perfection doesn’t have to be complicated. The simplicity of the ingredients, combined with the magic of whisking them into a velvety pudding, is pure culinary joy. Plus, it’s a fantastic make-ahead dessert, allowing the flavors to meld and the pie to chill to ideal perfection.
List of Ingredients
Here’s what you’ll need to create this divine Classic Chocolate Pie:
- 1 1/2 cups granulated sugar
- 1/4 cup cornstarch
- 1/4 teaspoon salt
- 3 cups whole milk
- 4 large egg yolks
- 6 1/2 ounces (about 1 cup) bittersweet chocolate, finely chopped
- 2 teaspoons vanilla extract
- 2 tablespoons unsalted butter
- 1 (9-inch) pie crust, pre-baked and cooled (can use traditional, Oreo, or graham cracker crust)
- Fresh whipped cream, for serving
- Optional: Chocolate shavings or cocoa powder, for garnish
Swaps and Notes
- Chocolate: Bittersweet chocolate is highly recommended for its depth of flavor and to prevent the pie from being overly sweet. However, if you prefer a sweeter pie, you can use semi-sweet chocolate. Chocolate chips can be used, but finely chopping a bar of chocolate will give a smoother melt and richer flavor.
- Milk: Whole milk is crucial for the richness and creamy texture of the filling. Using lower-fat milk may result in a thinner, less luxurious pudding.
- Egg Yolks: The egg yolks are essential for thickening the custard and providing richness. Do not omit them.
- Vanilla Extract: Pure vanilla extract offers the best flavor.
- Butter: Unsalted butter is preferred to control the saltiness. It adds a lovely richness and gloss to the filling.
- Pie Crust: The choice of crust is flexible. A classic butter pie crust provides a beautiful contrast, while an Oreo or graham cracker crust enhances the chocolate experience. Ensure it’s fully baked and cooled to prevent a soggy bottom.
- Cornstarch: This is the primary thickener. Ensure it’s thoroughly whisked into the dry ingredients before adding liquids to prevent lumps.
- Salt: A small amount of salt balances the sweetness and enhances the chocolate flavor.
List of Steps for the Recipe
1. Prepare the Pudding Base:
- In a medium-sized, heavy-bottomed saucepan, whisk or stir together the 1 1/2 cups granulated sugar, 1/4 cup cornstarch, and 1/4 teaspoon salt. Whisk well to ensure there are no lumps in the cornstarch.
- In a separate bowl, lightly whisk the 3 cups whole milk and 4 egg yolks together until just combined.
- Pour the milk and egg yolk mixture into the saucepan with the dry ingredients. Whisk thoroughly until everything is well combined and smooth.
2. Cook the Pudding:
- Place the saucepan over medium heat. Stir constantly with a whisk or wooden spoon. This constant stirring is crucial to prevent the bottom from scorching and to ensure even thickening.
- Continue to stir and cook the mixture until it just barely comes to a boil and becomes very thick, like a rich pudding. This process typically takes about 6 to 8 minutes, but it can vary. Watch it closely; the moment it starts to bubble and visibly thicken (it will coat the back of a spoon), remove it immediately from the heat. It should have the consistency of a thick custard or pudding.
3. Finish the Filling:
- Immediately remove the saucepan from the heat.
- Add the 6 1/2 ounces of finely chopped bittersweet chocolate, 2 teaspoons vanilla extract, and 2 tablespoons unsalted butter to the hot pudding.
- Stir vigorously with a whisk or rubber spatula until the chocolate and butter are completely melted and beautifully combined into the pudding. The mixture should be incredibly smooth, glossy, and uniformly chocolatey.
4. Assemble and Chill the Pie:
- Pour the warm chocolate pudding filling into your pre-baked and cooled 9-inch pie crust. Use a spatula to spread it evenly.
- If you have any extra filling (this recipe makes a generous amount), spoon it into small ramekins or dessert dishes for individual servings.
- Place the filled pie (and any extra pudding dishes) in the refrigerator, uncovered, to chill for at least 4 hours. Chilling uncovered for the first hour or so helps prevent condensation from forming on top, then you can loosely cover it with plastic wrap. This chilling time is essential for the pie to set completely and for the flavors to fully develop.
5. Serve:
- Once thoroughly chilled and set, slice the chocolate pie.
- Serve each slice with a generous dollop of freshly made whipped cream. Optionally, garnish with chocolate shavings or a dusting of cocoa powder for an elegant touch.
Tips for Success
- Finely Chop Chocolate: Finely chopping the chocolate ensures it melts quickly and smoothly into the hot pudding, preventing lumps.
- Constant Stirring: Do not walk away from the saucepan while cooking the pudding. Constant stirring prevents scorching and ensures a smooth, lump-free consistency.
- Watch for Thickness: The pudding will thicken rapidly once it reaches the right temperature. Remove it from the heat as soon as it visibly thickens and just begins to bubble. Overcooking can lead to a rubbery texture.
- Temper Eggs (Optional but Recommended): While this recipe doesn’t explicitly state tempering the yolks before adding to the full milk amount, ensuring the milk and yolks are whisked well together before heating helps prevent scrambling. For extra insurance, you can whisk a small amount of hot milk mixture into the egg yolks first before adding the tempered yolks back to the saucepan.
- Cool Completely: Allow the pie to chill for the full 4 hours (or more) to ensure it sets perfectly. An under-chilled pie will be too soft and runny.
- Plastic Wrap (After Initial Chill): Once the pie has chilled uncovered for an hour or so and a skin has formed, you can loosely cover it with plastic wrap to prevent it from drying out or absorbing refrigerator odors.
Serving Suggestions and Pairings
This Classic Chocolate Pie is a star on its own, but here are some ideas to complement its rich flavor:
- Whipped Cream: Absolutely essential! The lightness of the whipped cream provides a perfect counterpoint to the rich filling.
- Fresh Berries: A few fresh raspberries or sliced strawberries offer a beautiful color contrast and a touch of tartness to cut through the richness.
- Coffee or Espresso: The bold flavor of coffee or espresso enhances the chocolate notes in the pie.
- Dessert Wine: A light-bodied port wine or a raspberry liqueur could be a sophisticated pairing.
- Mint Sprig: A fresh mint sprig adds a vibrant color and a hint of refreshing aroma.
- Sea Salt Flakes: A tiny sprinkle of flaky sea salt on top of the whipped cream can really elevate the chocolate flavor and add a gourmet touch.
Nutritional Information
(Approximation per serving, based on 8 servings. Values can vary significantly based on ingredients and brands.)
- Calories: Approximately 450-550 kcal
- Protein: Approximately 7-9 g
- Fat: Approximately 25-35 g (with 15-20 g saturated fat)
- Carbohydrates: Approximately 50-60 g
- Fiber: Approximately 2-4 g
- Sodium: Approximately 150-200 mg
- Cholesterol: Approximately 100-120 mg
Note: These values are estimates. For precise nutritional information, it’s recommended to use a nutritional calculator with your specific ingredients.
Storage and Leftover Tips
- Refrigeration: Chocolate pie should always be stored in the refrigerator due to its dairy and egg content. Cover it loosely with plastic wrap or aluminum foil after it has fully chilled. It will keep well for 3-4 days.
- Covering for Best Quality: If the pie is not covered, the surface of the pudding can dry out or develop a film.
- Freezing: Freezing is generally not recommended for custard-based pies, as the texture can become watery or grainy upon thawing. However, if you must, freeze individual slices (without whipped cream) wrapped tightly in plastic wrap and then foil for up to 1 month. Thaw overnight in the refrigerator before serving.
- Reheating: This pie is best served chilled, so reheating is not necessary or recommended.
Final Thoughts
This Classic Chocolate Pie is a testament to the power of simple ingredients creating an extraordinary dessert. Its rich flavor and velvety texture make it an instant favorite, bringing smiles and satisfaction with every bite. It’s the kind of dessert that feels both deeply comforting and elegantly sophisticated, making it perfect for any occasion where you want to impress or simply indulge. Give this recipe a try; it’s sure to become a beloved staple in your dessert repertoire!
We’d love to hear about your experience making this delightful chocolate pie! Share your comments, tips, or any creative garnishes you used below. Don’t forget to follow us for more classic and comforting recipes!


Leave a Reply