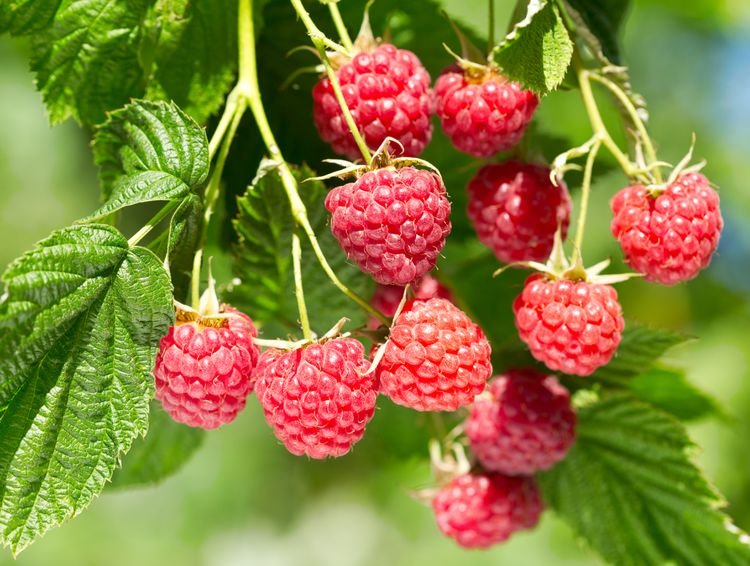
When I first started gardening, I thought raspberries were off-limits unless you had a big backyard and a dedicated patch of soil. I couldn’t have been more wrong. Growing raspberries in containers has become one of my favorite gardening successes — and trust me, it’s easier than it sounds. With the right setup and a bit of care, I get sweet, sun-kissed berries from my own patio, no raised beds required.
If you’ve been dreaming of fresh berries but only have a balcony or small space, let me show you exactly how I grow raspberries in containers — from choosing the right variety to harvesting plump fruit by the handful.
Why Container Growing Works for Raspberries
Space-saving and flexible: Containers let you grow raspberries even if you’re working with a small patio, balcony, or deck. You’re not tied to a single plot of soil and can move them around as needed for better sun exposure.
Better soil control: You’re in charge of the soil mix, drainage, and nutrients, which means fewer pests, diseases, and weeds compared to traditional garden beds.
Easy to manage: Pruning, watering, and harvesting are simpler when your plants are elevated and contained. No kneeling, digging, or complicated supports needed.
Step-by-Step: How I Grow Raspberries in Containers
1. Choose the Right Raspberry Variety
Not all raspberries are equally suited to container life. I stick with dwarf or compact varieties like:
- ’Raspberry Shortcake’: A thornless, bushy plant that doesn’t need staking.
- ’Heritage’: A reliable everbearing variety that fruits twice a season.
- ’Fall Gold’: If you’re after golden berries with a sweet flavor twist.
Everbearing types are perfect because they produce fruit on new canes in late summer and again in fall — more harvests with less hassle.
2. Pick the Right Container
A large container is key. I use one that’s at least 18 to 24 inches wide and deep. This gives the roots space to spread and keeps the plant stable. Make sure the container has good drainage holes to prevent root rot.
I like using:
- Sturdy plastic or ceramic pots (light-colored ones reflect heat)
- Half-barrel planters for a rustic look
- Fabric grow bags (surprisingly effective and breathable)
3. Use the Right Soil
Raspberries need well-draining, fertile soil. I mix:
- 2 parts high-quality potting mix
- 1 part compost for nutrients
- A handful of perlite or coarse sand for drainage
I avoid garden soil — it’s too heavy and can compact in a pot. Once planted, I top with a thin layer of mulch to retain moisture.
4. Provide Support (If Needed)
Some varieties stay compact, but if yours sends up tall canes, I add a simple tomato cage or small trellis to keep them upright. This prevents the stems from bending or breaking under the weight of fruit.
5. Place in Full Sun
Raspberries love the sun. I place my containers where they’ll get at least 6–8 hours of direct sunlight daily. If I notice legginess or poor fruiting, I move them to chase the sun.
How I Care for My Container Raspberries
Watering
Raspberries in containers dry out faster than those in the ground. I check soil moisture daily during warm months and water deeply when the top inch feels dry. A drip tray or saucer helps catch runoff, but I empty it after watering to prevent soggy roots.
Feeding
I fertilize once a month during the growing season with a balanced, slow-release fertilizer or liquid organic feed like fish emulsion. Raspberries are heavy feeders, and container plants need a consistent boost.
Pruning and Maintenance
Everbearing varieties produce on new canes, so I cut old ones to the base in late fall. For summer-bearing types, I only prune after fruiting, removing the canes that already produced berries.
If any leaves look yellow or spotted, I snip them off quickly to prevent disease. Container plants are more susceptible to stress, so a little TLC goes a long way.
Harvesting Raspberries
This is the best part. I harvest when the berries are deeply colored, plump, and easily pull away from the stem — usually mid to late summer and again in fall. I check every day during peak season because ripe berries don’t wait!
The flavor of homegrown raspberries is unbeatable — warm from the sun and incredibly sweet. I eat them straight from the plant, toss them on yogurt, or freeze for smoothies.
Tips From My Experience
- Rotate the container every week or so for even growth if you don’t have consistent light on all sides.
- Elevate the pot slightly with bricks or a stand to encourage drainage.
- Bring inside or protect in winter if you’re in a colder zone — the roots are more exposed in pots.
- Replenish soil every year with fresh compost or potting mix to keep the plant thriving.
Why You Should Try It
If you’ve ever dreamed of growing your own berries but felt limited by space, this method makes it possible. Container raspberry growing is approachable, rewarding, and surprisingly productive. It brings a burst of life and color to small spaces and gives you the joy of harvesting fruit with your own hands.
Even if you’re not a seasoned gardener, this is one project that pays off fast — and deliciously.


Leave a Reply