The Ultimate Guide to Easter Dyed Deviled Eggs
When it comes to holiday hosting, we often focus so much on the centerpieces and the main course that the appetizers become an afterthought. Not this year. If you want to stop your guests in their tracks, you have to try these Easter Dyed Deviled Eggs.
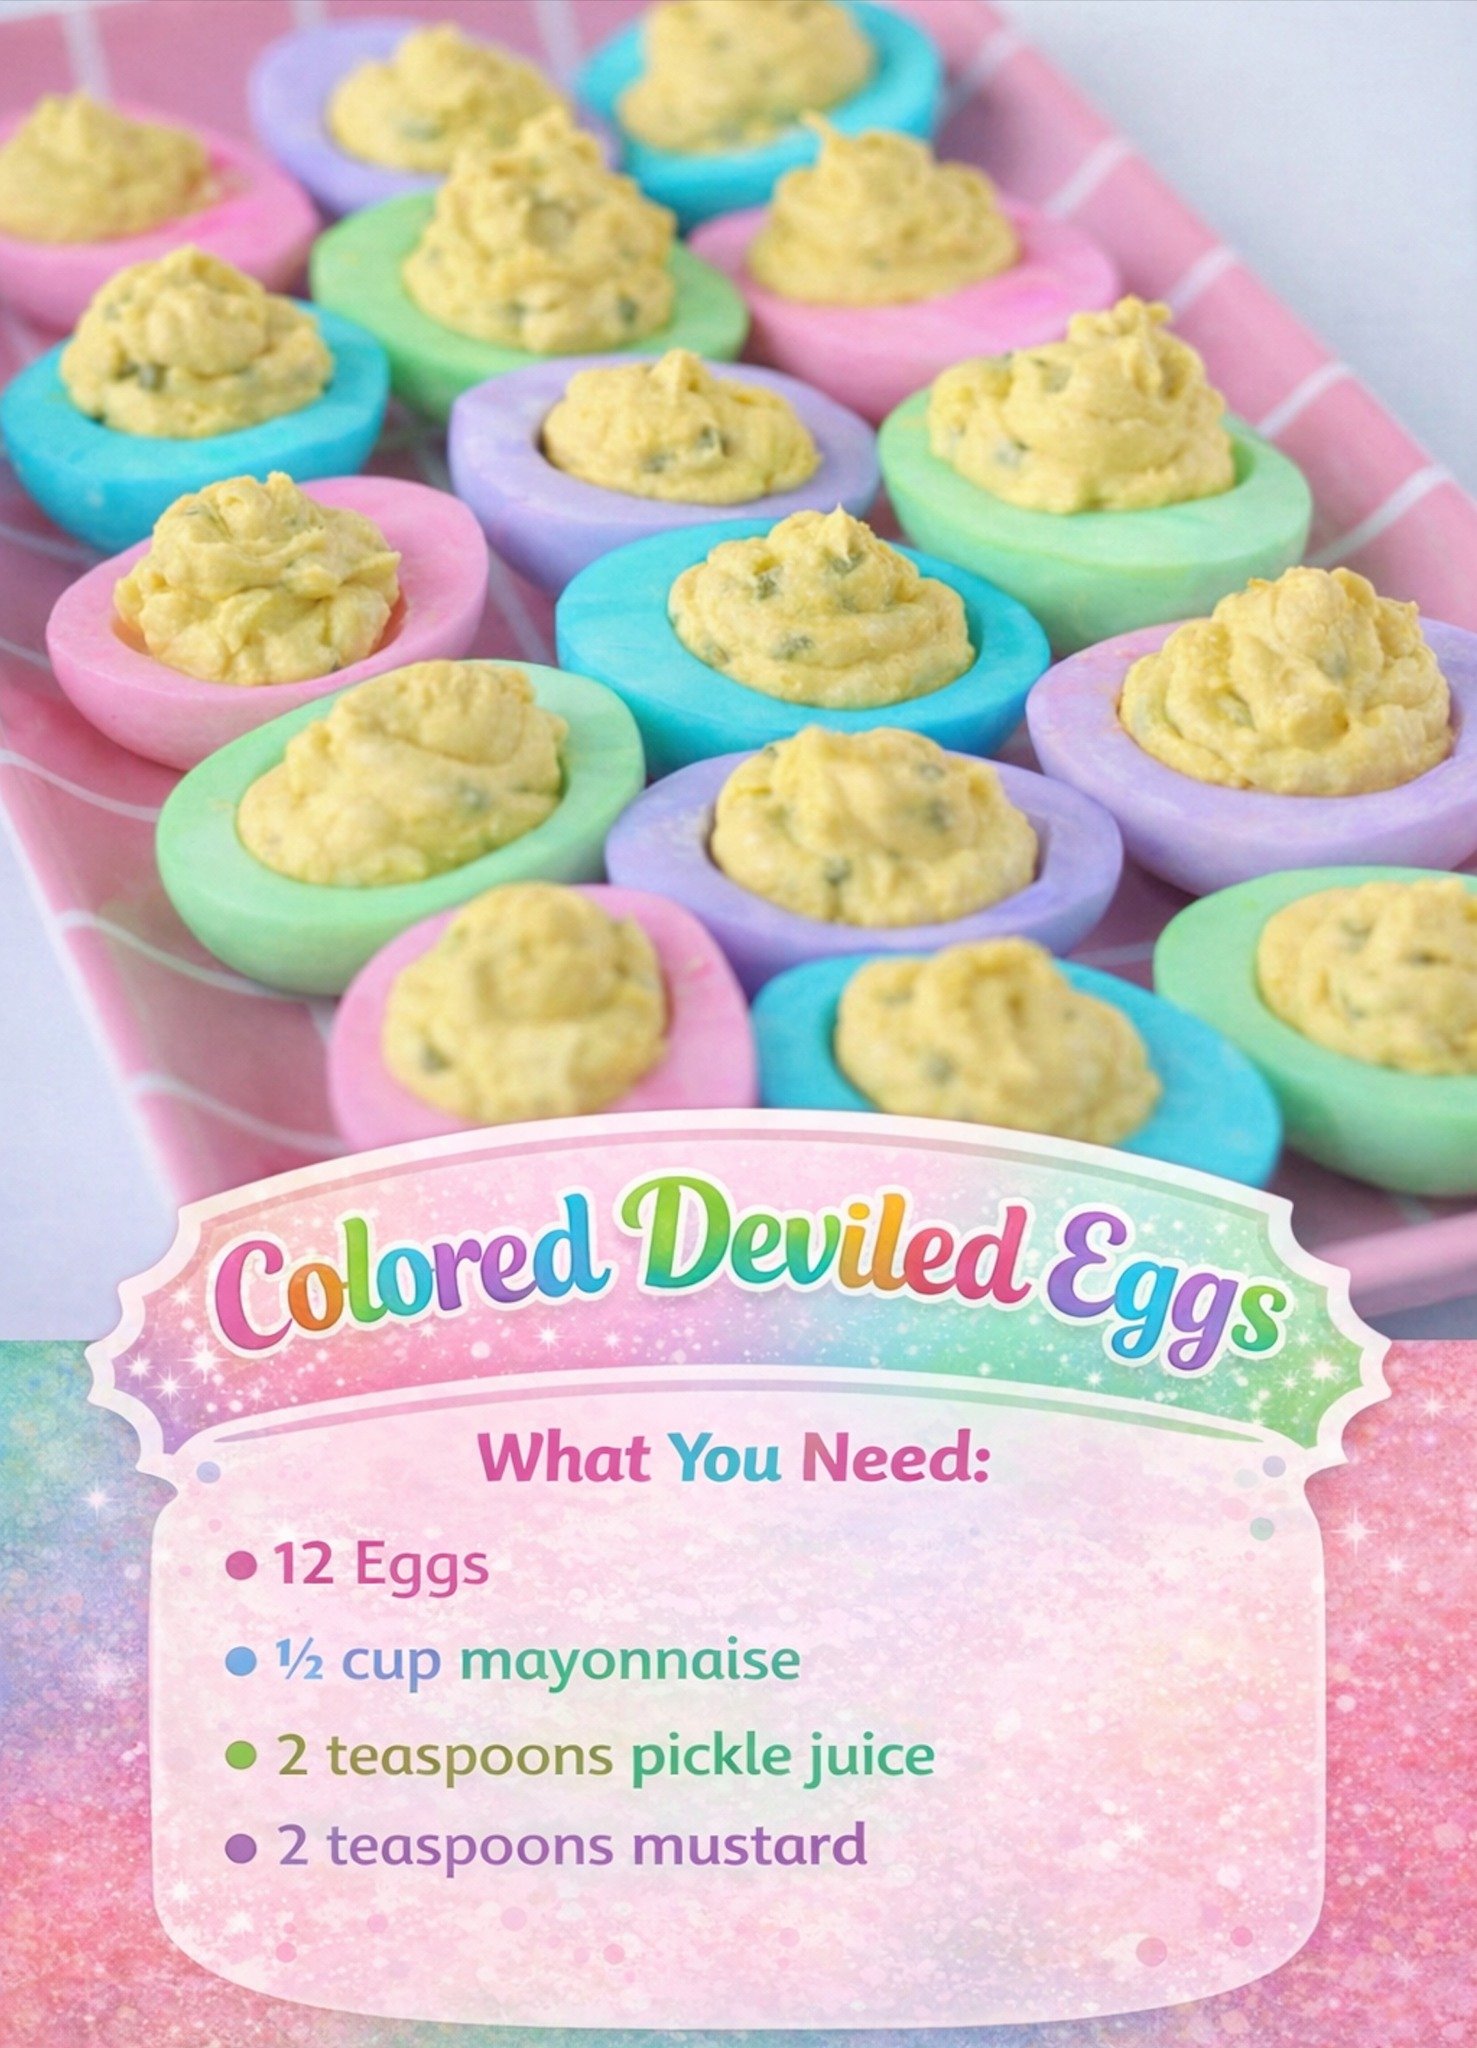
We’ve all seen standard deviled eggs—they’re a classic for a reason—but infusing the whites with soft pastels or bold neon hues turns a simple snack into a festive work of art. As a food writer, I’ve seen plenty of food trends come and go, but the “dyed egg” technique remains a top-tier “party trick” because it’s inexpensive, easy to do, and incredibly high-impact.
Why I Love This Recipe
There are three main reasons this recipe has earned a permanent spot in my holiday rotation:
- The Visual “Wow” Factor: These eggs look like they came from a high-end catering service. Whether you’re hosting a brunch or a backyard egg hunt, the colors pop against any serving platter.
- The Texture & Flavor: We aren’t just making these look pretty; we are making them taste amazing. The addition of chopped dill pickles and a splash of pickle juice adds a bright, acidic crunch that cuts through the richness of the yolk and mayonnaise.
- Kid-Friendly Fun: Much like making these rainbow sprinkle cookies, this is a fantastic kitchen project for kids. They love watching the “magic” of the egg whites changing color in the dye baths.
The Ingredients
To make these stunning eggs, you’ll need two sets of supplies: one for the delicious filling and one for the vibrant dye.
For the Deviled Egg Filling
- 12 Large Eggs: Fresh is great, but eggs that have been in the fridge for a week actually peel much easier after boiling.
- ½ Cup Mayonnaise: This provides the base for that silky, creamy texture.
- 2 tsp Pickle Juice: My secret weapon for tanginess.
- 2 tsp Yellow Mustard: Adds a classic deviled egg “zip.”
- 4 tbsp Finely Chopped Dill Pickles: This provides a necessary texture contrast.
- Salt & Pepper: To taste.
For the Egg Dye
- 6 oz Water: Per cup/color.
- 1 tsp White Vinegar: Per cup/color (this is crucial for setting the dye).
- Food Coloring: I recommend liquid or gel drops in various shades.
Swaps and Notes
- The Mustard: If you want a more sophisticated flavor profile, swap the yellow mustard for Dijon or a spicy brown mustard.
- The Pickles: If you aren’t a fan of dill, you can use sweet relish. However, I find the dill pickles balance the richness of the eggs much better.
- The Mayo: For a lighter version, you can swap half the mayo for Greek yogurt, though the texture will be slightly tangier.
- The Dye: Use gel food coloring if you want deep, saturated jewel tones. Use traditional liquid drops if you prefer soft Easter pastels.
Step-by-Step Instructions
1. The Perfect Hard-Boil
Place your 12 eggs in a large pot and cover them with at least an inch of cold water. Bring the water to a rolling boil over high heat. As soon as it hits that boil, turn off the heat completely, cover the pot with a tight-fitting lid, and let them sit for exactly 12 minutes. This method prevents that unappealing gray-green ring around the yolk.
2. Cool and Peel
Immediately drain the hot water and submerge the eggs in an ice bath or rinse under very cold water. Once cool, gently crack the shells and peel. Pro Tip: Peel them under a slow stream of running water to help the shell slide right off.
3. Prep the Whites
Slice the eggs in half lengthwise. Gently pop the yolks out into a medium-sized mixing bowl and set the whites aside on a clean paper towel.
4. Create the Dye Baths
Line up several small cups or bowls. In each, mix 6 ounces of water, 1 teaspoon of white vinegar, and several drops of your chosen food coloring. Stir well.
5. Color the Eggs
Submerge the egg white halves into the dye baths. Let them soak for about 10 minutes. Keep an eye on them—if you want pastel, pull them out early; for vibrant colors, let them sit longer. Once they reach your desired shade, remove them and place them “hole-side down” on paper towels to dry completely.
6. Make the Creamy Filling
While the whites dry, mash your yolks with a fork until they are fine crumbles. Add the mayonnaise, pickle juice, and mustard. Mix until the consistency is smooth and creamy. Fold in the chopped dill pickles and season with salt and pepper.
7. Fill and Serve
Transfer the yolk mixture into a zip-top bag and snip off a small corner (or use a piping bag with a star tip). Pipe the filling generously into the colorful egg white “cradles.”
Tips for Success
- Dry the Whites Thoroughly: If the egg whites are still wet from the dye, the yolk filling might slide around. Use a paper towel to pat the inside and outside dry.
- The Vinegar Secret: Don’t skip the vinegar in the dye! It acts as a mordant, ensuring the color sticks to the protein of the egg white rather than just washing off.
- Avoid Over-Mixing: When adding the pickles, fold them in gently so you don’t break down the creamy texture of the yolk base.
Serving Suggestions and Pairings
These eggs are the ultimate centerpiece for a spring brunch. To create a full spread, I recommend pairing them with other festive treats.
If you are looking for a sweet companion, the Easter cookies everyone will be talking about make for a perfect dessert follow-up. For a salty-sweet snack on the table, these spring flower pretzel bites are a huge hit with kids and adults alike.
If you’re hosting a larger crowd, a big bowl of this family-style banana pudding is an easy way to ensure everyone leaves full. And for the adults? A pitcher of this rainbow sangria mirrors the beautiful colors of the eggs perfectly.
Nutritional Information (Per Serving)
Serving size: 2 egg halves
- Calories: 145 kcal
- Fat: 12g
- Carbohydrates: 2g
- Protein: 6g
- Sodium: 210mg
Storage and Leftover Tips
- Refrigeration: These eggs should be kept in an airtight container in the fridge. They are best when eaten within 2 days.
- The “Bleed” Factor: Be aware that after 24 hours, the food coloring can sometimes begin to bleed slightly into the yellow filling. For the best photos, assemble them as close to serving time as possible.
- Make-Ahead: You can boil and dye the whites up to 24 hours in advance. Keep the yolk filling in its piping bag (sealed) and fill the eggs just before your guests arrive.
Final Thoughts
Easter is all about renewal and bright colors, and these dyed deviled eggs capture that spirit perfectly. They are a conversation starter that tastes even better than it looks.
I’d love to hear how yours turned out! Did you go with soft pastels or bold “galaxy” colors? Tag us in your photos or leave a comment below with your favorite deviled egg “secret ingredient.” Don’t forget to follow ChefManiac for more holiday shortcuts and kitchen inspiration!


Leave a Reply