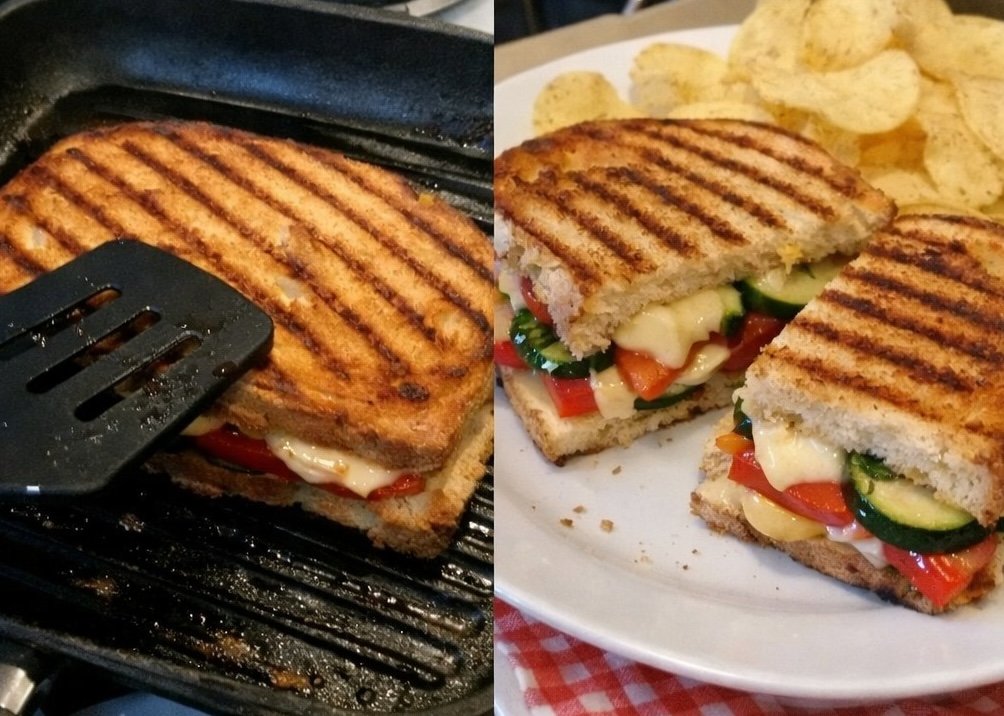
Grilled Veggie Panini – Easy Lunch with Crispy Bread & Melty Cheese
There’s something magical about a perfectly toasted panini. The golden, crispy bread. The warm, melty cheese. The tender roasted vegetables tucked inside. This Grilled Veggie Panini is one of those simple recipes that feels gourmet but takes barely 15 minutes to make.
Whether you’re working from home, packing a quick lunch, or craving something warm and comforting without too much effort, this panini delivers every single time. It’s fresh, satisfying, and endlessly customizable.
Let’s get into why this easy lunch recipe deserves a permanent spot in your rotation.
Why I Love This Recipe
As a food writer and someone who truly appreciates simple comfort food, I adore recipes that transform a few humble ingredients into something irresistible. This panini does exactly that.
It’s:
- Quick to prepare
- Budget-friendly
- Vegetarian
- Customizable
- Crispy, cheesy, and satisfying
The combination of warm, crispy bread with melty cheese and roasted veggies hits all the right notes. It’s comfort food without feeling heavy.
Ingredients
You only need a handful of simple ingredients:
- 2 slices of bread (sourdough, ciabatta, or whole grain work beautifully)
- 2–3 slices of cheese (mozzarella, provolone, Swiss, or cheddar)
- ½ cup sliced bell peppers or zucchini (or a mix!)
- 1–2 tablespoons butter (softened)
Ingredient Swaps & Notes
Bread Options:
Sourdough gives the best crunch, while ciabatta offers that classic panini texture. Whole grain adds nuttiness and fiber.
Cheese Choices:
Mozzarella melts beautifully. Provolone adds a sharp bite. Want bold flavor? Try smoked gouda.
Veggie Add-Ins:
- Red onions
- Mushrooms
- Spinach
- Roasted eggplant
- Sun-dried tomatoes
You can even use leftover roasted vegetables from dinner to cut down on prep time.
How to Make a Grilled Veggie Panini
Step 1: Assemble
Layer sliced veggies and cheese between two slices of bread.
Step 2: Butter the Bread
Brush the outside of each slice lightly with softened butter. This ensures a golden, crispy crust.
Step 3: Grill
Place the sandwich in a heated skillet over medium heat.
Cook for 3–4 minutes per side until golden brown.
Step 4: Press for Crispness
Use a spatula to press lightly while cooking. This helps everything melt together and gives that classic panini texture.
Step 5: Serve Hot
Remove from the pan, slice in half, and serve immediately while the cheese is perfectly gooey.
Tips for Panini Perfection
- Medium heat is key. Too high and the bread burns before the cheese melts.
- Don’t overstuff. Too many veggies make flipping difficult.
- Use freshly grated cheese if possible—it melts more smoothly.
- Pre-roast watery vegetables like zucchini to prevent sogginess.
Serving Suggestions & Pairings
This panini pairs beautifully with light, refreshing sides.
For drinks, I love serving it with this vibrant and refreshing This Blueberry Lemonade Is My Favorite Refreshing Drink for Sunny Days. The citrusy sweetness balances the savory sandwich perfectly.
If you’re feeding a group, consider pairing it with These Sheet Pan Quesadillas Are My Favorite Way to Feed a Crowd Fast for a fun sandwich spread.
Hosting friends? Start with This Baked Brie Appetizer Is My Favorite Effortless Way to Impress Guests before serving the panini.
Want a heartier meal idea for later in the week? Try This Mexican Chicken and Rice Casserole Is My Favorite One-Pan Dinner That’s Always a Hit.
And for dessert? You can’t go wrong with This Chocolate Chip Banana Bread Is My Favorite Way to Use Up Overripe Bananas.
Nutritional Information (Per Serving – Approximate)
- Calories: 420
- Protein: 16g
- Carbohydrates: 38g
- Fat: 22g
- Fiber: 4g
- Sugar: 4g
Values will vary depending on bread and cheese selection.
Storage & Leftover Tips
This panini is best enjoyed fresh, but if you have leftovers:
- Store in an airtight container in the refrigerator for up to 2 days.
- Reheat in a skillet to restore crispness (avoid microwaving—it makes the bread soft).
- You can prep veggies ahead of time and store them separately for quick assembly later.
More Recipes You’ll Love
If you enjoy easy, flavor-packed meals like this, don’t miss:
- This Mexican Chicken and Rice Casserole Is My Favorite One-Pan Dinner That’s Always a Hit
- These Sheet Pan Quesadillas Are My Favorite Way to Feed a Crowd Fast
- This Baked Brie Appetizer Is My Favorite Effortless Way to Impress Guests
- This Chocolate Chip Banana Bread Is My Favorite Way to Use Up Overripe Bananas
- This Blueberry Lemonade Is My Favorite Refreshing Drink for Sunny Days
Final Thoughts
The beauty of this Grilled Veggie Panini lies in its simplicity. A few fresh vegetables, quality cheese, and good bread come together to create something warm, crispy, and incredibly satisfying.
It’s proof that easy lunches don’t have to be boring.
If you try this recipe, I’d love to hear how you customized it! Leave a comment, share your variations, and don’t forget to follow along for more comforting, crave-worthy recipes.
Happy cooking!
— Jason Griffith, ChefManiac


Leave a Reply