Easy Southern-Style Fried Blackberry Hand Pies with Quick Glaze
By Jason Griffith
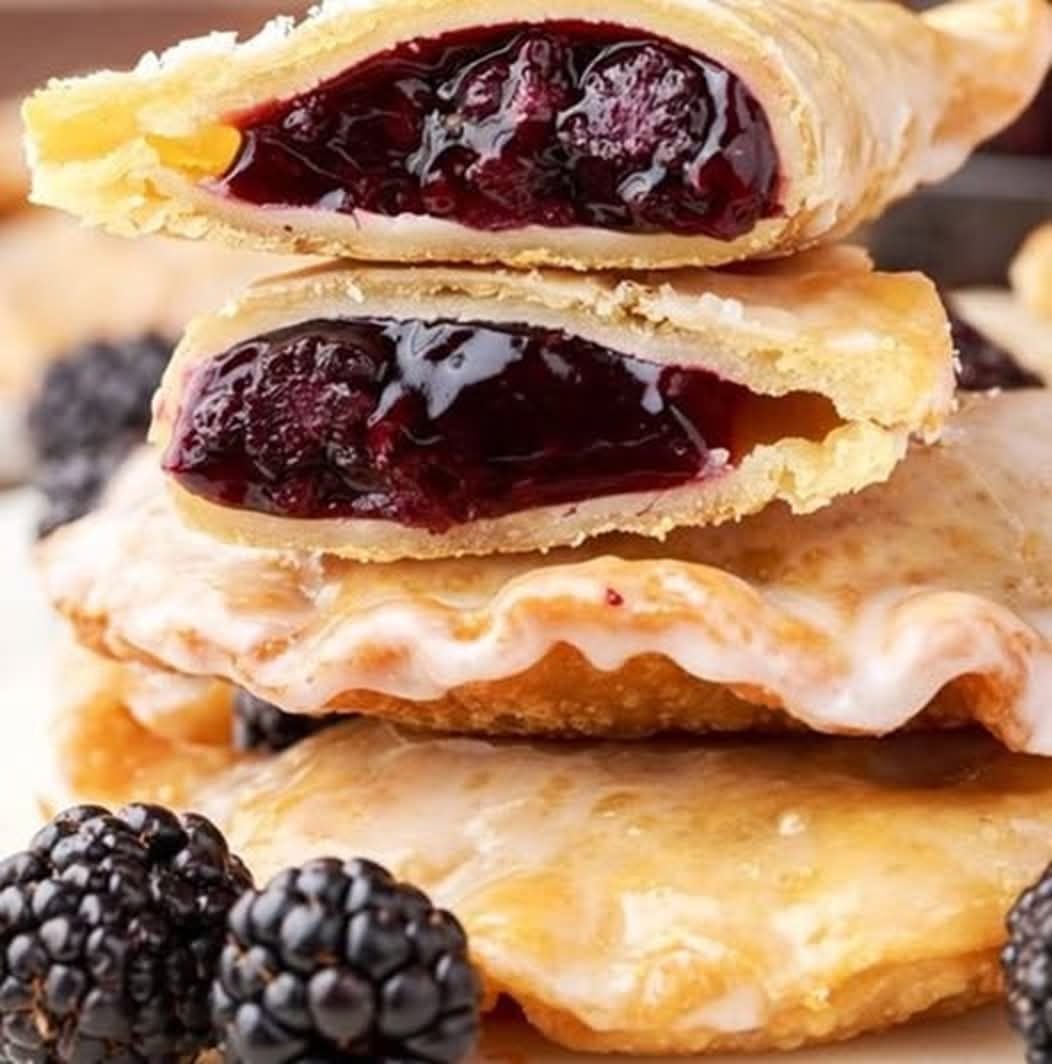
Some recipes are more than just food—they’re a piece of nostalgia. For me, these Fried Blackberry Hand Pies instantly transport me back to a summer kitchen, the air thick with the smell of sweet fruit and hot oil. They are the ultimate single-serving dessert: a flaky, golden-brown crust, bursting with warm, tangy blackberry filling, and crowned with a simple, sweet sugar glaze.
This recipe is designed for maximum flavor and minimal fuss. We’re taking a shortcut with refrigerated pie crust and canned filling, which means you can have a batch of these Southern-style treats ready to eat in under 30 minutes.
Why I Love This Recipe
I’m a big believer that sometimes, the simplest desserts are the most satisfying. While I love a complex, from-scratch pie, there’s a place for a quick, comforting treat. This recipe hits all the right notes:
- Speedy Satisfaction: Using canned filling and store-bought crust cuts the prep time drastically. You go from craving to eating a perfect, warm hand pie almost instantly.
- The Perfect Texture: The magic is in the deep-fry. It creates a blistered, bubbly, golden-crisp crust that you just can’t replicate in the oven. It’s the classic Southern diner pie texture, and it’s truly addictive.
- Built for Portability: These are individual pies, which means no slicing, no plates, and they are ideal for picnics, grab-and-go snacking, or just a Tuesday afternoon treat.
- Blackberry Perfection: The slightly tart, sweet, and rich blackberry filling is the perfect match for the rich, buttery, fried crust.
Ingredients
This recipe is simple, relying on just a few key components.
For the Hand Pies:
- 1 (21 oz.) can blackberry pie filling: The shortcut that makes this recipe shine!
- 1 box refrigerated pie crust (2 rounds): Let it sit out for about 10–15 minutes before rolling so it’s pliable.
- Vegetable Oil: For frying. You’ll need enough to fill your pot 4–5 inches deep.
For the Sugar Glaze:
- 1/2 cup powdered sugar: The base for a smooth, white glaze.
- 1 teaspoon corn syrup: This is the secret ingredient for a professional, glossy shine.
- 1 tablespoon water: For thinning the glaze to the perfect drizzly consistency.
Swaps and Notes
- Pie Filling Swap: Don’t love blackberry? Use any canned fruit pie filling you prefer! Apple, peach, and cherry are phenomenal alternatives.
- Crust Type: While I prefer the classic refrigerated pie crust for its flakiness, you can use refrigerated biscuit dough or puff pastry cut into squares for a slightly different texture.
- Frying Oil: Canola, peanut, or vegetable oil all work perfectly as they have a high smoke point necessary for deep-frying at 375∘F.
- Glaze Alternative: If you don’t have corn syrup, you can substitute it with a few drops of vanilla extract mixed with the powdered sugar and water. You won’t get the same high gloss, but it’ll still taste delicious.
- Baked Option: If you prefer not to deep-fry, you can bake these. Place the assembled pies on a baking sheet lined with parchment paper, brush with an egg wash (1 egg beaten with 1 tbsp water), vent with a few slits, and bake at 400∘F (200∘C) for 15–18 minutes, or until deeply golden. Glaze after they cool slightly.
Steps for the Recipe
Step 1: Prep the Oil and Glaze
- Heat the Oil: Fill a heavy Dutch oven or heavy-bottom pot 4–5 inches deep with vegetable oil. Attach an oil or candy thermometer to the side of the pot to monitor the temperature.
- Bring the Temperature Up: Slowly bring the oil temperature to 375∘F. This precise temperature is crucial: if it’s too cold, the pies absorb oil and get greasy; too hot, they burn before the crust is cooked through.
- Mix the Glaze: While the oil heats, make the glaze. In a small bowl, whisk together the powdered sugar, corn syrup, and water until smooth. Cover the bowl with a damp paper towel and set it aside to prevent it from drying out.
Step 2: Cut and Fill the Pies
- Roll and Cut: Roll out your refrigerated pie crust. Use a 5–6-inch bowl or cookie cutter to trace a round shape. Cut out the rounds with a knife. If your bowl only fits twice on the crust, you can use a rolling pin to roll the crust out a little more to get at least three rounds per crust (for a total of six pies).
- Spoon the Filling: Spoon about 2 tablespoons of blackberry pie filling onto the center of one half of a pie crust round. Be careful not to overfill, leaving a clean border for sealing.
- Seal the Edges: Using your fingers, lightly brush a little water along the edges of the crust. Fold the pie round over to create a half-moon shape, covering the filling. Crimp the edges tightly with a fork to seal the pie completely. This prevents the filling from leaking into the hot oil.
Step 3: Fry and Glaze
- Fry the Pies: Carefully lower one or two hand pies into the hot 375∘F oil. Do not overcrowd the pot, as this will drop the oil temperature.
- Cook to Golden: Fry them for 2–3 minutes per side, flipping once, or until the pie crust is a deep, rich golden brown.
- Drain and Glaze: Use a spider or slotted spoon to remove the fried pie from the oil and place it on a plate lined with a paper towel to drain excess oil.
- Immediate Glaze: While the pie is still piping hot, use a pastry brush to brush the prepared sugar glaze generously over both sides of the hand pie. The heat melts the glaze perfectly.
- Repeat: Place the finished pie on a baking sheet or cooling rack and repeat the frying and glazing process with the remaining hand pies.
Serve immediately while they are still warm!
Tips for Success
- The Thermometer is Your Friend: A digital or deep-fry thermometer is mandatory. Maintaining that 375∘F is the number one key to a perfect, non-greasy fried pie.
- Seal, Seal, Seal: Any opening in the crust is an invitation for the filling to bubble out and cause a mess (or an oil splatter). Press the edges firmly and use that fork to create a watertight seal.
- Vent the Steam: While not explicitly in the steps, cutting two small slits in the top of the crust before frying is a classic technique. It lets steam escape and helps prevent the pie from puffing up and splitting open.
- Fresh Oil is Best: Never reuse oil that’s been sitting for a long time. For the best, cleanest flavor, use fresh oil for frying.
Serving Suggestions and Pairings
These warm, glazed hand pies are amazing on their own, but a few additions can take them to the next level.
- A La Mode: Serve them alongside a small scoop of good vanilla bean ice cream or a dollop of fresh whipped cream.
- Dipping Sauce: A light cream cheese or lemon dipping sauce adds a nice tang.
- The Perfect Drink: Pair this sweet treat with a cool, tart beverage like a tall glass of milk or a refreshing homemade This Blueberry Lemonade Is My Favorite Refreshing Drink for Sunny Days.
Nutritional Information Per Serving
Disclaimer: This is an estimated value based on similar recipes and assumes 6 servings for the full recipe.
| Nutrient | Estimated Amount (Per Pie) |
| Calories | 380 kcal |
| Total Fat | 20 g |
| Saturated Fat | 5 g |
| Cholesterol | 0 mg |
| Sodium | 250 mg |
| Total Carbohydrates | 45 g |
| Dietary Fiber | 1 g |
| Total Sugars | 25 g |
| Protein | 3 g |
Export to Sheets
Storage and Leftover Tips
Hand pies are definitely best eaten fresh and warm, but you can save leftovers.
- Short-Term Storage: Store leftover hand pies in an airtight container at room temperature for up to 2 days. If you refrigerate them, the crust can become slightly soggy.
- Reheating: To bring back the crispness, reheat the pies in an air fryer at 350∘F for 3–5 minutes or a standard oven for 5–7 minutes until warm and crisp. Avoid the microwave, which will only make them soggy.
- Freezing (Unfried): You can assemble the hand pies completely, place them on a baking sheet, and freeze them until solid. Once frozen, transfer them to a freezer-safe bag. When ready to eat, simply fry them directly from frozen, adding a couple of minutes to the cooking time.
More Recipes You Will Love
If you’re a fan of satisfying, hand-held desserts and sweet, decadent treats, be sure to check out some of my other favorites:
- These Pecan Pie Bars Are My Favorite Make-Ahead Holiday Dessert
- This Edible Cookie Dough Is My Favorite No-Bake Treat for Late-Night Cravings
- This Big Family Banana Pudding Is My Favorite Classic Dessert to Feed a Crowd
- These Chocolate Chip Cookie Dough Brownie Bombs Are My Favorite Sweet Obsession
Final Thoughts
These Blackberry Hand Pies are everything a dessert should be: quick, comforting, and absolutely irresistible. The combination of the hot, flaky crust and the sweet, gooey glaze makes them an instant classic. Give this recipe a try next time you need a crowd-pleasing dessert in a hurry.
Did you try these fried pies? I’d love to hear how they turned out! Let me know in the comments if you stuck to the blackberry or if you tried a different filling. Be sure to follow me on Instagram and Pinterest for more classic comfort food recipes!


Leave a Reply