Easy Chili Relleno Casserole: The Cheesy, Spicy Weeknight Dinner Shortcut
Author: Jason Griffith
Introduction: The Comfort of Chile Rellenos, Simplified
I’m a massive fan of classic Mexican flavors, and few dishes hit that perfect balance of heat, cheese, and comfort quite like Chile Rellenos. But let’s be honest—stuffing chiles, dredging them in batter, and frying them can turn a weeknight dinner into a high-stakes kitchen project.
That’s where this Chili Relleno Casserole comes in.
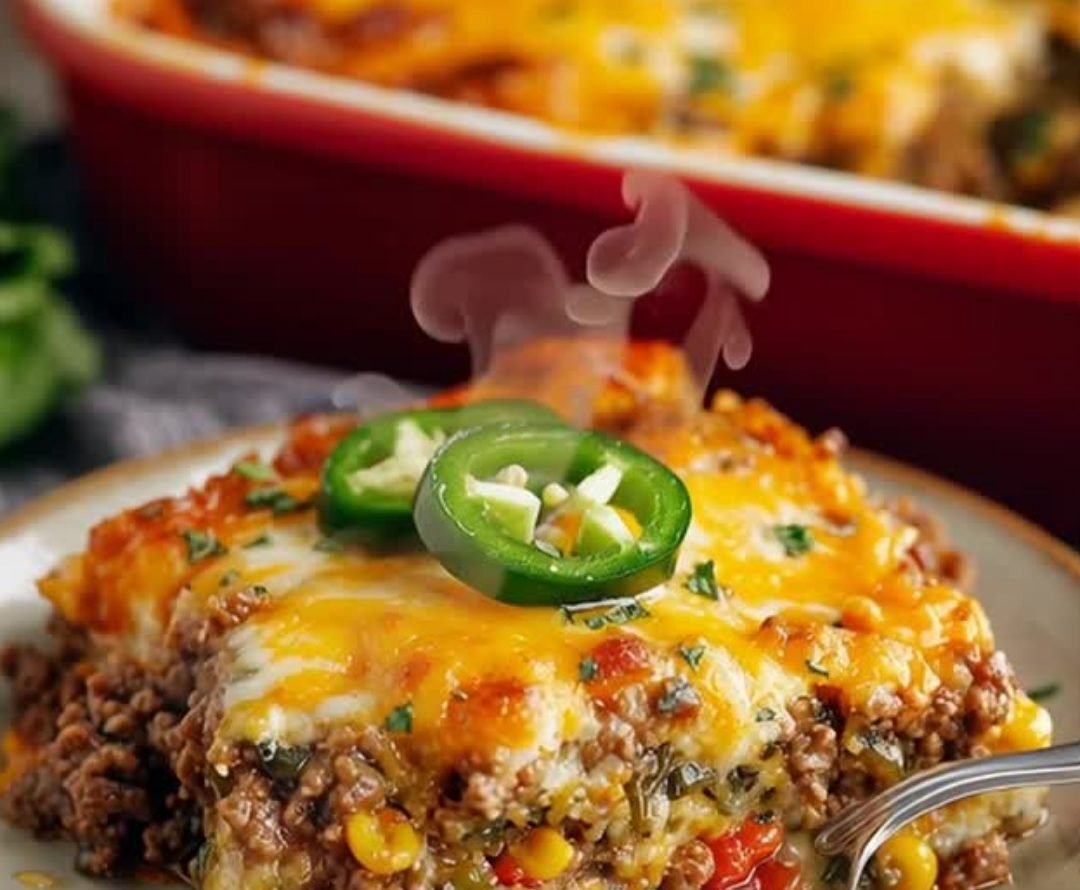
It takes everything you love about the original—the tender green chiles, the savory ground beef filling, and the blanket of melted cheese—and bakes it into a single, effortless casserole. No frying, no messy batter, just easy assembly and incredible flavor. It’s spicy, it’s cheesy, and it’s a total family-friendly win that’s always guaranteed to disappear. If you love big, bold, comforting meals, this is your new go-to.
Why I Love This Chili Relleno Casserole Recipe
This recipe is proof that you don’t need to spend hours in the kitchen to achieve restaurant-quality flavor.
- Ultimate Shortcut: We skip the messy frying and battering entirely. Using canned whole green chiles (Hatch, if you can find them!) means we get that authentic chile flavor without any prep work.
- One-Pan Dinner Power: Aside from browning the beef, everything happens in one baking dish. Less cleanup means a happier cook (that’s me).
- Customizable Heat: The recipe is mild enough for most families, but easily ramped up with a handful of fresh jalapeños or a dash of hot sauce.
- A Crowd-Pleaser: This is the dish I serve when I need guaranteed compliments. It has the cheesy, comforting appeal of a good pasta bake but with a vibrant, spicy, South-of-the-border twist. If you enjoy cozy, cheesy bakes, you’ll also love my recipe for These Chicken Enchiladas are my go-to for cozy crowd-pleasing dinners.
🍽️ Ingredients List
| Ingredient | Quantity | Notes |
| Whole Green Chiles (canned) | 1 can (27 oz) | Preferably Hatch chiles for best flavor, drained well. |
| Ground Beef | 121 lbs | I recommend 80/20 for flavor, but 90/10 works too. |
| Onion, finely chopped | 1 medium | Adds a necessary aromatic base to the filling. |
| Diced Tomatoes (canned) | 1 can | Optional, but highly recommended. Fire-roasted adds depth. |
| Shredded Cheese | 2 cups | Monterey Jack, Cheddar, or a Mexican blend. Reserve 21 cup for topping. |
| Eggs | 3 large | The binder for the classic ‘relleno’ custard layer. |
| Milk | 1 cup | Whole milk works best for a rich custard. |
| Garlic Powder | 21 tsp | |
| Cumin | 21 tsp | |
| Salt & Black Pepper | To taste | |
| Optional: Corn or Jalapeños | 21 cup | Add to the ground beef mixture for texture/heat. |
| Optional: Cilantro | For garnish |
Export to Sheets
Swaps and Notes
- Protein Swap: Ground turkey, ground chicken, or even crumbled plant-based meat can easily replace the ground beef.
- Vegetarian Option: Omit the meat entirely and increase the onion, add one can of black beans (rinsed/drained), and 21 cup of corn.
- Cheese Choice: Don’t skimp on the cheese. The blend of Monterey Jack and Cheddar melts beautifully, but Asadero or Pepper Jack are great for an extra kick.
- Heat Level: If you want more heat, slice up a fresh jalapeño or serrano and mix it into the beef filling, or switch to a hotter brand of green chiles.
👨🍳 How to Make Chili Relleno Casserole
This recipe is baked at 375∘F and requires about 30–35 minutes of cooking time.
Step-by-Step Instructions
- Prep the Oven and Dish: Preheat your oven to 375∘F (190∘C). Lightly grease a 9×13-inch baking dish.
- Cook the Filling: In a large skillet over medium-high heat, cook the ground beef and chopped onion, breaking up the meat as it browns. Drain off any excess grease.
- Season the Meat: Stir in the garlic powder, cumin, salt, and pepper. Cook for 1 minute until fragrant. Add the can of diced tomatoes (drained) and any optional corn or jalapeños. Simmer for 3–5 minutes to let the flavors meld. Remove from heat.
- Assemble the Base: Layer the drained whole green chiles evenly across the bottom of the prepared baking dish.
- Add the Filling and Cheese: Spread the ground beef mixture evenly over the layer of green chiles. Sprinkle 121cups of the shredded cheese over the beef filling.
- Prepare the Custard: In a separate medium bowl, whisk together the 3 eggs and 1 cup of milk until well combined. This mixture forms the “relleno” part of the casserole.
- Pour and Top: Carefully pour the egg and milk mixture evenly over the casserole layers. Top the entire casserole with the remaining 21 cup of shredded cheese.
- Bake: Bake for 30–35 minutes, or until the casserole is golden brown, the cheese is bubbly, and the egg mixture is set in the center (it should not jiggle).
- Cool and Serve: Let the casserole cool for 5–10 minutes before slicing. This allows the custard and cheese to set, making it easier to serve.
💡 Tips for Success
- Squeeze the Chiles: Even after draining the can, gently pat the chiles dry or give them a light squeeze to remove excess liquid. Too much liquid can result in a soggy casserole.
- Don’t Overbake: The casserole is done when the edges are golden and the center is set. Overbaking can make the egg custard rubbery.
- Layering is Key: Make sure the green chiles form a complete, even layer on the bottom. They act as the flavorful foundation for the dish.
- Use the Right Cheese: Opt for freshly shredded cheese if possible, as pre-shredded varieties often contain anti-caking agents that can hinder smooth melting.
- Make it Ahead: You can assemble the entire casserole (up to the point of baking) and cover it tightly. Store it in the refrigerator for up to 24 hours. Add 5–10 minutes to the baking time if baking straight from the fridge.
🥣 Serving Suggestions and Pairings
This rich and flavorful casserole pairs beautifully with fresh, cool accompaniments to balance the heat.
- Cool Toppings: A dollop of sour cream or plain Greek yogurt and a sprinkle of fresh cilantro are non-negotiable finishes. A squeeze of lime juice adds essential brightness.
- On the Side: Serve it with a simple side of fluffy Mexican rice or warm flour tortillas.
- For Dipping: If you want a fun appetizer to start the meal, I highly recommend this incredible This Crockpot Nacho Dip is the reason I never have leftovers.
Nutritional Information Per Serving (Estimate)
| Component | Value |
| Serving Size | 1 slice (8 servings total) |
| Calories | 450–500 |
| Protein | 35g |
| Fat | 30g |
| Carbohydrates | 10g |
| Fiber | 3g |
Export to Sheets
Note: This is an estimate based on average ingredient usage (80/20 ground beef, whole milk, etc.) and should be calculated more precisely if strict dietary needs apply.
🧊 Storage and Leftover Tips
- Storage: Store any leftovers in an airtight container in the refrigerator for up to 3–4 days.
- Reheating: This casserole reheats wonderfully! For the best results, reheat individual slices in the microwave for 1–2 minutes, or cover a larger portion with foil and bake at 350∘F (175∘C) until heated through (about 15–20 minutes).
- Freezing: Slice the cooled casserole into individual servings, wrap each slice tightly in plastic wrap, and then place them in a freezer-safe bag or container. Freeze for up to 2–3 months. Thaw overnight in the refrigerator before reheating.
🧑🍳 More Recipes You Will Love
If you loved the ease and flavor of this Chili Relleno Casserole, you might also enjoy these other comfort food favorites and crowd-pleasers:
- For Another Easy Mexican Bake: Try my recipe for These Sheet Pan Quesadillas are my favorite way to feed a crowd fast.
- If You Love Cheesy Appetizers: Don’t miss this showstopper: This Baked Brie Appetizer is my favorite effortless way to impress guests.
- For Classic Comfort: Sometimes, you just need a hearty, reliable dish: Classic Spaghetti Recipe with Homemade Sauce.
Final Thoughts
This Chili Relleno Casserole is a perfect example of how to deconstruct a complex dish and turn it into a simple, beautiful, weeknight meal. The result is pure, unadulterated comfort food—cheesy, spicy, savory, and absolutely satisfying. I promise you, once you try this simplified version, you’ll be putting it on repeat.
Did you try this recipe? Let me know what you thought in the comments! Don’t forget to follow us on social media for more easy, crowd-pleasing recipes.


Leave a Reply