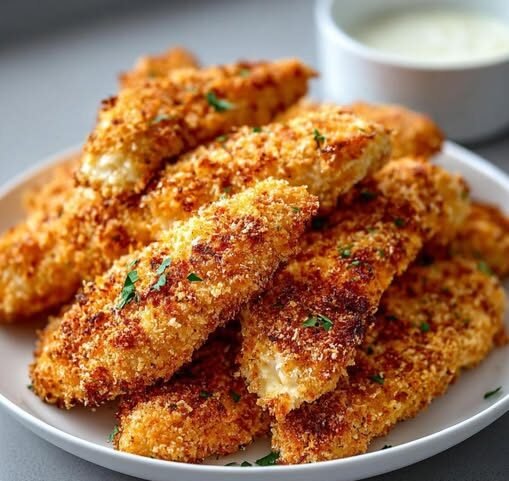
There’s something universally appealing about a perfectly crispy chicken tender. But often, that crispiness comes with a side of deep-frying and a lot of oil. These Crispy Baked Chicken Tenders offer all the satisfying crunch and flavor you crave, but with a healthier, oven-baked approach. They are the perfect solution for a weeknight dinner that both kids and adults will cheer for.
Why This Recipe is a Favorite
This recipe is a favorite because it proves you don’t need a deep fryer to achieve a golden, crunchy exterior and a juicy, tender interior. The secret is in the coating and a simple baking technique that gives these tenders a fantastic texture. They are incredibly versatile, perfect for dipping in your favorite sauces, and a fantastic, protein-packed meal. It’s a quick, healthier alternative to a takeout classic that you’ll feel good about serving.
Ingredients
Here’s a complete list of what you’ll need to create these delicious Crispy Baked Chicken Tenders, building on your provided partial list:
Ingredients:
- Chicken:
- 1 lb chicken breasts or chicken tenders, cut into 1-inch thick strips if using breasts
- Coating:
- 1/2 cup all-purpose flour
- 1 large egg, whisked
- 1/4 cup milk or buttermilk
- 1 cup panko breadcrumbs
- 1/2 cup grated Parmesan cheese
- 1 teaspoon garlic powder
- 1 teaspoon onion powder
- 1/2 teaspoon paprika
- 1/4 teaspoon salt
- 1/4 teaspoon black pepper
- For Baking:
- Cooking spray or 1 tablespoon olive oil
- For Serving (Optional):
- Your favorite dipping sauces (BBQ, honey mustard, ranch, etc.)
Swaps and Notes
- Chicken: Boneless, skinless chicken tenders are the most convenient, but chicken breasts cut into strips work just as well and can be more cost-effective.
- Flour: All-purpose flour is the standard, but you can use whole wheat flour for a slightly nuttier flavor.
- Egg Wash: The combination of egg and milk creates the perfect liquid binder for the coating. Buttermilk adds a little extra tang and tenderness to the chicken.
- Panko Breadcrumbs: Panko is the key to that extra-crispy texture! It’s flakier than traditional breadcrumbs, resulting in a lighter, crunchier crust. You can use regular breadcrumbs in a pinch, but the result won’t be as crispy.
- Seasonings: The garlic powder, onion powder, and paprika give the tenders a classic, savory flavor. Feel free to add a pinch of cayenne pepper for a little heat if you like.
- Dipping Sauces: These tenders are perfect with a variety of sauces. A simple [easy homemade ranch] dressing would be a fantastic pairing.
Steps for the Recipe
- Preheat Oven & Prep Pan: Preheat your oven to 400°F (200°C). Line a baking sheet with parchment paper and place a wire rack on top. Lightly grease the rack with cooking spray or olive oil. Using a wire rack is crucial for allowing air to circulate and ensuring the bottoms of the tenders get crispy.
- Set Up Dredging Stations: Set up three shallow dishes. In the first, place the all-purpose flour. In the second, whisk the egg and milk together. In the third, combine the panko breadcrumbs, grated Parmesan cheese, garlic powder, onion powder, paprika, salt, and black pepper. Stir well to combine the seasonings with the breadcrumbs.
- Coat the Chicken: Pat the chicken strips dry with a paper towel. This helps the coating adhere better. Take one chicken strip at a time and follow this process:
- First, dredge it in the flour, shaking off the excess.
- Next, dip it into the egg wash, letting any excess drip off.
- Finally, press it into the panko mixture, ensuring both sides are well-coated.
- Arrange and Bake: Place the coated chicken tenders on the prepared wire rack on the baking sheet, making sure they are not touching.
- Bake to Perfection: Bake for 15-20 minutes, flipping them halfway through, until the tenders are golden brown, crispy, and the chicken is cooked through (internal temperature of 165°F or 74°C). The time will vary based on the thickness of your tenders.
- Serve: Let the tenders cool for a minute or two before serving. Serve hot with your favorite dipping sauces.
Tips for Success
- Pat Chicken Dry: This is a simple but critical step. Dry chicken allows the coating to stick better, preventing a soggy crust.
- Use Panko: For that truly crispy, “fried-like” texture, panko breadcrumbs are essential. They’re lighter and absorb less oil.
- The Wire Rack is Key: Baking on a wire rack allows for even heat circulation, ensuring the bottoms of the tenders get just as crispy as the tops.
- Don’t Overcrowd: Give the tenders some space on the rack. Overcrowding can lead to steaming, which will make them less crispy.
- Cook Time: Adjust the baking time based on the thickness of your chicken. Thicker tenders will need more time, while thinner ones will cook faster.
Serving Suggestions and Pairings
These Crispy Baked Chicken Tenders are incredibly versatile. They are perfect with French fries or sweet potato fries, a side of coleslaw, or a simple green salad. They can also be chopped and added to salads or wraps for a quick and easy lunch.
For other crowd-pleasing chicken dishes, consider these:
- This Mexican Chicken and Rice Casserole is My Favorite One-Pan Dinner That’s Always a Hit
- These Chicken Enchiladas are My Go-To for Cozy Crowd-Pleasing Dinners
Storage and Leftover Tips
Leftover chicken tenders can be stored in an airtight container in the refrigerator for up to 3-4 days.
To reheat, the best method is to use a toaster oven or an air fryer to help them regain their crispy texture. Reheat at 375°F (190°C) for a few minutes until heated through. Microwaving is not recommended as it will make them soggy.
More Recipes You Will Love
If you appreciate easy, cheesy, and satisfying chicken meals, you’ll find more to love on ChefManiac.com:
- Easy Cheesy Chicken Sliders with Marinara Garlic Butter – perfect for a fun dinner or party.
- Easy Cheese Stuffed Chicken Wontons with Ranch Golden Crunchy Addictive – for a fun, crispy, and cheesy appetizer.
- A Light, Tangy Chicken Salad I Actually Crave (and There’s No Mayo in Sight) – for when you’re looking for something fresh and different.
Final Thoughts
These Crispy Baked Chicken Tenders are a simple yet fantastic recipe that delivers on all the things you want in a chicken tender: tender on the inside, crispy on the outside, and full of flavor. It’s a testament to how healthy eating can still be delicious and incredibly satisfying.
What are your favorite dipping sauces for chicken tenders? Share your ideas and feedback in the comments below! And don’t forget to follow ChefManiac.com for more delicious and easy-to-make recipes!


Leave a Reply