Jam Thumbprint Cookies That Just Channel Nostalgia
By Jason Griffith
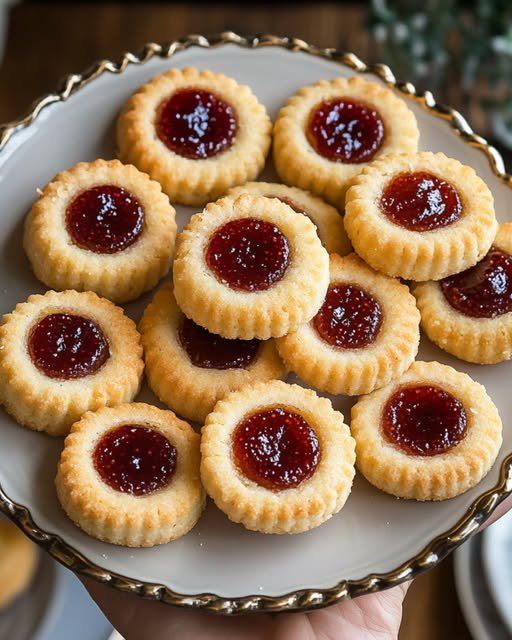
There is something inherently magical about a cookie that carries the weight of a thousand childhood memories. For many of us, the Jam Thumbprint Cookie is that treat. Whether it was tucked into a holiday tin or waiting on a cooling rack in Grandma’s kitchen, these buttery, fruit-filled gems are the epitome of “home-baked.”
In this guide, I’m sharing my favorite version of this classic. It strikes the perfect balance between a tender shortbread-like base and the sweet, concentrated burst of fruit jam. They are simple to make, beautiful to look at, and even better to eat.
Why I Love This Recipe
I’ve baked a lot of treats over the years, from these rainbow sprinkle cookies to more decadent caramel apple pie cookies, but I always return to the thumbprint.
I love this recipe because it uses pantry staples and is incredibly versatile. You can change the jam to suit the season—bright apricot for summer or a deep, spiced plum for winter. Plus, they look like little jewels on a dessert platter, making them look far more impressive than the effort required.
The Ingredients
To get that perfect texture, you’ll need the following:
- 1 1/2 cups all-purpose flour: Provides the structure.
- 1/2 tsp baking powder: For a slight lift.
- 1/4 tsp salt: To balance the sweetness.
- 1/2 cup unsalted butter (softened): Ensure it is room temperature for easy creaming.
- 1/2 cup granulated sugar: Provides sweetness and crisp edges.
- 1 large egg: Acts as the binder.
- 1 tsp vanilla extract: For that classic aromatic warmth.
- 1/4 cup fruit jam: Strawberry or raspberry are traditional favorites.
Swaps and Notes
- The Flour: You can use a 1-to-1 gluten-free baking flour if needed.
- The Fat: If you only have salted butter, omit the 1/4 tsp of salt from the recipe.
- The Flavor: Swap vanilla extract for almond extract for a professional, “bakery-style” flavor profile.
- The Jam: Ensure your jam is relatively thick. If it’s too runny, it may boil over in the oven.
Step-by-Step Instructions
- Prep Your Station: Preheat your oven to 350°F (175°C). Line a large baking sheet with parchment paper or a silicone baking mat to prevent sticking.
- Whisk Dry Ingredients: In a medium bowl, whisk together the flour, baking powder, and salt. Set this aside.
- Cream Butter and Sugar: In a large bowl (or using a stand mixer), beat the softened butter and sugar together until the mixture is light, fluffy, and pale in color (about 2–3 minutes).
- Add Wet Ingredients: Add the egg and vanilla extract to the butter mixture. Mix well until fully incorporated.
- Combine: Gradually add the dry flour mixture to the wet ingredients. Mix on low speed until the dough just comes together. Do not overmix, or the cookies will be tough.
- Shape the Cookies: Roll the dough into 1-inch balls (roughly 1 tablespoon of dough each). Place them on the prepared baking sheet about 2 inches apart.
- Make the Thumbprint: Use your thumb (or the back of a small round measuring spoon) to gently press an indentation into the center of each ball. If the edges crack significantly, just gently press them back together with your fingers.
- Fill with Jam: Carefully spoon about 1/2 to 1 teaspoon of jam into each indentation.
- Bake: Place in the oven and bake for 10–12 minutes. The edges should be just barely golden, and the centers should look set.
- Cool: Let the cookies rest on the baking sheet for 5 minutes before moving them to a wire rack to cool completely.
Tips for Success
- Prevent Cracking: If the dough feels too dry or cracks when you press it, chill the dough for 15 minutes before rolling.
- Warm the Jam: If your jam is very chunky, give it a quick stir or microwave it for 10 seconds to make it easier to spoon into the cookies.
- Don’t Over-Bake: These cookies don’t get very dark. If you wait for the tops to brown, they will be too crunchy.
Serving Suggestions and Pairings
These cookies are perfect for an afternoon tea. I highly recommend pairing them with a cold glass of refreshing blueberry lemonade during the warmer months. If you are hosting a cookie exchange, they look wonderful alongside these copycat Neiman Marcus chocolate chip cookies for a variety of textures.
Nutritional Information (Per Serving)
- Calories: 115 kcal
- Fat: 5g
- Carbohydrates: 16g
- Protein: 1g
- Sugar: 8g
Storage and Leftover Tips
- Room Temperature: Store in an airtight container for up to 5 days. Use parchment paper between layers to prevent the jam from sticking to the bottoms of other cookies.
- Freezing: You can freeze these cookies for up to 3 months. Thaw at room temperature before serving.
More Recipes You Will Love
If you enjoyed this nostalgic bake, you have to try these other favorites:
- Easy Cake Mix Cookies – For when you need a sweet treat in a hurry!
- Copycat Neiman Marcus Cookies – My secret weapon for any party.
- Rainbow Sprinkle Cookies – Perfect for brightening any day.
Final Thoughts
Jam Thumbprint cookies are more than just a recipe; they are a tradition. I hope this version brings a little bit of nostalgic joy to your kitchen this week.
What’s your favorite jam flavor to use? Let me know in the comments below! Be sure to follow us for more easy baking tips and classic recipes. Happy baking!


Leave a Reply