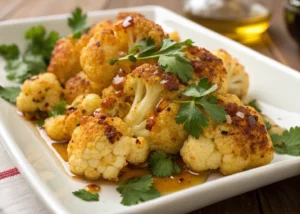
There are few dishes as comforting and satisfying as a plate of perfectly cooked Corned Beef Hash. This recipe takes humble ingredients – tender corned beef, diced potatoes, and savory onions – and transforms them into a golden, crispy, and incredibly flavorful hash that’s ideal for breakfast, brunch, or even a simple, hearty dinner. It’s all about achieving those irresistible browned bits and that perfect texture that makes every bite a delight.
Why I Love This Recipe
Corned Beef Hash is pure comfort food that holds a special place in my heart. What I love most about this particular recipe is how it prioritizes that signature crispy crust – the secret to truly great hash. The combination of salty corned beef, tender yet browned potatoes, and sweet, caramelized onions creates a symphony of flavors and textures. It’s a fantastic way to use up leftover corned beef from a holiday meal, or simply to enjoy a classic diner-style dish right in your own kitchen. It’s hearty, satisfying, and endlessly delicious!
Ingredients
Here’s what you’ll need to create this classic Corned Beef Hash:
- 6 Tablespoons unsalted butter divided use
- 4 cups (1/2-inch diced) russet potatoes (peeled)
- 1 small sweet onion, small diced
- ½ teaspoon kosher salt
- ½ teaspoon black pepper
- 4 cups chopped cooked corned beef
- ½ teaspoon garlic powder
- ½ teaspoon onion powder
Swaps and Notes
- Corned Beef: This recipe is perfect for using leftover cooked corned beef from a St. Patrick’s Day feast or a deli. If you don’t have cooked corned beef, you can buy pre-cooked, sliced corned beef from the deli counter and chop it, or cook a small corned beef brisket specifically for this. Canned corned beef hash is an option in a pinch, but the texture and flavor will differ significantly.
- Potatoes: Russet potatoes are ideal because their high starch content helps create that desirable crispy exterior. You can leave the skin on if you prefer, just scrub them well.
- Onion: A sweet onion will caramelize nicely. Yellow onion can also be used.
- Butter: Unsalted butter allows you to control the saltiness. The generous amount of butter is key for browning and flavor.
- Seasoning: Feel free to adjust salt and pepper to taste, especially since corned beef can vary in saltiness. A pinch of paprika could add color and a subtle smoky note.
- Optional Additions: Some people like a touch of bell pepper (finely diced) for extra color and flavor, or a dash of Worcestershire sauce for more umami.
Instructions
Let’s get that golden, crispy Corned Beef Hash sizzling!
- Prep and Par-Boil Potatoes: Dice up your peeled russet potatoes into uniform 1/2-inch pieces until you have about 4 cups. Place the diced potatoes in a pot of cold, salted water. Bring to a boil and cook just until they are fork-tender, about 5-10 minutes. Be careful not to overcook them, or they’ll become mushy. Drain the potatoes very well in a colander, allowing any steam to escape, which helps them dry out.
- Sauté Potatoes and Onions: In a large, heavy-bottomed skillet (cast iron works beautifully here) over medium heat, add 4 Tablespoons of the unsalted butter. Once the butter is melted and shimmering, add the par-boiled potatoes, small diced sweet onion, kosher salt, and black pepper. Cook, stirring occasionally, for 8-10 minutes, or until the onions have softened and the potatoes and onion start to brown and develop a nice crust.
- Add Corned Beef and Seasonings: Add the chopped cooked corned beef, garlic powder, and onion powder to the pan with the potato mixture. Stir everything well to combine, ensuring the corned beef is evenly distributed.
- Form the First Crust: Using the back of a spatula or a potato masher, press the entire mixture down firmly into an even layer across the bottom of the skillet. This step is crucial for developing that desirable crispy crust. Cook for 3-5 minutes without stirring, allowing a golden crust to form on the bottom.
- Flip and Add More Butter: After 3-5 minutes, use the spatula to scrape the bottom of the pan and flip up sections of the hash, so the crusty part is now on top. Add the remaining 2 Tablespoons of butter to the pan and mix it in, distributing it throughout the hash.
- Form Second Crust and Repeat: Again, using the spatula, press the hash down firmly to form another even layer. Cook for another 3-5 minutes until a second golden crust forms on the bottom. Continue doing this process (pressing, cooking, flipping, adding butter if needed) until you reach your desired level of browning and crispiness. We usually do this 3 times to get a really good crust.
- Serve: Once your Corned Beef Hash has reached your desired golden, crispy perfection, serve it immediately!
Tips for Success
- Don’t Overcook Potatoes in Boil: Par-boiling the potatoes is meant to soften them, not fully cook them. They should still be slightly firm. Overcooked potatoes will turn to mush when you try to fry them.
- Drain Potatoes Very Well: Excess moisture is the enemy of crispiness. Make sure your potatoes are as dry as possible after draining.
- Use a Large Skillet: A large, heavy-bottomed skillet (cast iron is ideal) provides more surface area for browning, which is key to crispy hash.
- Patience for Browning: Don’t rush the browning process. Allowing the hash to sit undisturbed for a few minutes at a time is what creates those delicious crispy bits.
- Season to Taste: Corned beef can be quite salty, so start with the recommended salt and pepper, then taste and adjust at the end.
Serving Suggestions and Pairings
Corned Beef Hash is incredibly versatile and can be served for any meal of the day:
- Classic Breakfast: Top with a perfectly fried or poached egg for the ultimate breakfast or brunch. The runny yolk mixes beautifully with the hash.
- Toast or Biscuits: Serve alongside buttered toast or fluffy biscuits for a complete morning meal.
- Simple Side: It makes a hearty side dish for other breakfast proteins like sausage or bacon.
- Lunch/Dinner: Enjoy it as a comforting and filling lunch or dinner. You could add a side of simple steamed vegetables.
- For other comforting and hearty breakfast options, check out our One-Pan Breakfast Bake or try The Viral Cottage Cheese Pancake for a unique twist.
Storage and Leftover Tips
Corned Beef Hash makes fantastic leftovers, and the flavors often deepen overnight!
- Refrigeration: Store any cooled leftover hash in an airtight container in the refrigerator for up to 3-4 days.
- Reheating: For best results, reheat hash in a skillet over medium-high heat with a little butter or oil, pressing it down to re-crisp the bottom layer. You can also reheat in an oven or air fryer until hot and crispy. Microwaving is not recommended as it will make it soggy.
- Freezing: You can freeze cooked hash in an airtight, freezer-safe container for up to 2-3 months. Thaw overnight in the refrigerator before reheating.
More Recipes You Will Love
If you enjoyed the hearty and comforting nature of this Corned Beef Hash, you’ll definitely want to explore some of our other delicious and easy recipes:
- For another incredibly satisfying skillet meal packed with flavor, try This Tomato Skillet with Okra and Sausage Is My Favorite Quick Dinner Packed with Southern Flavor.
- If you’re looking for another comforting, slow-cooked meat dish, our These Easy Turkey Wings Are My Favorite Comfort Food for Lazy Sundays are a must-try.
- And for a super quick and easy breakfast or lunch idea, check out This 3-Ingredient Egg Wrap Is Taking Over Busyfor a new favorite.
Final Thoughts
This Corned Beef Hash recipe is a true ode to classic diner comfort, perfected in your own kitchen. The crispy, golden exterior combined with the tender, savory interior makes it an irresistible dish for any time of day. It’s hearty, flavorful, and a fantastic way to enjoy a timeless favorite.
I encourage you to give this recipe a try and experience the deliciousness for yourself! We’d love to hear what you think, so please share your feedback and any delicious variations you discover in the comments below. And as always, for more amazing, easy-to-follow recipes that bring joy to your kitchen, be sure to visit Chefmaniac.com. Happy cooking!


Leave a Reply