Apple Crisp Cheesecake: The Ultimate Fall Dessert Recipe
Print it, save it, or add it to your recipe binder.
Apple Crisp Cheesecake: The Ultimate Fall Dessert Recipe
(Author: Jason Griffith)
Introduction
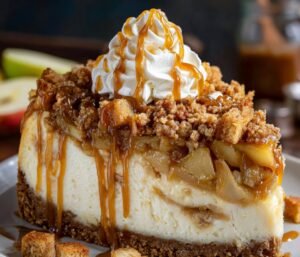
There are few desserts that perfectly capture the essence of fall quite like the apple crisp. And then there is the cheesecake, the undisputed champion of creamy, rich indulgence. What happens when you smash them together? You get the Apple Crisp Cheesecake, a magnificent creation that marries the warm, buttery crunch of an oat streusel with the cool, tangy smoothness of classic vanilla cheesecake.
This recipe isn’t just a dessert; it’s a centerpiece. It’s the moment the whole table pauses, forks in hand, to admire the layers—the buttery graham cracker crust, the impossibly smooth cream cheese filling, the tender, cinnamon-spiced apples, and that irresistible, golden crisp topping. Forget choosing between your favorite seasonal treats; with this recipe, you truly get the best of both worlds.
Why I Love This Recipe
I’ve made countless cheesecakes over the years, and while the classics are great, this one hits differently. The reason I adore this Apple Crisp Cheesecake is the texture contrast. That moment your fork cuts through the crisp topping and into the silky cheesecake underneath is pure magic.
- Perfectly Balanced Flavor: The sweetness of the cheesecake is brilliantly offset by the slight tartness of the Granny Smith apples and the warming spice of cinnamon.
- A Showstopper Presentation: It looks far more complicated than it is. The high sides, the golden topping, and a simple caramel drizzle make it look like it came straight from a gourmet bakery.
- Ultimate Comfort Food: It takes the nostalgic flavors of home—cinnamon, apples, and butter—and elevates them into a truly decadent experience. It’s the dessert I crave when the air turns chilly.
Ready to make your new favorite fall dessert? Let’s dive in!
🛒 Ingredients You Will Need
For the Crust:
- 121 cups graham cracker crumbs
- 41 cup brown sugar
- 21 tsp cinnamon
- 6 tbsp melted butter
For the Cheesecake Filling:
- 3 packages (8 oz each) cream cheese, softened
- 1 cup sugar
- 2 large eggs
- 1 tsp vanilla extract
- 41 cup sour cream
- 1 tbsp flour (all-purpose)
For the Apple Topping:
- 3 medium apples, peeled & diced (Honeycrisp or Granny Smith work best)
- 2 tbsp butter
- 41 cup brown sugar
- 21 tsp ground cinnamon
- 1 tbsp lemon juice
For the Crisp Topping:
- 21 cup old-fashioned oats
- 21 cup brown sugar
- 41 cup flour (all-purpose)
- 41 cup cold butter, cubed
Garnish:
- Caramel sauce drizzle
- Whipped cream for serving
🔄 Swaps and Notes
- Cream Cheese: Must be full-fat and room temperature. This is non-negotiable for a smooth, lump-free filling.
- Apples: Granny Smith provides the best balance of tartness, but a mix of Granny Smith and Honeycrisp works beautifully, too.
- Crust: Feel free to swap graham crackers for vanilla wafers or even shortbread cookies for a different base flavor.
- Flour in Filling: The small amount of flour helps stabilize the cheesecake, preventing cracks. You can use cornstarch as an alternative.
- Oats: Use old-fashioned/rolled oats for the crisp topping; instant oats will not give you the right texture.
👩🍳 How to Make Apple Crisp Cheesecake
Prep Time: 25 min | Cook Time: 1 hr | Chill Time: 4 hrs | Total: 5.5 hrs | Serves: 10
Step 1 — Make the Crust:
- Preheat your oven to 325∘F (160∘C).
- In a medium bowl, combine the graham crumbs, 41 cup brown sugar, cinnamon, and melted butter. Mix until the crumbs are evenly moistened.
- Press the mixture firmly into the bottom of a 9-inch springform pan. Use the bottom of a glass to get a compact, even layer.
- Bake the crust for 8–10 minutes. Let it cool completely while you prepare the filling.
Step 2 — Prepare the Cheesecake Filling:
- In a large mixing bowl (or the bowl of a stand mixer), beat the softened cream cheese and 1 cup of sugar until the mixture is completely smooth and creamy. Scrape down the sides of the bowl often.
- Add the eggs, one at a time, mixing only until just combined after each addition. Do not overmix.
- Mix in the vanilla extract, sour cream, and the 1 tbsp of flour.
- Pour the cheesecake batter over the cooled crust and smooth the top with a spatula.
Step 3 — Cook the Apple Mixture:
- In a skillet, melt 2 tbsp of butter over medium heat.
- Add the diced apples, 41 cup brown sugar, 21 tsp cinnamon, and lemon juice.
- Cook, stirring occasionally, until the apples are tender and slightly caramelized (about 5–7 minutes). They should still hold their shape.
- Spoon the apple mixture evenly over the cheesecake batter.
Step 4 — Add the Crisp Topping:
- In a small bowl, combine the oats, 21 cup brown sugar, 41 cup flour, and the cold, cubed butter.
- Use a pastry blender or a fork to cut the butter into the dry ingredients until the mixture resembles coarse crumbs.
- Sprinkle the crisp topping evenly over the apple layer.
Step 5 — Bake & Cool:
- Bake for 55–60 minutes. The edges should look set, but the very center should still have a slight jiggle.
- Turn off the oven, and crack the oven door slightly (you can prop it open with a wooden spoon). Let the cheesecake sit inside the cooling oven for 1 hour. This slow cooling helps prevent cracks.
- Transfer the cheesecake to the counter, let it cool to room temperature, and then refrigerate for at least 4 hours, but ideally overnight.
Step 6 — Garnish & Serve:
- Carefully remove the springform ring.
- Garnish with a drizzle of rich caramel sauce and a dollop of whipped cream before slicing and serving.
💡 Tips for Success
- Room Temperature is Key: Ensure your cream cheese, eggs, and sour cream are at room temperature. Cold ingredients are the primary cause of lumpy cheesecake filling and overmixing.
- The No-Fail Water Bath Alternative: While a water bath is traditional, the slow cooling method in the oven (Step 5) works just as well and is much less messy!
- Check the Jiggle: The cheesecake is done when the edges are set and the inner 2-inch circle still wiggles slightly. It will continue to set as it cools.
- Use High-Quality Cinnamon: A fresh, fragrant cinnamon (like Ceylon) will elevate the entire dish, especially in the apple mixture.
🍽️ Serving Suggestions and Pairings
This Apple Crisp Cheesecake is rich, so it pairs best with simple, refreshing drinks and light accompaniments.
- Coffee: A simple, strong brew or an iced latte cuts through the richness beautifully.
- Drink Pairing: Serve it alongside a glass of chilled, homemade Blueberry Lemonade for a bright, contrasting beverage.
- Ice Cream: A scoop of high-quality vanilla bean ice cream is always a welcome addition to warm desserts.
- Sauce: Drizzle it with a homemade salted caramel sauce for an extra layer of complexity.
📊 Nutritional Information (Per Serving)
- Serves: 10
- Calories: ~580 kcal
- Total Fat: ~38g
- Saturated Fat: ~23g
- Cholesterol: ~140mg
- Sodium: ~300mg
- Total Carbohydrates: ~54g
- Dietary Fiber: ~2g
- Sugars: ~42g
- Protein: ~10g
Disclaimer: These are estimated nutritional values and may vary based on specific ingredients and portion sizes.
📦 Storage and Leftover Tips
- Storage: Store the Apple Crisp Cheesecake covered loosely in the refrigerator for up to 4–5 days. A springform pan with a lid is ideal for storage.
- Freezing: You can freeze leftover slices! Wrap individual slices tightly in plastic wrap, then place them in a freezer-safe bag or container. Thaw overnight in the refrigerator before serving. The crisp topping may lose a little of its crunch, but the flavor will remain excellent. Tip: Freeze before adding the caramel or whipped cream garnish.
- Reheating (Optional): If you like a warm apple crisp, you can gently heat individual slices in the microwave for 10-15 seconds, or in a 300∘F (150∘C) oven for 5 minutes.
🧡 More Recipes You Will Love
If you loved the combination of comfort and indulgence in this recipe, you need to check out these other favorites:
- For a savory comfort dish: Try my Cajun Chicken Sausage Gumbo.
- If you’re craving classic dessert: You can’t beat this Big Family Banana Pudding.
- When a simple, hearty dinner is needed: My recipe for Classic Spaghetti with Homemade Sauce is always a winner.
Final Thoughts
This Apple Crisp Cheesecake is truly a celebration on a plate. It’s the perfect end to a holiday meal or the centerpiece for a cozy weekend gathering. It brings everyone together with its irresistible aroma of cinnamon and apples, and its rich, satisfying texture. Don’t let the multi-step process intimidate you; each layer is simple, and the final result is a masterpiece.
I hope you give this recipe a try this season.
Happy Baking!
Apple Crisp Cheesecake: The Ultimate Fall Dessert Recipe
, a magnificent creation that marries the warm, buttery crunch of an oat streusel with the cool, tangy smoothness of classic vanilla cheesecake.
Prep: 25 min | Cook: 1 min | Total: 26 min
Servings:
Ingredients
- For the Crust:
- 121 cups graham cracker crumbs
- 41 cup brown sugar
- 21 tsp cinnamon
- 6 tbsp melted butter
- For the Cheesecake Filling:
- 3 packages (8 oz each) cream cheese, softened
- 1 cup sugar
- 2 large eggs
- 1 tsp vanilla extract
- 41 cup sour cream
- 1 tbsp flour (all-purpose)
- For the Apple Topping:
- 3 medium apples, peeled & diced (Honeycrisp or Granny Smith work best)
- 2 tbsp butter
- 21 tsp ground cinnamon
- 1 tbsp lemon juice
- For the Crisp Topping:
- 21 cup old-fashioned oats
- 21 cup brown sugar
- 41 cup flour (all-purpose)
- 41 cup cold butter, cubed
- Garnish:
- Caramel sauce drizzle
- Whipped cream for serving
- 🔄 Swaps and Notes:
- Cream Cheese: Must be full-fat and room temperature. This is non-negotiable for a smooth, lump-free filling.
- Apples: Granny Smith provides the best balance of tartness, but a mix of Granny Smith and Honeycrisp works beautifully, too.
- Crust: Feel free to swap graham crackers for vanilla wafers or even shortbread cookies for a different base flavor.
- Flour in Filling: The small amount of flour helps stabilize the cheesecake, preventing cracks. You can use cornstarch as an alternative.
- Oats: Use old-fashioned/rolled oats for the crisp topping; instant oats will not give you the right texture.
- 👩🍳 How to Make Apple Crisp Cheesecake:
- Step 1 — Make the Crust:
- Preheat your oven to 325∘F (160∘C).
- In a medium bowl, combine the graham crumbs, 41 cup brown sugar, cinnamon, and melted butter. Mix until the crumbs are evenly moistened.
- Press the mixture firmly into the bottom of a 9-inch springform pan. Use the bottom of a glass to get a compact, even layer.
- Bake the crust for 8–10 minutes. Let it cool completely while you prepare the filling.
- Step 2 — Prepare the Cheesecake Filling:
- In a large mixing bowl (or the bowl of a stand mixer), beat the softened cream cheese and 1 cup of sugar until the mixture is completely smooth and creamy. Scrape down the sides of the bowl often.
- Add the eggs, one at a time, mixing only until just combined after each addition. Do not overmix.
Instructions
- Prep : Time: 25 min | Cook Time: 1 hr | Chill Time: 4 hrs | Total: 5.5 hrs | Serves: 10
- Step 1 — Make the Crust:: Preheat your oven to 325∘F (160∘C).
- In a medium bowl, combine the graham crumbs, 41 cup brown sugar, cinnamon, and melted butter. Mix until the crumbs are evenly moistened.
- Press the mixture firmly into the bottom of a 9-inch springform pan. Use the bottom of a glass to get a compact, even layer.
- Bake the crust for 8–10 minutes. Let it cool completely while you prepare the filling.
- Step 2 — Prepare the Cheesecake Filling:: In a large mixing bowl (or the bowl of a stand mixer), beat the softened cream cheese and 1 cup of sugar until the mixture is completely smooth and creamy. Scrape down the sides of the bowl often.
- Add the eggs, one at a time, mixing only until just combined after each addition. Do not overmix.
- Mix in the vanilla extract, sour cream, and the 1 tbsp of flour.
- Pour the cheesecake batter over the cooled crust and smooth the top with a spatula.
- Step 3 — Cook the Apple Mixture:: In a skillet, melt 2 tbsp of butter over medium heat.
- Add the diced apples, 41 cup brown sugar, 21 tsp cinnamon, and lemon juice.
- Cook, stirring occasionally, until the apples are tender and slightly caramelized (about 5–7 minutes). They should still hold their shape.
- Spoon the apple mixture evenly over the cheesecake batter.
- Step 4 — Add the Crisp Topping:: In a small bowl, combine the oats, 21 cup brown sugar, 41 cup flour, and the cold, cubed butter.
- Use a pastry blender or a fork to cut the butter into the dry ingredients until the mixture resembles coarse crumbs.
- Sprinkle the crisp topping evenly over the apple layer.
- Step 5 — Bake & Cool:: Bake for 55–60 minutes. The edges should look set, but the very center should still have a slight jiggle.
- Turn off the oven, and crack the oven door slightly (you can prop it open with a wooden spoon). Let the cheesecake sit inside the cooling oven for 1 hour. This slow cooling helps prevent cracks.
- Transfer the cheesecake to the counter, let it cool to room temperature, and then refrigerate for at least 4 hours, but ideally overnight.
- Step 6 — Garnish & Serve:: Carefully remove the springform ring.
- Garnish with a drizzle of rich caramel sauce and a dollop of whipped cream before slicing and serving.
- 💡 Tips for Success: Room Temperature is Key: Ensure your cream cheese, eggs, and sour cream are at room temperature. Cold ingredients are the primary cause of lumpy cheesecake filling and overmixing.
- The : No-Fail Water Bath Alternative: While a water bath is traditional, the slow cooling method in the oven (Step 5) works just as well and is much less messy!
- Check the : Jiggle: The cheesecake is done when the edges are set and the inner 2-inch circle still wiggles slightly. It will continue to set as it cools.
- Use : High-Quality Cinnamon: A fresh, fragrant cinnamon (like Ceylon) will elevate the entire dish, especially in the apple mixture.
- 🍽️ Serving Suggestions and Pairings: This Apple Crisp Cheesecake is rich, so it pairs best with simple, refreshing drinks and light accompaniments.
- Coffee: A simple, strong brew or an iced latte cuts through the richness beautifully.
- Drink : Pairing: Serve it alongside a glass of chilled, homemade Blueberry Lemonade for a bright, contrasting beverage.
- Ice : Cream: A scoop of high-quality vanilla bean ice cream is always a welcome addition to warm desserts.
- Sauce: Drizzle it with a homemade salted caramel sauce for an extra layer of complexity.
Nutrition
- Calories:
- Fat:
- Carbs:
- Protein:
Rate This Recipe
Average Rating: 0 (0 votes)