The Flakiest English Butter Biscuits: A Step-by-Step Guide to Southern Comfort
By Jason Griffith
Introduction
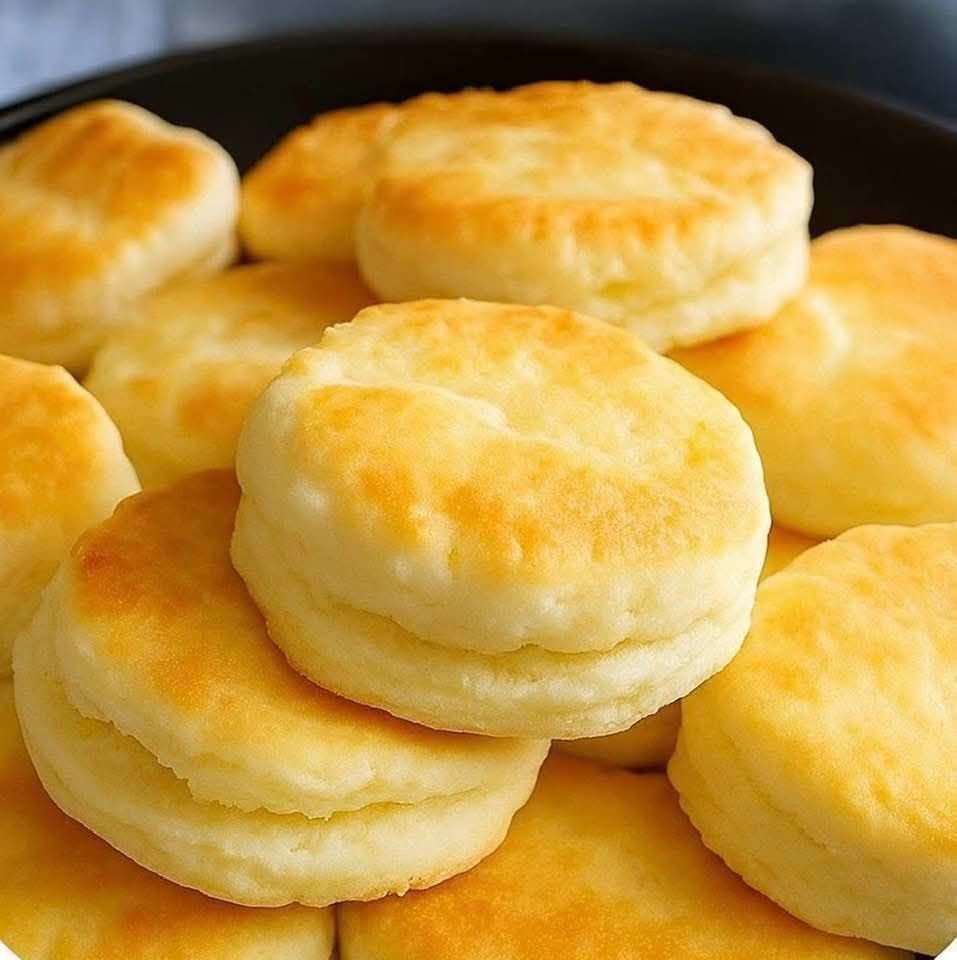
There are few simple pleasures in life that rival a perfectly baked biscuit. When I say English Butter Biscuits—sometimes just called classic buttermilk biscuits—I’m not talking about a cookie; I’m talking about a warm, flaky, layered cylinder of pure buttery comfort. This recipe is the cornerstone of any great weekend breakfast, the ideal accompaniment to a hearty stew, or the base for a decadent dessert.
The magic in this recipe lies in a few key, easy-to-master techniques: the use of cold butter and buttermilk, and a simple folding method that creates those incredible, sky-high layers. Forget dense, puck-like biscuits. If you follow these steps, you’ll achieve a light, tender crumb every single time. Get ready to fall in love with biscuit making!
Why I Love This Recipe
This recipe is simple, but it’s a showstopper. I’ve tried countless biscuit recipes over the years—some using shortening, some cream—but nothing beats the pure, unadulterated flavor of these butter biscuits. The folding technique, which we’ll cover in detail, is a game-changer that takes mere seconds but makes all the difference in achieving maximum height and flakiness.
There’s a comforting nostalgia to a fresh, warm biscuit. For me, they pair perfectly with something savory like sausage gravy, but they are just as delicious split open and smeared with jam or a little bit of honey. It’s a versatile masterpiece that deserves a permanent spot in your recipe rotation. Plus, the whole process, from mixing bowl to oven, takes less than 30 minutes. Fast, easy, and undeniably delicious—that’s a recipe win in my book!
Ingredients
| Ingredient | Metric Measurement | US Measurement | Notes |
| All-Purpose Flour | 240 grams | 2 cups | Plus more for dusting. |
| Baking Powder | 10 grams | 1 tablespoon | Ensures a good rise. |
| Baking Soda | ¼ teaspoon | ¼ teaspoon | Reacts with the buttermilk for lift. |
| Kosher Salt | 1 ¼ teaspoon | 1 ¼ teaspoon | Balances the flavor. |
| Unsalted Butter, cold | 85 grams | 6 tablespoons | Dice into small cubes and keep cold. |
| Buttermilk, cold | 240 grams | 1 cup (240 ml) | Use full-fat for the best results. |
Export to Sheets
Swaps and Notes
- Buttermilk Substitute: If you don’t have buttermilk, you can make a quick substitute. Add 1 tablespoon of white vinegar or lemon juice to a liquid measuring cup, then fill it up to the 1-cup mark (240 ml) with milk. Let it sit for 5 minutes before using. The texture might not be quite as rich, but it works in a pinch.
- Butter: The key is coldness. If the butter warms up, the biscuits won’t rise as high. If your kitchen is warm, you can put the bowl of dry ingredients and butter pieces in the freezer for 5–10 minutes before adding the buttermilk.
- Gluten-Free: I have not personally tested this recipe with gluten-free flour, but a good 1:1 gluten-free baking blend should work, though the texture may vary slightly.
Step-by-Step Directions
1. Prep the Oven and Pan
- Position an oven rack to the center position and preheat your oven to 450°F (230°C). This high heat is crucial for a rapid rise.
- Lightly spray a cast iron pan (my preference for crust development) or a cake pan with non-stick spray, or line a sheet pan with parchment paper.
- Measure all ingredients, dicing the butter into small cubes. Keep the butter and buttermilk in the refrigeratoruntil the moment you are ready to combine them.
2. Mix Dry Ingredients and Cut in the Butter
- In a large mixing bowl, whisk together the flour, baking powder, baking soda, and kosher salt.
- Add the cold diced butter to the bowl. Use a pastry blender, a fork, or your fingertips to “cut” the butter into the flour mixture. You want to press down on the fat as you move it around the bowl.
- Continue until most of the pieces of butter are about the size of peas, with a few slightly larger pieces (walnut half size) remaining. These larger pieces create the pockets of steam for flakiness.
3. Add Buttermilk
- Add the cold buttermilk to the bowl. Stir with a spoon or a silicone spatula just until combined. This should only take a few turns. The dough will be very wet and sticky—do not overmix!
4. The Layering Fold Technique (The Secret to Flakes)
- Turn the wet dough out onto a lightly floured counter. Dust the top of the dough with a little flour.
- With floured hands, gently bring the dough together into one mass. Do not knead.
- Pat the dough out (do not use a rolling pin) until it is about 1-inch (2.5 cm) thick.
- Using a bench knife or a metal spatula, fold the dough in half (like a book), and then turn it 90 degrees.
- Pat out and fold again. Repeat this process for a total of 6 times. This crucial layering process is what creates flaky biscuits.
5. Cut and Bake
- Press the dough out one last time to about 1-inch (2.5 cm) thick.
- Use a round cutter (about 2.5-inches in diameter) to cut out your biscuits. Crucially: dip the cutter in flour, press straight down, and pull it back up without twisting. Twisting seals the edges and prevents the biscuit from rising fully.
- Gently pat the scraps together to cut out any remaining biscuits.
- Place the biscuits in the prepared pan with their edges touching. This encourages them to rise up, not out.
- Optional Step: Place the pan in the freezer for 10 minutes before baking to ensure the butter is rock-hard for maximum rise.
- Bake at 450°F (230°C) for 13-15 minutes until the tops are golden brown. Do not open the oven door for at least the first 7 minutes to trap the steam and assist the rise.
- Optional: Immediately brush the warm biscuits with melted butter and sprinkle with flaky salt for extra flavor and shine.
Tips for Success
- Always Use Cold Ingredients: This is the most important rule. Cold butter creates steam pockets as it melts in the hot oven, which pushes the dough up into layers. Warm butter just melts and mixes, leading to flat biscuits.
- High Heat is Your Friend: The 450°F (230∘C) temperature is non-negotiable. It helps the baking powder/soda activate rapidly and sets the layers before the butter completely melts, ensuring a high rise.
- No Twisting: When cutting the biscuits, press straight down. Twisting seals the layers you just created with the folding technique, preventing them from puffing up.
Serving Suggestions and Pairings
These biscuits are versatile and can go savory or sweet.
For a Savory Meal:
- Serve them hot alongside a comforting bowl of chili or my personal favorite, Classic Spaghetti Recipe with Homemade Sauce.
- Use them as the base for a chicken pot pie filling or split them and fill with my Easy Cheesy Chicken Sliders with Marinara Garlic Butter filling for a decadent twist.
- A side of whipped chive butter or a simple white gravy is always a winner.
For a Sweet Treat:
- Split, toast slightly, and serve with strawberry jam and homemade whipped cream.
- Pair them with a refreshing glass of This Blueberry Lemonade is My Favorite Refreshing Drink for Sunny Days.
- They’re delicious as a vehicle for fruit compotes, like a simplified shortcake.
Nutritional Information (Per Serving)
The following is an estimate for one biscuit (assuming 8 servings) and may vary based on exact ingredient weights and brands.
| Nutrient | Amount |
| Calories | 265 kcal |
| Carbohydrates | 32g |
| Protein | 6g |
| Fat | 12g |
| Saturated Fat | 7g |
| Cholesterol | 30mg |
| Sodium | 360mg |
| Fiber | 1g |
| Sugar | 1g |
Export to Sheets
Storage and Leftover Tips
Storage: Biscuits are best enjoyed fresh, but you can store cooled leftovers in an airtight container at room temperature for up to 2 days. They will inevitably lose some of their freshness and become slightly dry.
Reheating: To bring them back to life, wrap them loosely in foil and reheat them in a 350°F (175∘C) oven for about 5–7 minutes. The oven heat will crisp up the exterior and soften the interior better than a microwave.
Freezing (Unbaked): If you want to prep ahead, you can cut the biscuits and place them on a parchment-lined tray. Freeze them until solid (about 1 hour), then transfer them to a freezer-safe zip-top bag. They can be frozen for up to 1 month. To bake, place the frozen biscuits on a baking sheet and bake as directed, adding about 5 minutes to the total baking time.
More Recipes You Will Love
If you loved the comfort and simplicity of these biscuits, you might also want to try these other favorite recipes:
- For a savory bite perfect for parties: Easy Cheesy Chicken Sliders with Marinara Garlic Butter
- If you’re craving a rich dessert: These Pecan Pie Bars are My Favorite Make-Ahead Holiday Dessert
- Need a quick sweet fix? Try these These Cake Mix Cookies are My Go-To Shortcut for Easy Foolproof Treats
Final Thoughts
These English Butter Biscuits prove that the most delicious foods are often the simplest. Master the cold butter, use the high heat, and practice the quick fold—you’ll be rewarded with a batch of perfectly flaky, tender biscuits that are lightyears better than anything store-bought. They’re comfort food at its absolute finest.
Did you try the layering technique? Let me know your favorite topping in the comments below! Don’t forget to tag @ChefManiac when you share your creations on social media. Happy baking!


Leave a Reply