Vibrant Pickled Sweet Peppers: A Burst of Flavor for Your Pantry
Print it, save it, or add it to your recipe binder.
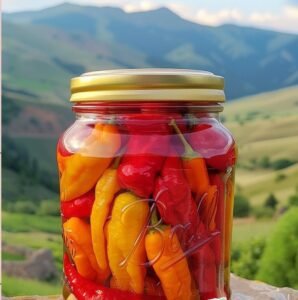
If you’re looking to capture the vibrant taste of summer and extend its joy long into the year, look no further than these Pickled Sweet Peppers. This recipe transforms abundant bell peppers into crisp, tangy, and subtly sweet jewels, perfect for adding a burst of flavor to sandwiches, salads, grilled meats, or simply enjoying straight from the jar. It’s a rewarding canning project that fills your pantry with deliciousness!
Why I Love This Recipe
I’m incredibly passionate about preserving the harvest, and these Pickled Sweet Peppers are a standout in my canning repertoire. What I absolutely adore about this recipe is how it takes the natural sweetness of ripe bell peppers and enhances it with a perfectly balanced sweet and tangy brine. The addition of fresh garlic cloves infuses each jar with an aromatic warmth, and the optional pickling salt ensures a crisp texture. The process of water bath canning, while requiring a few steps, is deeply satisfying and guarantees you can enjoy these vibrant flavors for months to come. It’s a fantastic way to capture the essence of summer and have a versatile, delicious condiment always on hand.
Ingredients
- 7 pounds ripe bell peppers (any variety or mix of colors—red, yellow, orange are best for sweetness)
- 3 cups sugar (granulated white sugar)
- 3 cups white vinegar (5% acidity)
- 3 cups water
- 9 cloves garlic (1 per pint jar, optional)
- 4 ½ teaspoons pickling salt (½ tsp per pint jar, optional, do not use iodized table salt)
Swaps and Notes
- Bell Peppers: A mix of red, yellow, and orange bell peppers provides beautiful color and varying degrees of sweetness. Green bell peppers can be used for a slightly more bitter, traditional pickle flavor. Ensure they are fresh and firm.
- Sugar: Adjust the amount of sugar slightly if you prefer a less sweet or more sweet pickle.
- Vinegar: Use white vinegar with 5% acidity for safety and proper pickling. Do not reduce the vinegar quantity.
- Pickling Salt: This is important as it doesn’t contain anti-caking agents or iodine, which can cloud your brine or affect flavor. If omitting salt, understand it primarily affects flavor and texture, not safety, in a vinegar-based pickle.
- Garlic: Fresh garlic cloves add a lovely aromatic note. You can add more or less per jar, or omit if you prefer.
- Spice: For a spicy kick, add a few red pepper flakes to each jar, or a thin slice of fresh jalapeño or serrano pepper.
- Sterilization: While the recipe guides to simmering jars, always refer to current safe canning guidelines for proper sterilization, especially if you’re new to canning.
Directions
- Prepare Jars & Tools: Start by thoroughly washing your pint-sized canning jars, lids, bands, and all canning tools (jar lifter, funnel, bubble popper/de-bubbler, head-space tool) with hot, soapy water. Rinse them thoroughly.
- Heat Jars in Canner: Place the jar rack inside your water bath canner. Place the clean jars upright on the rack. Fill the canner and jars with water, ensuring the jars are covered by at least 1 inch of water. Bring the water to a simmer (around 180°F / 82°C) over medium heat and keep the jars hot until ready to fill. Heat the lids and bands according to manufacturer’s instructions (usually in simmering water, not boiling).
- Prepare Bell Peppers: While jars are heating, wash your bell peppers. Remove the stems, core out the seeds and white membranes thoroughly, as these can add bitterness. Slice the peppers into delightful strips (about ½ inch wide). Set them aside for later.
- Prepare Brine: In a large non-reactive saucepan (stainless steel or enamel-coated), combine the 3 cups of sugar, 3 cups of white vinegar, and 3 cups of water. Bring this mixture to a rolling boil over medium-high heat and let it boil vigorously for 1 minute, stirring to dissolve the sugar.
- Heat Peppers in Brine: Add the sliced peppers to your bubbling hot brine. Stir to combine. Bring the mixture back to a boil once more, and keep it hot at a rolling boil for just one minute. This helps tenderize the peppers slightly and ensures they are hot when filled into jars.
- Fill Jars (One by One): Spread a clean towel on your counter. Carefully lift one hot jar from the canner using your jar lifter, draining any hot water back into the canner. Place the hot, empty jar on the towel.
- Add Garlic & Salt: Into the hot jar, add one garlic clove (if using) and ½ teaspoon of pickling salt (if using).
- Pack Peppers & Brine: Using a slotted spoon, carefully pack the hot pepper strips tightly into the jar, leaving about ½ inch of headspace at the top. This is important for proper sealing. Ladle the hot brine over the peppers, ensuring they are completely submerged and still maintaining that ½ inch of headspace at the top.
- Remove Air Bubbles & Wipe Rim: Use a clean bubble popper tool (or a non-metallic spatula) to remove any trapped air bubbles from the jar. Gently press down on the peppers to release air. Wipe the rim of the jar thoroughly with a damp paper towel to ensure it’s clean of any food particles, which can prevent a proper seal.
- Seal Jars: Place a hot lid centered on the jar. Screw the band on until it’s “fingertip tight” (snug but not overly tightened). Return the filled and sealed jar to the rack in the water bath canner. Repeat this process for all remaining jars.
- Process Jars: Once all jars are in the canner, ensure the water in the canner covers the jars by at least 2 inches. Cover the canner with its lid and bring the water to a rolling boil. Once it reaches a full, rolling boil, process your pint jars for 10 minutes. (Note: Adjust processing time for higher altitudes. Consult a reliable canning chart for your specific elevation.)
- Cool Jars: After processing, turn off the heat. Carefully remove the canner lid (lift it away from your face to avoid steam burns!) and let the jars sit in the hot water bath for 5 minutes. This helps prevent siphoning and aids in sealing.
- Final Cooling & Seal Check: Lift out the jars one by one using the jar lifter and place them upright on a towel-lined surface or wire rack, ensuring they are not touching. Let them cool undisturbed for 12 to 24 hours. As they cool, you should hear a “ping!” sound, indicating a successful seal. Once completely cooled, check your seals by pressing down on the center of each lid; if it doesn’t pop back when pressed, the jar is sealed. If a lid does pop back, refrigerate that jar and use its contents within a month.
- Store: Remove the bands (they can be reused). Wash the sealed jars again to remove any residue. Label them with the contents and date, and store them in a cool, dark place for up to 18 months.
- For Best Flavor: For the best flavor development, let your pickled sweet peppers sit for about 4 to 5 weeks before diving in. This allows the flavors to fully meld and mature. Once opened, keep them in the fridge and enjoy within a month!
Tips for Success
- Sanitation is Key: Always follow proper canning sanitation procedures to ensure food safety.
- Even Slices: Slice peppers into uniform strips for consistent texture and better packing.
- Hot Jars, Hot Brine, Hot Peppers: Keeping everything hot (jars, brine, and peppers) minimizes thermal shock and helps prevent jar breakage and ensures a good seal.
- Don’t Rush the Boil: Ensure the water bath reaches a full, rolling boil before starting your processing timer.
- Headspace is Crucial: Always leave the specified headspace (½ inch) to allow for expansion during processing and proper sealing.
- Use Pickling Salt: Regular table salt often contains anti-caking agents that can make your brine cloudy. Pickling salt is pure and dissolves cleanly.
- Patience for Flavor: While tempting, waiting 4-5 weeks allows the flavors to truly develop and mellow.
Serving Suggestions and Pairings
These Pickled Sweet Peppers are incredibly versatile and can add a bright, tangy, and subtly sweet kick to a wide range of dishes:
- As a vibrant topping for sandwiches, burgers, or hot dogs.
- Mixed into salads for an extra burst of flavor and crunch.
- As part of an antipasto platter or cheese board (they pair wonderfully with soft cheeses like goat cheese or brie).
- Stirred into tuna or chicken salad.
- Served alongside grilled meats or fish.
- A colorful addition to scrambled eggs or omelets.
- As a garnish for savory cocktails (like a Bloody Mary).
For other vibrant and savory dishes, you might also enjoy:
- My This Tomato Skillet with Okra and Sausage is My Favorite Quick Dinner Packed with Southern Flavor.
- Or my This Baked Brie Appetizer Is My Favorite Effortless Way to Impress Guests.
Storage and Leftover Tips
Once processed and properly sealed, jars of Pickled Sweet Peppers can be stored in a cool, dark place (like a pantry) for up to 18 months. Once a jar is opened, it must be stored in the refrigerator and the contents should be consumed within one month for best quality.
More Recipes You Will Love
If you loved the zesty and refreshing flavors of these pickled peppers, you’ll find similar enjoyment in these other fantastic recipes:
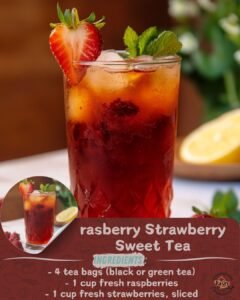
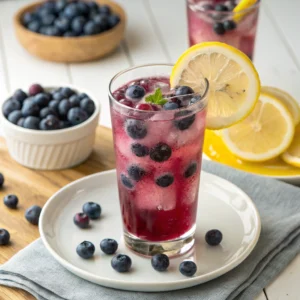
- For another refreshing beverage to make and enjoy, check out my This Blueberry Lemonade is My Favorite Refreshing Drink for Sunny Days.
- If you’re into making your own flavorful cocktails, my Classic Margarita Recipe: Easy and Delicious is a must-try.
- For another hearty, comforting meat dish, check out This Cajun Chicken Sausage Gumbo is My Favorite Bowl of Southern Comfort.
Final Thoughts
These Pickled Sweet Peppers are more than just a condiment; they’re a jar full of sunshine and flavor that will brighten your meals all year round. The process of canning, while initially daunting for some, is incredibly rewarding and gives you complete control over the ingredients. It’s a wonderful way to savor the best of the harvest and add a gourmet touch to countless dishes. Give them a try – your pantry (and your taste buds!) will thank you!
Have you ever tried pickling vegetables at home? What are your favorite canning recipes? Share your ideas and tips in the comments below, and don’t forget to follow Chef Maniac for more delicious and inspiring recipes!
Vibrant Pickled Sweet Peppers: A Burst of Flavor for Your Pantry
If you’re looking to capture the vibrant taste of summer and extend its joy long into the year, look no further than these
Prep: min | Cook: min | Total: min
Servings:
Ingredients
Instructions
Nutrition
- Calories:
- Fat:
- Carbs:
- Protein:
Rate This Recipe
Average Rating: 0 (0 votes)