Homemade Sour Patch Kids – Sweet, Tangy, and Totally Addictive
Print it, save it, or add it to your recipe binder.
Homemade Sour Patch Kids – A Tangy, Chewy DIY Candy Treat
If you’ve ever reached into a movie theater candy stash and pulled out a handful of tangy, fruity Sour Patch Kids, you already know how irresistible they are. But did you know you can make your own at home—with real juice and just a few simple ingredients?
This DIY Sour Patch Kids recipe gives you all the mouth-puckering sourness and chewy goodness of the original but with a homemade twist. Whether you’re crafting fun treats with kids or satisfying your late-night sweet tooth, this recipe is a total win.
Why I Love This Recipe
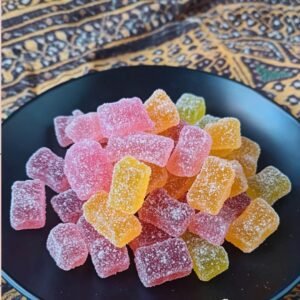
There’s something incredibly satisfying about making your own candy—especially when it tastes just like your childhood favorite. These gummies are chewy, fruity, and tart with a customizable flavor and color profile. Plus, they pair perfectly with fun party treats like Unicorn Poop Bark and Jolly Rancher Shot Glasses.
Ingredients
For the Lemon/Lime Sour Base:
- 4 Tbsp fresh lemon or lime juice
- 3 Tbsp pectin
- 5 Tbsp granulated sugar
- 2 Tbsp water
- 1 Tbsp unflavored gelatin
- 1 Tbsp water (for blooming gelatin)
- ⅛ tsp salt
For Other Fruit Flavors:
- 4 Tbsp fresh fruit juice (like cherry, grape, or orange)
- 3 Tbsp granulated sugar
- 1 Tbsp water
- 2 Tbsp cold water
- 1 Tbsp unflavored gelatin
For Sour Coating:
- ½ cup granulated sugar
- 1 Tbsp citric acid
Directions
Step 1: Bloom the Gelatin
Mix unflavored gelatin with 1 tablespoon of water in a small bowl. Let it sit for 5 minutes to bloom.
Step 2: Make the Fruit Base
In a saucepan over medium-low heat, combine your fresh juice and sugar. Stir until the sugar dissolves, then add pectin and bring to a light boil.
Step 3: Add Gelatin and Thicken
Stir the bloomed gelatin into the boiling mixture. Cook until fully dissolved and slightly thickened, then remove from heat.
Step 4: Mold the Gummies
Using a spoon or syringe, fill candy molds with your hot mixture. Chill in the fridge for 2–3 hours to set.
Step 5: Dry the Candies
Once set, remove gummies from molds and let them dry uncovered in the fridge overnight. This gives them that classic chewy texture.
Step 6: Coat in Sour Sugar
Mix the sugar and citric acid together in a bowl. Toss your gummy candies in the sour sugar mix until evenly coated.
Tips for Success
- Use silicone molds for easy release.
- Let them air dry overnight—it’s key for the perfect chew.
- Citric acid is essential for that sour punch—find it in baking aisles or online.
Flavor Variations
Try these juice swaps for a rainbow batch of candies:
- Cherry juice + red food coloring for cherry gummies
- Grape juice for a rich purple hue
- Orange juice with zest for a citrus twist
- Berry blends for wild flavors
Serving Ideas
Serve your sour gummies alongside:
- Spring Flower Pretzel Bites
- Caramel Apple Nachos for fruity fun
- Edible Cookie Dough as a no-bake indulgence
Storage Tips
- Airtight container: Store gummies in a cool, dry place for up to 2 weeks.
- Avoid humidity: It can melt the sour coating.
- Freezer friendly: Freeze up to 1 month, then bring to room temp before eating.
More Recipes You’ll Love
- Unicorn Poop Bark
- Jolly Rancher Edible Shot Glasses
- Spring Flower Pretzel Bites
- Caramel Apple Nachos
Final Thoughts
Making your own Homemade Sour Patch Kids is not only easy, but incredibly fun. You control the flavor, the color, and the sour factor—perfect for customizing party favors or satisfying nostalgic cravings.
Tried it? Show off your candy creations! Got questions about flavors or mold recommendations? I’m here to help—let’s get sour!
Homemade Sour Patch Kids – Sweet, Tangy, and Totally Addictive
Homemade Sour Patch Kids – A Tangy, Chewy DIY Candy Treat
Prep: min | Cook: min | Total: min
Servings:
Ingredients
- For the Lemon/Lime Sour Base:
- 4 Tbsp fresh lemon or lime juice
- 3 Tbsp pectin
- 5 Tbsp granulated sugar
- 2 Tbsp water
- 1 Tbsp unflavored gelatin
- 1 Tbsp water (for blooming gelatin)
- ⅛ tsp salt
- For Other Fruit Flavors:
- 4 Tbsp fresh fruit juice (like cherry, grape, or orange)
- 3 Tbsp granulated sugar
- 1 Tbsp water
- 2 Tbsp cold water
- For Sour Coating:
- ½ cup granulated sugar
- 1 Tbsp citric acid
- Directions:
- Step 1: Bloom the Gelatin:
- Step 2: Make the Fruit Base:
- Step 3: Add Gelatin and Thicken:
- Step 4: Mold the Gummies:
- Step 5: Dry the Candies:
- Step 6: Coat in Sour Sugar:
- Tips for Success:
- Use silicone molds for easy release.
- Let them air dry overnight—it’s key for the perfect chew.
- Citric acid is essential for that sour punch—find it in baking aisles or online.
- Flavor Variations:
- Cherry juice + red food coloring for cherry gummies
- Grape juice for a rich purple hue
- Orange juice with zest for a citrus twist
- Berry blends for wild flavors
- Serving Ideas:
- Spring Flower Pretzel Bites
- Caramel Apple Nachos for fruity fun
- Edible Cookie Dough as a no-bake indulgence
- Storage Tips:
- Airtight container: Store gummies in a cool, dry place for up to 2 weeks.
- Avoid humidity: It can melt the sour coating.
- Freezer friendly: Freeze up to 1 month, then bring to room temp before eating.
Instructions
- Step 1: Bloom the Gelatin: Mix unflavored gelatin with 1 tablespoon of water in a small bowl. Let it sit for 5 minutes to bloom.
- Step 2: Make the Fruit Base: In a saucepan over medium-low heat, combine your fresh juice and sugar. Stir until the sugar dissolves, then add pectin and bring to a light boil.
- Step 3: Add Gelatin and Thicken: Stir the bloomed gelatin into the boiling mixture. Cook until fully dissolved and slightly thickened, then remove from heat.
- Step 4: Mold the Gummies: Using a spoon or syringe, fill candy molds with your hot mixture. Chill in the fridge for 2–3 hours to set.
- Step 5: Dry the Candies: Once set, remove gummies from molds and let them dry uncovered in the fridge overnight. This gives them that classic chewy texture.
- Step 6: Coat in Sour Sugar: Mix the sugar and citric acid together in a bowl. Toss your gummy candies in the sour sugar mix until evenly coated.
- Tips for Success: Use silicone molds for easy release.
- Let them air dry overnight—it’s key for the perfect chew.
- Citric acid is essential for that sour punch—find it in baking aisles or online.
- Flavor Variations: Try these juice swaps for a rainbow batch of candies:
- Cherry juice + red food coloring for cherry gummies
- Grape juice for a rich purple hue
- Orange juice with zest for a citrus twist
- Berry blends for wild flavors
- Serving Ideas: Serve your sour gummies alongside:
- Spring : Flower Pretzel Bites
- Caramel : Apple Nachos for fruity fun
- Edible : Cookie Dough as a no-bake indulgence
- Storage Tips: Airtight container: Store gummies in a cool, dry place for up to 2 weeks.
- Avoid humidity: It can melt the sour coating.
- Freezer friendly: Freeze up to 1 month, then bring to room temp before eating.
- More Recipes You’ll Love: Unicorn Poop Bark
- Jolly : Rancher Edible Shot Glasses
- Caramel : Apple Nachos
- Final Thoughts: Making your own Homemade Sour Patch Kids is not only easy, but incredibly fun. You control the flavor, the color, and the sour factor—perfect for customizing party favors or satisfying nostalgic cravings.
- Tried it? Show off your candy creations! Got questions about flavors or mold recommendations? I’m here to help—let’s get sour!
Nutrition
- Calories:
- Fat:
- Carbs:
- Protein:
Rate This Recipe
Average Rating: 0 (0 votes)