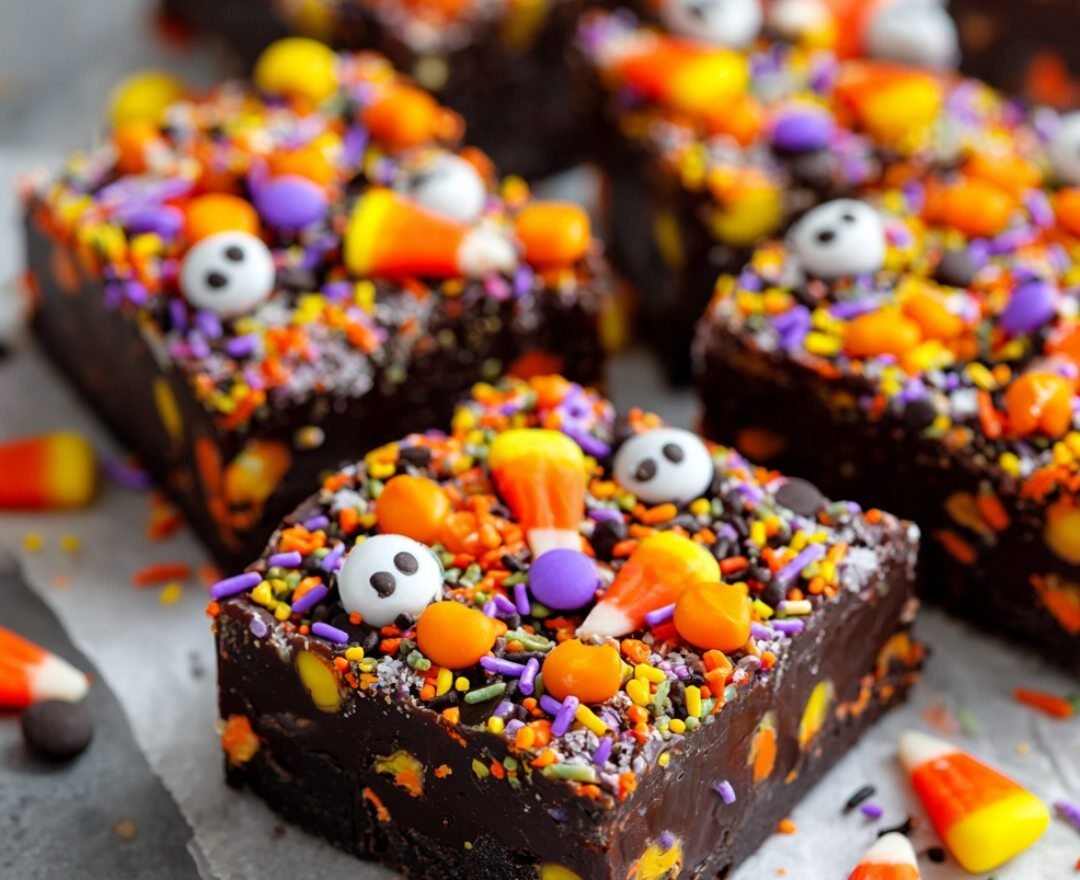
3-Ingredient No-Bake Halloween Fudge: The Easiest Spooky Treat!
There’s no better time than Halloween to embrace a little kitchen chaos—but who has time to bake elaborate, scary-looking treats when there are costumes to finish and pumpkins to carve? That’s where this easy no-bake Halloween Fudge comes in.
This recipe is my secret weapon for the spooky season. It’s rich, deeply chocolatey, and packed with all the festive sprinkles and candy that make a holiday treat truly special. Best of all? It requires only a handful of ingredients and about 10 minutes of active time. No candy thermometer, no fuss, just perfect, creamy fudge every time.
— Jason Griffith, Professional Food Writer, Chefmaniac.com
Why I Love This Recipe
I’m a huge believer that holiday treats should be fun, not frustrating. Every October, I get requests for this fudge because it truly captures the spirit of the season.
It’s Incredibly Easy
The base of this fudge is the classic “two-ingredient” method—chocolate chips and sweetened condensed milk—but with a tiny bit of butter added for an unbelievably smooth and creamy texture. If you can melt chocolate, you can make this fudge. It’s foolproof!
It’s a Canvas for Creativity
The chocolate fudge is just the starting point. This recipe is a blank slate for all your favorite spooky toppings. I use candy corn and Halloween sprinkles for maximum color, but you can raid your trick-or-treat haul and use chopped fun-size candy bars, crushed cookies, or anything else you’ve got on hand. It turns a simple dessert into a festive showstopperfor any party.
It’s Perfect for Crowds
This recipe makes about 24 squares, making it ideal for a school bake sale, a neighborhood bonfire, or just keeping a tray of treats handy for hungry ghosts and goblins. It’s rich, so a little square goes a long way, ensuring you have enough to share.
Ingredients
This recipe is based on an 8×8 pan, yielding about 24 pieces.
| Ingredient | Quantity | Notes |
| Semi-Sweet Chocolate Chips | 3 cups | High-quality chips melt better. |
| Sweetened Condensed Milk | 1 can (14 oz) | NOT evaporated milk. |
| Butter | 2 Tbsp | Helps with smoothness and texture. |
| Vanilla Extract | 1 tsp | For depth of flavor. |
| Candy Corn | ½ cup | Essential for that classic Halloween look. |
| Halloween Sprinkles | ½ cup | Use a mix of black, orange, and purple. |
| Optional Toppings | Crushed Oreos, Candy Eyeballs | For extra spooky fun! |
Export to Sheets
Swaps and Notes
- For a White Chocolate Swirl: Swap 1 cup of the semi-sweet chips for white chocolate chips. Melt the white chocolate separately with one-third of the condensed milk. Add a few drops of orange or green food coloring to the white mixture, swirl it onto the chocolate base, and then add your toppings.
- Dairy-Free Fudge: You can substitute the dairy butter for a vegan butter stick and use dairy-free chocolate chipsand sweetened condensed coconut milk. The texture will be slightly different, but the flavor will still be fantastic.
- Alternative Toppings: Instead of candy corn, try crushed peppermint patties, mini chocolate peanut butter cups, or even crushed pretzel pieces for a sweet-and-salty twist.
- Deep Chocolate: For an even richer flavor, substitute dark chocolate chips for the semi-sweet variety.
Step-by-Step Instructions
Follow these simple steps for perfectly set, ultra-creamy Halloween fudge.
Step 1: Prep Your Pan
Line an 8×8-inch baking pan with parchment paper, leaving an overhang on two sides. This is crucial for lifting the fudge out later. A light spray of non-stick cooking spray underneath the parchment can help keep it in place.
Step 2: Melt the Base
In a medium saucepan, combine the chocolate chips, sweetened condensed milk, and butter. Place the saucepan over low heat. Stir continuously until the butter is completely melted and the mixture is smooth, glossy, and uniform. Do not use medium or high heat, as this can cause the chocolate to burn or seize.
Step 3: Add Vanilla and Pour
Once the mixture is fully melted and smooth, remove the pan from the heat and stir in the vanilla extract. Immediately pour the mixture into your prepared 8×8 pan. Use a spatula to smooth the top into an even layer.
Step 4: Decorate
Time for the fun part! While the fudge is still wet and warm, immediately sprinkle the candy corn, Halloween sprinkles, and any optional toppings (like candy eyeballs) generously over the top. Gently press them down with the back of a spatula or your hands so they adhere to the chocolate.
Step 5: Chill and Cut
Chill the pan in the refrigerator for 2 to 3 hours, or until the fudge is completely firm. Use the parchment paper overhang to lift the fudge block out of the pan. Place it on a cutting board and cut it into about 24 equal squares (a 6×4 grid).
Tips for Success
- Use Low Heat: This is the #1 rule for making fudge with condensed milk. Low and slow melting prevents the chocolate from getting grainy or separating.
- Do Not Overheat: As soon as the mixture is smooth, remove it from the heat. Continuous heat will make the fudge dry.
- Chill Time is Key: Do not rush the chilling process. The fudge needs the full 2-3 hours to fully set so you can cut clean, crisp squares.
- Knife Trick: For a perfectly smooth cut, warm your knife under hot water, wipe it dry, and then slice. Repeat this process for every few cuts.
Serving Suggestions and Pairings
Fudge is a decadent treat, and pairing it with something that cuts the richness is always a smart move.
- Beverages: Serve a square with a glass of ice-cold milk or, for the adults, a spooky sip like a classic Margarita or a refreshing Strawberry Mojito.
- Appetizers: Before you dive into dessert, serve up some savory bites. The dark chocolate pairs beautifully with the creamy, savory flavor of a warm Baked Brie Appetizer.
- Dessert Bar: This fudge is perfect alongside a spread of other no-bake Halloween favorites, such as the festive and creamy Pumpkin Delight Dessert. For the kids, serve it with slices of my fun-to-make Unicorn Poke Cake.
Nutritional Information Per Serving
(Based on 24 servings using the core ingredients listed)
While exact figures can vary based on toppings and brands, this no-bake fudge recipe provides the following estimated nutritional profile per square:
| Component | Amount |
| Calories | ∼210 kcal |
| Total Fat | ∼11 g |
| Saturated Fat | ∼7 g |
| Total Carbohydrate | ∼28 g |
| Sugars | ∼26 g |
| Protein | ∼3 g |
Export to Sheets
Note: The addition of optional toppings like candy corn, crushed cookies, or candy eyeballs will increase the sugar and calorie content.
Storage and Leftover Tips
This fudge keeps beautifully, which is another reason it’s a holiday favorite.
- Storage: Store the fudge in an airtight container in the refrigerator. Layer the squares with parchment paper to prevent them from sticking together. It will stay fresh for up to 1 week.
- Freezing: Fudge freezes exceptionally well. Cut it into squares, wrap the entire block tightly in plastic wrap, and then place it in a freezer-safe bag or container. It will keep for up to 3 months. Thaw it overnight in the refrigerator before serving.
- Party Favors: Cut the squares and wrap individual pieces in small cellophane bags tied with a festive black and orange ribbon. They make excellent, homemade trick-or-treat bag fillers or party favors.
More Recipes You Will Love
If you enjoyed this easy, festive treat, you’ll love these other quick recipes perfect for parties and gatherings:
- For a sweet, shareable treat: These Chocolate Chip Cookie Dough Brownie Bombs Are My Favorite Sweet Obsession
- For an easy weeknight meal: Easy Cheesy Chicken Sliders with Marinara Garlic Butter
- For a simple, creamy dessert: This Pumpkin Delight Dessert Is My Favorite No-Bake Fall Treat
- For an elegant appetizer: This Baked Brie Appetizer Is My Favorite Effortless Way to Impress Guests
- For the ultimate kid-friendly celebration cake: How This Unicorn Poke Cake Became My Favorite Party Trick
Final Thoughts
This Halloween Fudge is more than just a dessert—it’s a tradition in a pan. The combination of creamy, homemade chocolate fudge with the crunchy, vibrant toppings is absolutely addictive. It simplifies your holiday prep without sacrificing any of the fun, festive spirit that makes this season so great.
Give this recipe a try, and let me know which spooky toppings you choose! Tag me in your photos and share your creative spins on this classic. Happy haunting!


Leave a Reply